Registrations
We now manually approve all new user accounts due to a large influx of spam bots. Accounts are normally approved within 48 hours.
If you need any help with using this Wiki, please ask here: TalkFord.com Wiki Submission Forum
EGR Valve and Inlet Manifold Clearout TDCi
For more information, visit the Ford Mondeo forum on TalkFord.com, the definitive resource site covering all Fords from the present day to the 1970's.
|
Overview Guide | |
| Ford Model: | Mondeo Mk3 |
|---|---|
| Petrol/Diesel: | Diesel |
| Estimated Cost: | ? |
| Difficulty? | Easy/Medium |
| How long does this take? | ? |
Contents
EGR Valve and Inlet Manifold Clearout - 2004 TDCi Euro 4
Disclaimer
Disclaimer: As we live in a litigious world I have to make it clear that no guarantee or warranties are expressed or implied, you follow this guide entirely at your own risk. If you, your car, or any 3rd party is damaged as a consequence of following this guide that is not my responsibility. Hope that is clear!
<google uid="C01"></google>
Introduction
EGR (Exhaust Gas Recirculation) is a system used on modern engines to reduce the emissions. Basically it is implemented by piping a route from the exhaust system back to the inlet manifold via a vacuum and/or electronically activated valve that operates depending upon engine conditions.
The EGR circuit, valve and inlet manifold therefore receive an amount of carbon build that is fed from the exhaust, which after a period of time and miles build up and start to cause restrictions in the inlet tract leading to engine inefficiencies: poor performance, increased fuel consumption, smokey, ‘noisy’ and general poor engine running.
For more information on the EGR, take a look at this Wikipedia article on the EGR system.
As my car was experiencing these symptoms, I decided to clean out the EGR valve and inlet manifold to try and restore the engines performance.
The photo sequence that follows shows the work involved on a 2004 Ford Mondeo 130 TDCi ‘Euro4’, though I am sure other models will be similar.
The text and photos were done by Dave Yardy (daveyardy@hotmail.com) and this is the 'version 1'.
Parts and Tools Needed
The work involved is simple and should well be in the capabilities of the home mechanic, the car doesn’t need to be lifted and the work is all done at the front of the car.
A basic range of metric sockets and spanners are needed (ranging from 7mm upto 13mm), socket extension bar, screwdrivers, newspaper, paper towel, a small torque wrench is needed to refit the inlet manifold.
It is a messy job so suitable protective gloves are needed – though normal latex gloves will melt when it comes to spraying Carburettor Cleaner on them, Nitrile gloves or even washing up gloves will be stronger. You may wish to consider a suitable face mask to reduce the risk of inhaling carbon dust. Old clothes/overalls should be worn.
At least one can of ‘Carburettor Cleaner’ spray is needed, though best to get 2 cans. This is available from any motor factors.
A small brass/wire brush, and a green ‘scotch brite’ scouring pad will also be useful to have to hand. (available from tool suppliers, eg Cromwell Tools, ebay, DIY stores, motor factors - even Tesco and Sainsbury!)
A ‘Mityvac’ hand operated vacuum pump, if you have access to one, can be used to test the function of the EGR valve when it is removed and on the bench. These pumps are very useful and can be used to prime the fuel filter, bleed brakes, test vacuum systems, etc.
I found that the manifold to cylinder head ‘gaskets’ were made of rubber and were reusable, as was the rubber gasket seal between manifold and EGR valve and the metal gasket between EGR valve and the EGR pipe. You may wish to err on the side of caution and renew these parts.
Removing and Cleaning the EGR Valve
I did the work first thing in the morning so the engine was cold, no concerns of getting burnt.
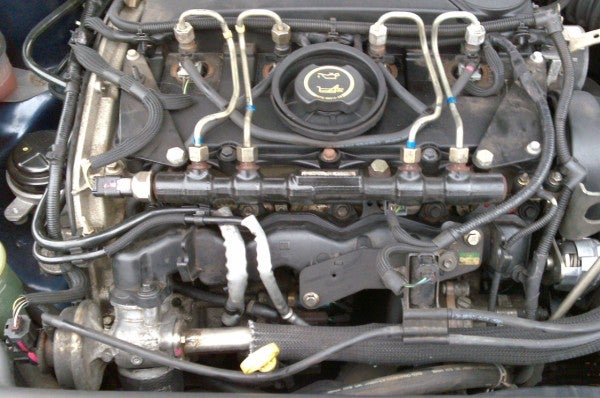
Open the bonnet, remove the engine cover (remove the oil dipstick, and pull the cover up and off. Put the dipstick back into its tube)
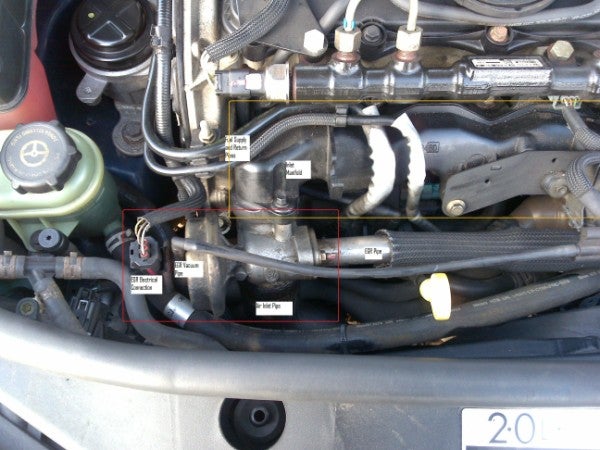
This picture shows the EGR Valve that is to be removed (inside the red box):
- Undo the hose clip that holds the rubber pipe onto the bottom of the valve (this is the air inlet pipe to the engine from the intercooler).
- Remove the two nuts holding the metal pipe onto the side of the valve (this is the EGR pipe from the exhaust).
- Remove the two bolts holding the valve onto the inlet manifold (the black plastic ‘ducting’ above the valve inside the yellow box in the picture above).
- Remove the electrical plug on the end of the valve.
- Remove the thin vacuum pipe that plugs into the valve adjacent to the electrical connection.
The valve should then be free to be removed.
- Recover the rubber circular gasket from between the valve and the inlet manifold and the thin metal gasket from between the valve and the metal EGR pipe.
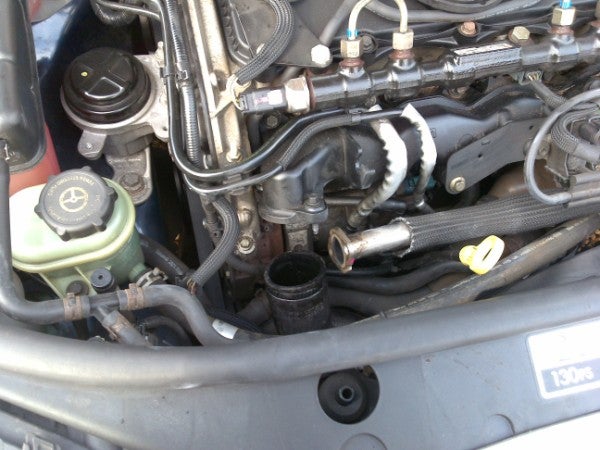
The engine bay will now look like:
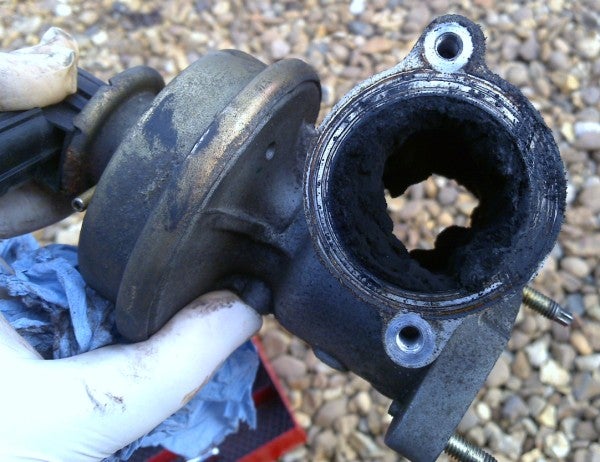
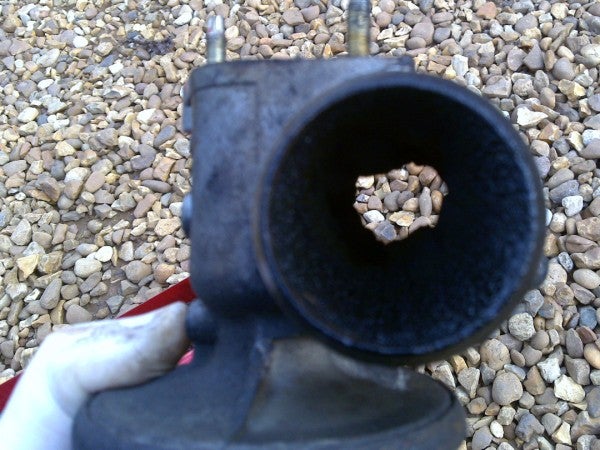
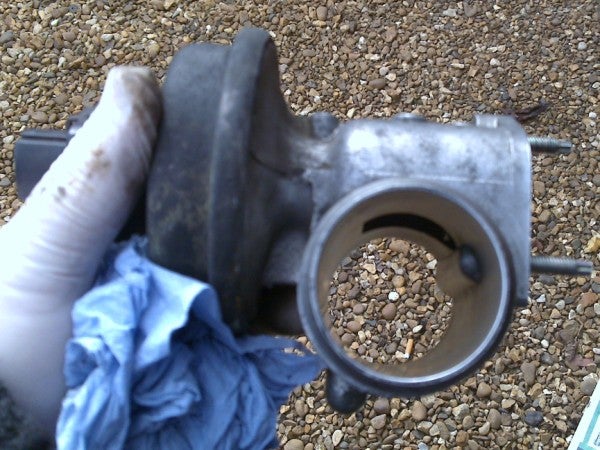
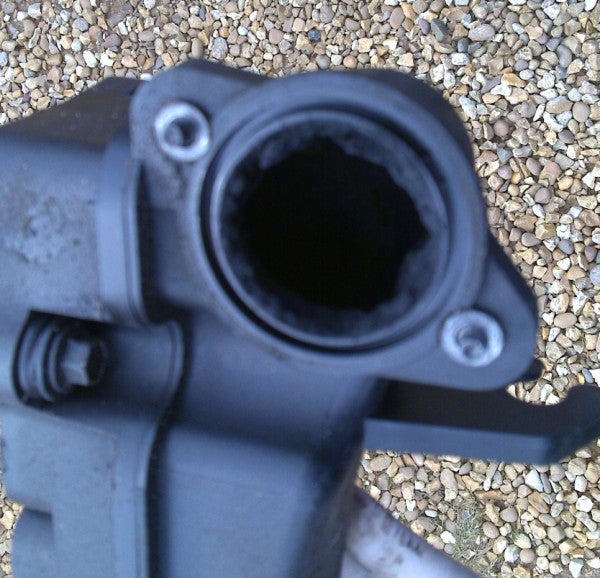
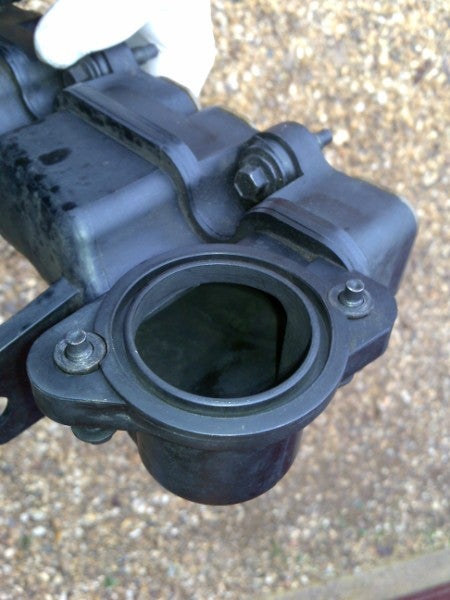
And looking into the valve you will more than likely find a hefty build up of carbon crud:
Manifold side:
Air inlet side:
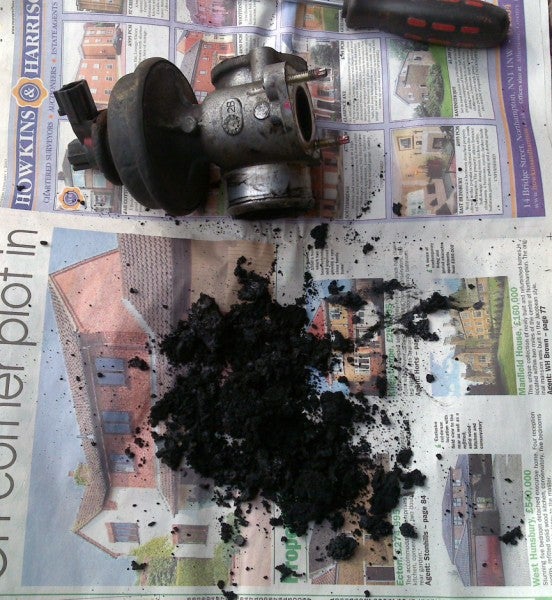
Working on a piece of newspaper, and using a suitable screwdriver, carefully clear out this carbon without gouging the inside of the valve.
The majority of the build up will come out this way:
Once the majority is cleared out, it’s time to use the ‘Carb Cleaner’ spray and paper towel to start clearing the rest out, this is where things get messy. The use of a thin brass brush, small screwdriver and the scotchbrite pad will help to get the really stuck on bits of carbon moving. The aim is to get everything inside the valve back to shiny alloy and the gasket surfaces spotless:
Comparing the before and after pictures of the EGR - it obvious to see that the carbon was making a substantial restriction to the air flow for the engine.
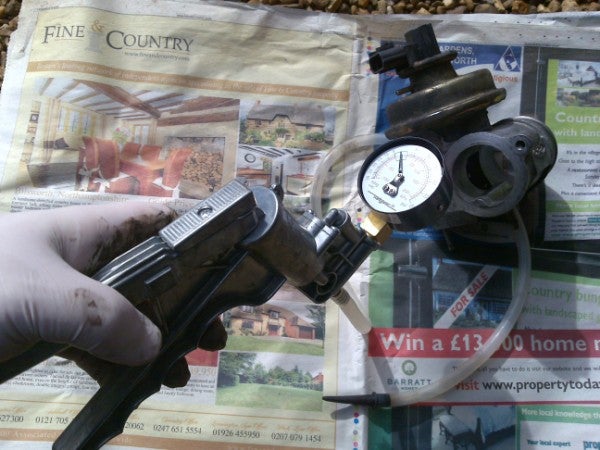
At this stage I used a Mityvac pump to check and ‘exercise’ the valve. This is connected to the small vacuum port on the valve (the one adjacent to the electrical connection on the end of the valve).
This valve seems to operate fine: It opened up when there was around 15 inHg of vacuum.
Removing and Cleaning the Inlet Manifold
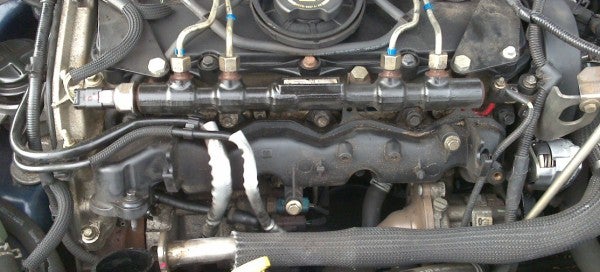
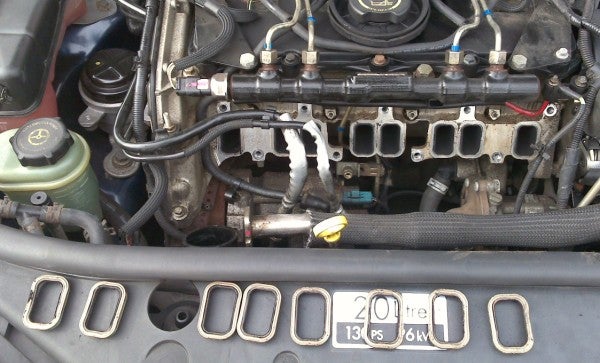
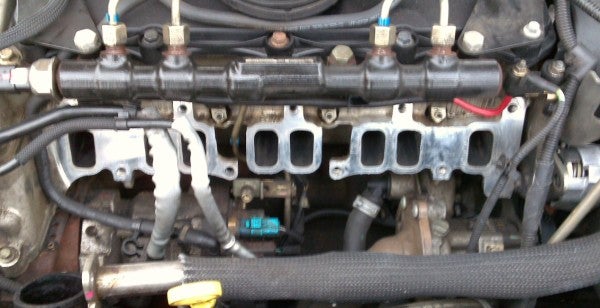
With the EGR valve now spotless, it could be refitted. However considering how choked up the valve was I decided to remove the inlet manifold and give that a clear out. Again, this is straightforward with no nasty surprises, currently the engine bay looks like this:
The diesel fuel pipes need to be unclipped from their support but not disconnected, the supports are on the left hand side of the engine (as you look at the engine from the front), there are bits of wiring that need to be unclipped from the manifold on the right hand side, the vacuum solenoid complete with its mounting needs to be removed from where it bolts onto the manifold and moved to one side, as does the grey electrical connection just above the manifold but below the fuel rail.
Undo the 9 bolts around the periphery that secure the manifold to the cylinder head. The bolts on this manifold are captive so shouldn’t fall out. Once the manifold is loose it can be removed carefully to the right, and clearing the fuel lines. Note that there are 8 rubber sealing gaskets used between the manifold and the cylinder head, although these are a snug fit in the manifold: be careful that these don’t fall out whilst removing the manifold. Once the manifold is clear of the engine, remove the rubber gasket seals and keep them in order for reuse.
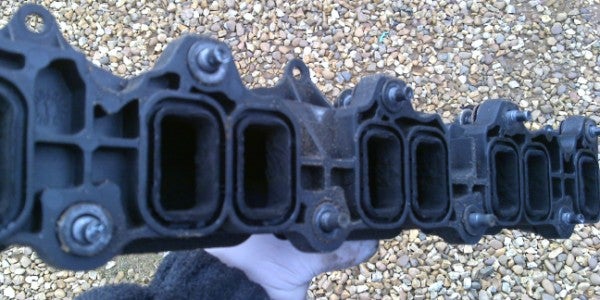
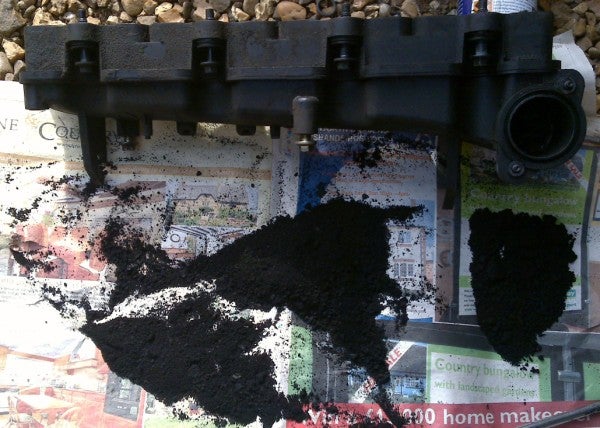
As expected, the inside of the manifold was also choked up with carbon deposits:
Access inside the manifold is far more difficult compared to the EGR valve, however good results can be had with the wire brush and screwdriver poking into the various ports to scrape away and loosen as much as possible:
More ‘carb cleaner’ spray and paper towel is used to clean up the manifold, both inside and out. The gasket recesses need to be cleaned out too, as well as all the rubber gasket seals, though I didn't use any solvents on the rubber gaskets.
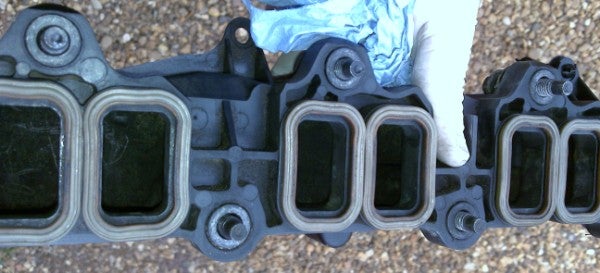
The cleaned up manifold, again a massive difference to how it was when removed:
Refit the cleaned up rubber gasket seals and the manifold is ready to be refitted:
Reassembly and Finishing off
Before refitting the manifold and EGR back onto the car, there's a few additional things to do and check:
Attention needs to be turned to the cylinder head. Here, the gasket surface needs to be carefully cleaned (carb cleaner, scotchbrite pad) ensure that the surface isn’t deeply scratched – it is alloy and is easily damaged.
Any carbon build up in the cylinder head ports can be carefully removed. Care is needed here to ensure the carbon comes out of the engine and not pushed in.
It is worth giving the rubber air intake hose a thorough check to ensure that there are no splits or tears as this will give a dramatic performance loss, 'whooshing' noises and increased smoke. It’s easier to do this check now as there is a bit more space.
- The metal gasket (that goes between the EGR pipe and the EGR valve) needs to be cleaned, as does the end of the EGR pipe (scotchbrite pad)
- Clean up the rubber gasket seal that goes between the EGR valve and the inlet manifold.
- Reassembly, as they say, is the reverse of the disassembly...
- Manoeuvre the manifold into place (from the right hand side) ensuring that the rubber gasket seals aren’t dislodged and tighten the 9 bolts to a torque of 18Nm.
- Tighten these progressively starting in the middle and working outward to ensure no twist on the manifold.
- Refit the vacuum solenoid and its mounting bracket to the manifold, connect up the grey electrical plug and clip the necessary wiring and fuel line supports back into place.
- Refit the EGR valve, don’t forget the cleaned up gaskets (the circular rubber gasket between the inlet manifold and the valve, and the diamond shaped metal gasket between the valve and the EGR pipe.
- Check that the air intake pipe is pushed firmly into place and tighten with the hose clip.
- Reconnect the wiring plug to the EGR valve, and the vacuum pipe.
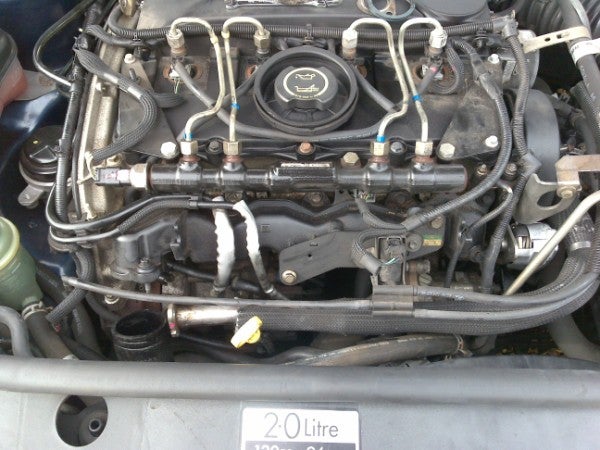
- Double check that all is connected up, tightened up and nothing is out of place:
Before refitting the engine cover, it may be prudent to do a road test to ensure all is secure and no air leaks. It may take the Engine Management 100 miles or so to adjust to the sudden increase in air being delivered to the engine. Mine was a little 'grumpy' for a while but certainly got better under 100 miles.
 Your Privacy Choices