Registrations
We now manually approve all new user accounts due to a large influx of spam bots. Accounts are normally approved within 48 hours.
If you need any help with using this Wiki, please ask here: TalkFord.com Wiki Submission Forum
Difference between revisions of "Rear washer jet replacement"
52graphite (Talk | contribs) m (Category) |
52graphite (Talk | contribs) m |
||
| Line 1: | Line 1: | ||
| + | This is for the hatchback only. | ||
| + | |||
If your rear washer jet isn't performing well and you're sure the "usual suspect" pipe join behind the RH C-pillar trim is secure, here's how to replace your rear washer jet. This is a quick and easy process that should take about 10 minutes tops, assuming you don't waste time taking photos for the Wiki as you go. | If your rear washer jet isn't performing well and you're sure the "usual suspect" pipe join behind the RH C-pillar trim is secure, here's how to replace your rear washer jet. This is a quick and easy process that should take about 10 minutes tops, assuming you don't waste time taking photos for the Wiki as you go. | ||
Revision as of 12:11, 12 March 2010
This is for the hatchback only.
If your rear washer jet isn't performing well and you're sure the "usual suspect" pipe join behind the RH C-pillar trim is secure, here's how to replace your rear washer jet. This is a quick and easy process that should take about 10 minutes tops, assuming you don't waste time taking photos for the Wiki as you go.
Buy the part
FINIS code 1144075, cost me £3.58. This includes the rubber gasket / washer.
Here's the packet:
and the new part:
Remove the old part
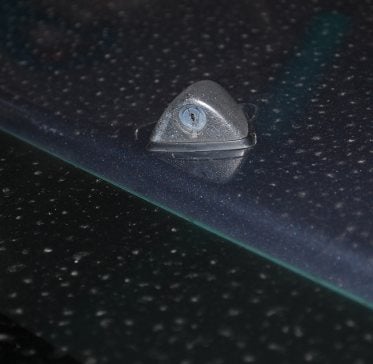
Twist the old washer jet 45 degrees towards the RH side of the car. Why do I always take Wiki pictures after dusty rain?!
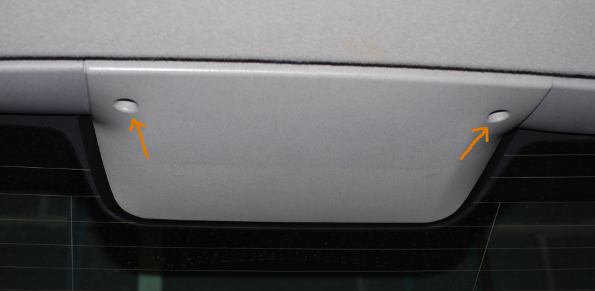
Remove the two screws holding the centre brake light cover on, and drop the cover. The lamp and wiring stay attached, so be gentle.
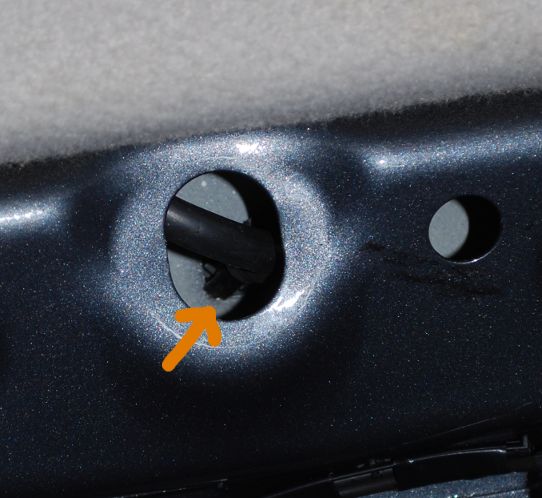
Using a screwdriver, push the arrowed tab on the old washer jet to persuade it through the hole. This shouldn't take much force.
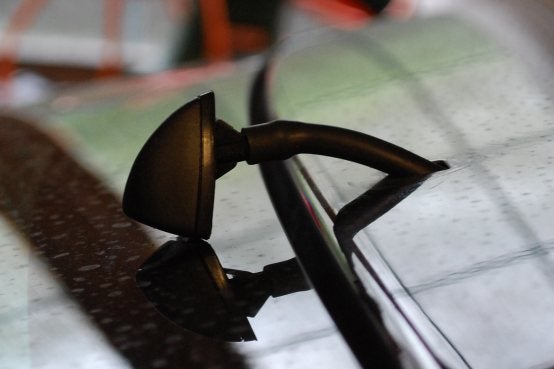
From outside the car, pull the jet out a couple of inches and disconnect the pipe.
Fit the new part
Plug the new part into the pipe. This photo came out unexpectedly artistic:
Clean up the paintwork where the washer sits. Locate the front-facing tab of the new washer jet into the hole - straight, not twisted - and push down to locate the rear tab. Give the new jet a quick test to make sure the pipe isn't kinked, then refit the lamp cover making sure not to trap the wiring. Ensure the brake light still works.
Job done.


 Your Privacy Choices