Registrations
We now manually approve all new user accounts due to a large influx of spam bots. Accounts are normally approved within 48 hours.
If you need any help with using this Wiki, please ask here: TalkFord.com Wiki Submission Forum
Difference between revisions of "LED's in door handles"
| (One intermediate revision by the same user not shown) | |||
| Line 21: | Line 21: | ||
| − | STEP 1 | + | '''STEP 1''' |
| + | |||
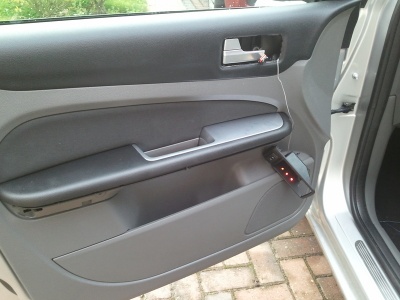
Removing the door panel , First start by squeezing the top and bottom of the plastic door trim by the handle and then prize from the window switch or alarm switch side. | Removing the door panel , First start by squeezing the top and bottom of the plastic door trim by the handle and then prize from the window switch or alarm switch side. | ||
Pulling gently until it unclips, use a flat screwdriver if you cannot get your finger nails behind. Once released unclip the wiring. | Pulling gently until it unclips, use a flat screwdriver if you cannot get your finger nails behind. Once released unclip the wiring. | ||
[[File:LED2.jpg|400px]] | [[File:LED2.jpg|400px]] | ||
| + | [[File:LED3.jpg|400px]] | ||
| + | '''STEP 2''' | ||
| − | |||
with a flat screw drive move to the bottom half of the handle cover, insert the screwdriver and push down and work your way across until lower handle comes down and remove. | with a flat screw drive move to the bottom half of the handle cover, insert the screwdriver and push down and work your way across until lower handle comes down and remove. | ||
Undo the 2 x 8mm bolts underneath the door handle and remove. If working on the driver’s door unplug the window and mirror wires. | Undo the 2 x 8mm bolts underneath the door handle and remove. If working on the driver’s door unplug the window and mirror wires. | ||
| − | [[File: | + | [[File:LED4.jpg|400px]] |
| + | [[File:LED5.jpg|400px]] | ||
| + | '''STEP 3''' | ||
| − | |||
Inner door card is held by 7 clips , easy way I found to remove was start at lower edge getting my fingers behind and using a large flat screwdriver rest it next to the clip and twist | Inner door card is held by 7 clips , easy way I found to remove was start at lower edge getting my fingers behind and using a large flat screwdriver rest it next to the clip and twist | ||
to unclip, cover the screwdriver with a rag first. Then work your way along the bottom and side's then the top leaving the one by the mirror until last as there is a small section behind the mirror trim. | to unclip, cover the screwdriver with a rag first. Then work your way along the bottom and side's then the top leaving the one by the mirror until last as there is a small section behind the mirror trim. | ||
| − | [[File: | + | [[File:LED6.jpg|400px]] |
| + | |||
| + | '''STEP 4''' | ||
| − | |||
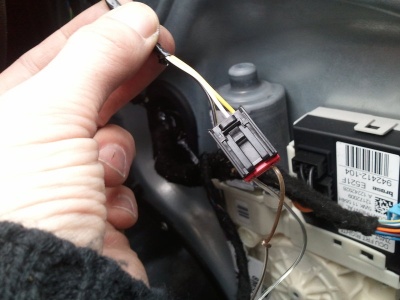
Checking which wires so out with the multimeter, wiring is different. Passenger side the switch is the power window, drivers side is the alarm sensor turn off switch. | Checking which wires so out with the multimeter, wiring is different. Passenger side the switch is the power window, drivers side is the alarm sensor turn off switch. | ||
| Line 49: | Line 53: | ||
Drivers door wires to wire too are Yellow (+) and Black/White (-). | Drivers door wires to wire too are Yellow (+) and Black/White (-). | ||
| − | [[File: | + | [[File:LED7.jpg|400px]] |
| + | [[File:LED8.jpg|400px]] | ||
| + | '''STEP 5''' | ||
| − | |||
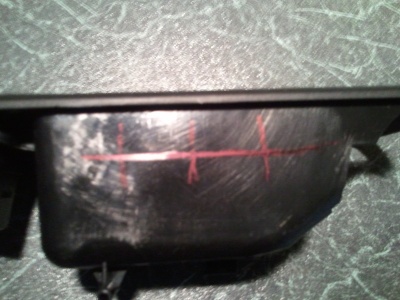
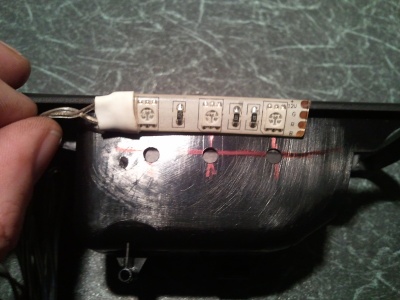
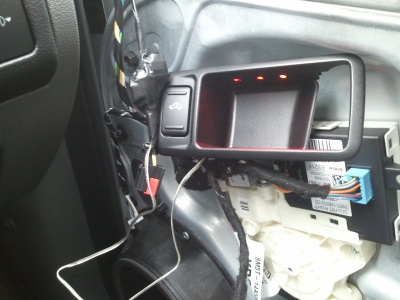
Mark door handle trim with placement of LEDS as shown and drill 3 x 4mm holes. Make sure you are drilling the top of the trim and not the bottom. | Mark door handle trim with placement of LEDS as shown and drill 3 x 4mm holes. Make sure you are drilling the top of the trim and not the bottom. | ||
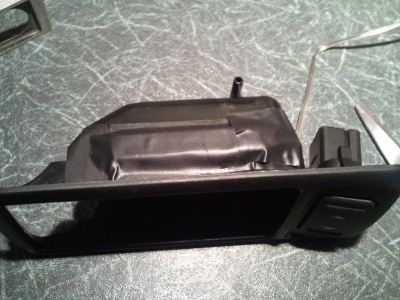
Try LEDS against the holes and use Wide 1 inch insulation tape to secure LEDS to the trim. | Try LEDS against the holes and use Wide 1 inch insulation tape to secure LEDS to the trim. | ||
| − | [[File: | + | [[File:LED9.jpg|400px]] |
| + | [[File:LED10.jpg|400px]] | ||
| + | [[File:LED11.jpg|400px]] | ||
| + | '''STEP 6''' | ||
| − | |||
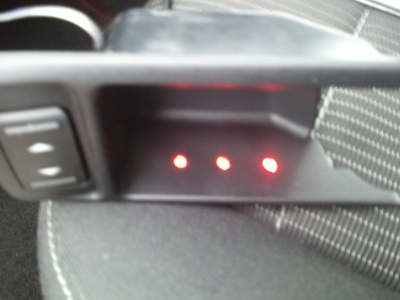
Scotch lock (+) LED wire to Green/Black and (-) LED to Black/White .Switch on ignition to test. | Scotch lock (+) LED wire to Green/Black and (-) LED to Black/White .Switch on ignition to test. | ||
| + | [[File:LED12.jpg|400px]] | ||
| + | [[File:LED13.jpg|400px]] | ||
| + | '''STEP 7''' | ||
| − | |||
| − | |||
Slide door handle trim through door hand gap in door card and position clips over the clip holes starting with the top corner by the mirror. | Slide door handle trim through door hand gap in door card and position clips over the clip holes starting with the top corner by the mirror. | ||
Push against door card in the corner and then align the top and again pushing door card until clip clicks into place, carry on around until door card is back in place. | Push against door card in the corner and then align the top and again pushing door card until clip clicks into place, carry on around until door card is back in place. | ||
| Line 74: | Line 82: | ||
Pull handle forward and slide handle trim behind the handle, reconnect the wiring plug, and clip back into place. Passenger side is complete. | Pull handle forward and slide handle trim behind the handle, reconnect the wiring plug, and clip back into place. Passenger side is complete. | ||
| + | [[File:LED14.jpg|400px]] | ||
| − | STEP 8 | + | '''STEP 8''' |
| + | |||
Drivers side follow previous steps apart from the wiring. | Drivers side follow previous steps apart from the wiring. | ||
The wiring in the Drivers switch is different as it’s not the electric window switch ; it is the alarm sensor off switch. | The wiring in the Drivers switch is different as it’s not the electric window switch ; it is the alarm sensor off switch. | ||
Wire (+) LED to Yellow and wire (-) LED to Black/White. | Wire (+) LED to Yellow and wire (-) LED to Black/White. | ||
| − | + | [[File:LED15.jpg|400px]] | |
| − | + | [[File:LED16.jpg|400px]] | |
| − | + | [[File:LED17.jpg|400px]] | |
| − | + | ||
| − | + | ||
What I will say is. The passenger and rear Passenger doors all work differently to the driver’s door. All the passenger doors light up when opening the door or switching on courtesy lights. | What I will say is. The passenger and rear Passenger doors all work differently to the driver’s door. All the passenger doors light up when opening the door or switching on courtesy lights. | ||
| Line 93: | Line 101: | ||
driver’s door if you wanted them to all act the same. But I’m happy with it as it is for now. | driver’s door if you wanted them to all act the same. But I’m happy with it as it is for now. | ||
Just got to order 2 more SMD leds for the rear doors now. | Just got to order 2 more SMD leds for the rear doors now. | ||
| + | |||
| + | [[File:LED18.jpg|400px]] | ||
| + | Source: http://www.ffoc.co.uk/modules.php?name=Forums&file=viewtopic&t=264251 | ||
| − | + | [[Category:Focus_Mk2]] | |
Latest revision as of 13:49, 5 December 2011
Tools Needed:
Large flat head screwdriver
8mm socket and driver
Multimeter
4 x Scotch locks
Insulation tape
4mm drill bit and drill
Marker pen
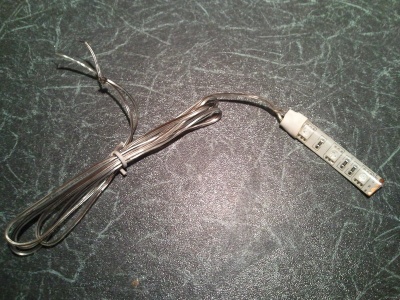
What I’m fitting is a 3 light SMD, they come in longer strips and can be cut down, These depending how you wire them can glow RED/BLUE or GREEN.
STEP 1
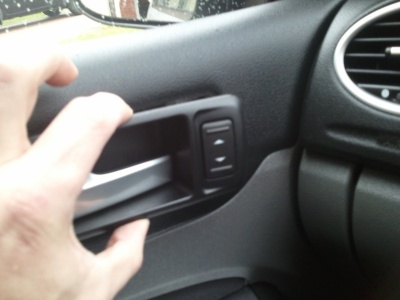
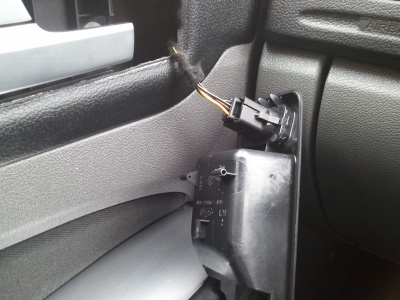
Removing the door panel , First start by squeezing the top and bottom of the plastic door trim by the handle and then prize from the window switch or alarm switch side. Pulling gently until it unclips, use a flat screwdriver if you cannot get your finger nails behind. Once released unclip the wiring.
STEP 2
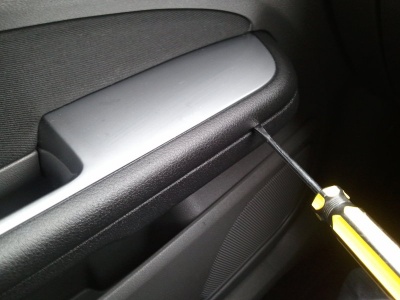
with a flat screw drive move to the bottom half of the handle cover, insert the screwdriver and push down and work your way across until lower handle comes down and remove. Undo the 2 x 8mm bolts underneath the door handle and remove. If working on the driver’s door unplug the window and mirror wires.
STEP 3
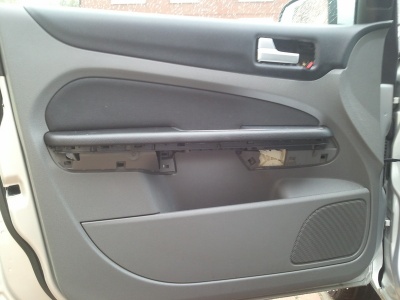
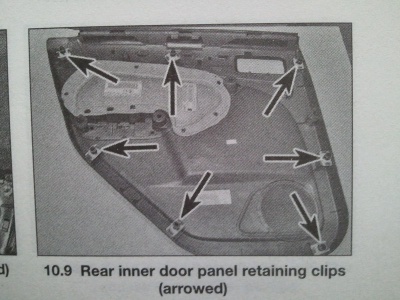
Inner door card is held by 7 clips , easy way I found to remove was start at lower edge getting my fingers behind and using a large flat screwdriver rest it next to the clip and twist to unclip, cover the screwdriver with a rag first. Then work your way along the bottom and side's then the top leaving the one by the mirror until last as there is a small section behind the mirror trim.
STEP 4
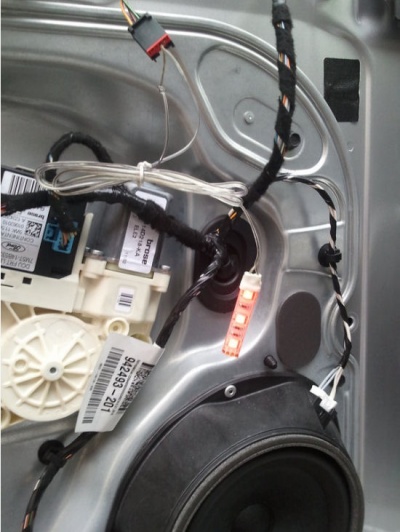
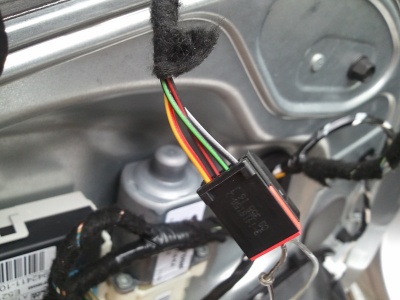
Checking which wires so out with the multimeter, wiring is different. Passenger side the switch is the power window, drivers side is the alarm sensor turn off switch.
Passenger side wires to wire too are Green/Black (+) and Black/White (-)
Drivers door wires to wire too are Yellow (+) and Black/White (-).
STEP 5
Mark door handle trim with placement of LEDS as shown and drill 3 x 4mm holes. Make sure you are drilling the top of the trim and not the bottom. Try LEDS against the holes and use Wide 1 inch insulation tape to secure LEDS to the trim.
STEP 6
Scotch lock (+) LED wire to Green/Black and (-) LED to Black/White .Switch on ignition to test.
STEP 7
Slide door handle trim through door hand gap in door card and position clips over the clip holes starting with the top corner by the mirror. Push against door card in the corner and then align the top and again pushing door card until clip clicks into place, carry on around until door card is back in place. Replace the 2 x 8mm handle securing nuts and lower door handle trim. Pull handle forward and slide handle trim behind the handle, reconnect the wiring plug, and clip back into place. Passenger side is complete.
STEP 8
Drivers side follow previous steps apart from the wiring. The wiring in the Drivers switch is different as it’s not the electric window switch ; it is the alarm sensor off switch. Wire (+) LED to Yellow and wire (-) LED to Black/White.
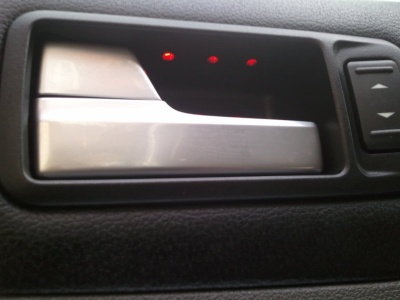
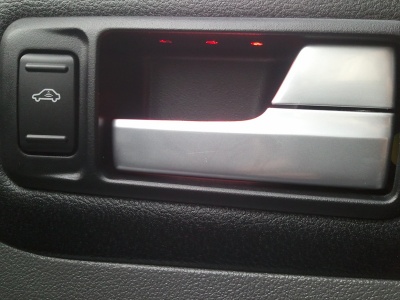
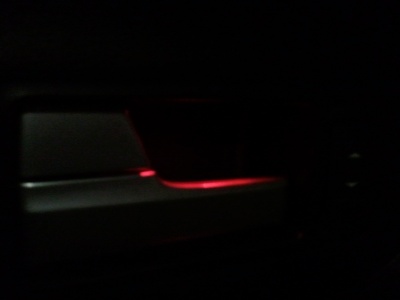
What I will say is. The passenger and rear Passenger doors all work differently to the driver’s door. All the passenger doors light up when opening the door or switching on courtesy lights. This stays on for 3 seconds , when ignition is turned on it lights up full time , when ignition is turned off it stays illuminated for 3 seconds and then goes off after you leave the car. The driver’s door however only come's on when ignition is on and goes off when you turn ignition off. Obviously they are not on the same circuit, but I have tested all other wiring there and the same circuit is not in the driver’s door. You could however trace a wire from the rear O/S door to the driver’s door if you wanted them to all act the same. But I’m happy with it as it is for now. Just got to order 2 more SMD leds for the rear doors now.
Source: http://www.ffoc.co.uk/modules.php?name=Forums&file=viewtopic&t=264251
 Your Privacy Choices