Registrations
We now manually approve all new user accounts due to a large influx of spam bots. Accounts are normally approved within 48 hours.
If you need any help with using this Wiki, please ask here: TalkFord.com Wiki Submission Forum
Difference between revisions of "Fog Lights - Mk2"
| (3 intermediate revisions by 3 users not shown) | |||
| Line 1: | Line 1: | ||
| + | {{note|'''The Ford Mondeo hit our roads in 1993, and has consistently been a sales success. Now on its 4th incarnation, it remains a drivers favourite.'''<br> | ||
| + | '''For more information, visit the [http://www.talkford.com/forum/596-mondeo/ Ford Mondeo] forum on [http://www.talkford.com TalkFord.com], the definitive resource site covering all Fords from the present day to the 1970's.'''}} | ||
| + | ---- | ||
| + | {{Infobox | ||
| + | |name = Infobox Template | ||
| + | |bodystyle = float:right; valign:top; | ||
| + | |image = [[File:Fordwiki infobox.png]] | ||
| + | |imagestyle = | ||
| + | |caption = Overview Guide | ||
| + | |captionstyle = | ||
| + | |headerstyle = background:#ccf; | ||
| + | |labelstyle = background:#ddf; | ||
| + | |datastyle = text-align:right; | ||
| + | |header1 = | ||
| + | |label1 = Ford Model: | ||
| + | |data1 = '''Mondeo''' | ||
| + | |header2 = | ||
| + | |label2 = Petrol/Diesel: | ||
| + | |data2 = '''???''' | ||
| + | |header3 = | ||
| + | |label3 = Estimated Cost: | ||
| + | |data3 = '''???''' | ||
| + | |header4 = | ||
| + | |label4 = Difficulty? | ||
| + | |data4 = '''???''' | ||
| + | |label5 = How long does this take? | ||
| + | |data5 = '''???''' | ||
| + | }} | ||
== Fitting MKII Front Foglights == | == Fitting MKII Front Foglights == | ||
| Line 48: | Line 76: | ||
[[Image:Mk2foglight10.gif]] | [[Image:Mk2foglight10.gif]] | ||
| − | |||
| − | [[Category: | + | [[Category:Mondeo_Mk2]] |
| − | + | ||
Latest revision as of 21:05, 20 February 2011
For more information, visit the Ford Mondeo forum on TalkFord.com, the definitive resource site covering all Fords from the present day to the 1970's.
|
Overview Guide | |
| Ford Model: | Mondeo |
|---|---|
| Petrol/Diesel: | ??? |
| Estimated Cost: | ??? |
| Difficulty? | ??? |
| How long does this take? | ??? |
Fitting MKII Front Foglights
Note
NB: This giude is for those who already have the wiring for the front fogs in place
Method
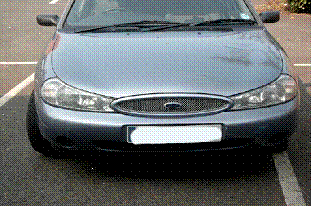
Your car will look something like this. The spaces where the fog lights will fit are covered by dummy air vents. To remove these you need to pull hard on the outer ring (the best way is to put your fingers under the top lip and tug!)
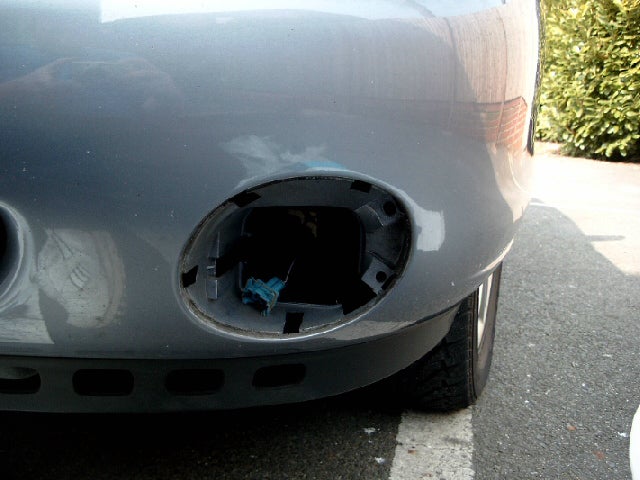
Once removed the opening should look like this. Notice the blue connector, essential when fitting fog lights.
The next step is to put into place the metal clips which you will attach the fog lights too. These are a real PITA. Lots of patience. The clips need sliding over the hole in the bumper, I did it all through the fog light hole, but some may find it easier by removing the scuttle panel from underneath the bumper and reaching up.
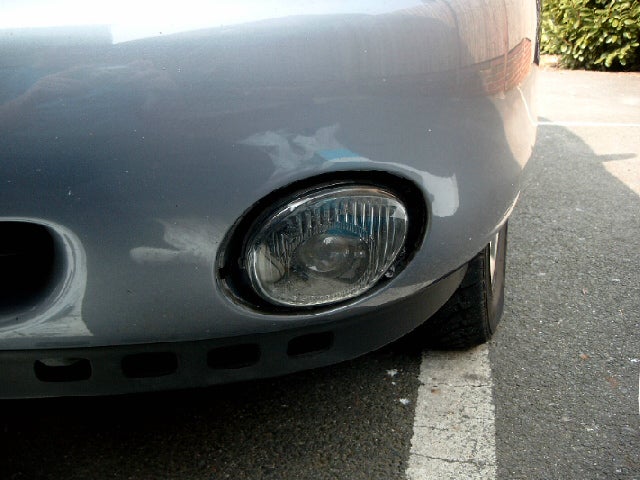
Once screwed in the fog light should look like this; Now all you need to do is put the surround back on again.
Next step is to go into the car. Under the steering wheel is a panel which is held in by three screws. Undo these and give a hard tug, the top of the panel is held in by metal clips which can be quite tight.
The panel will look like this. unplug all the switches to make the removal of the headlight switch much easier. To remove the light switch, undo the three screws holding it in and it should just pull out. Replace it with the double pull light switch.
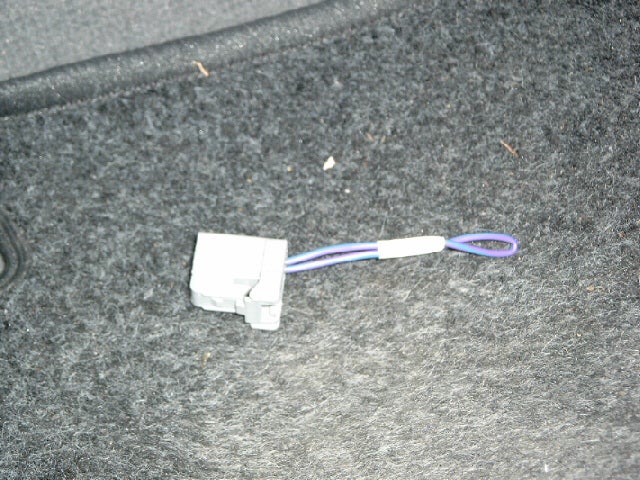
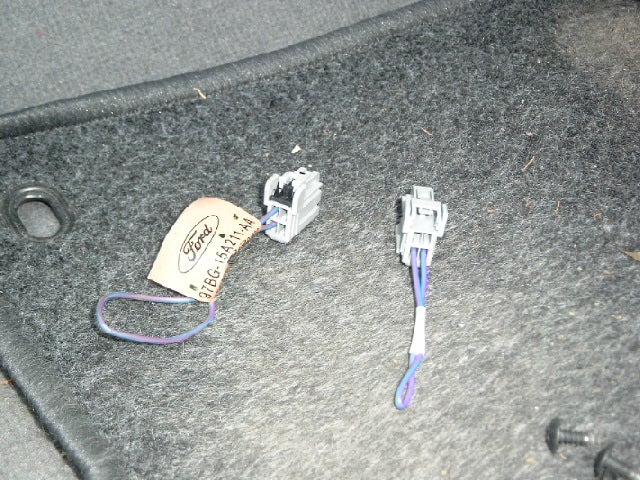
The next thing to do involves the purple loop! (Left Picture) And again with the original on the left and the new one on the right. Notice the different configuration of the pins. (Right Picture)
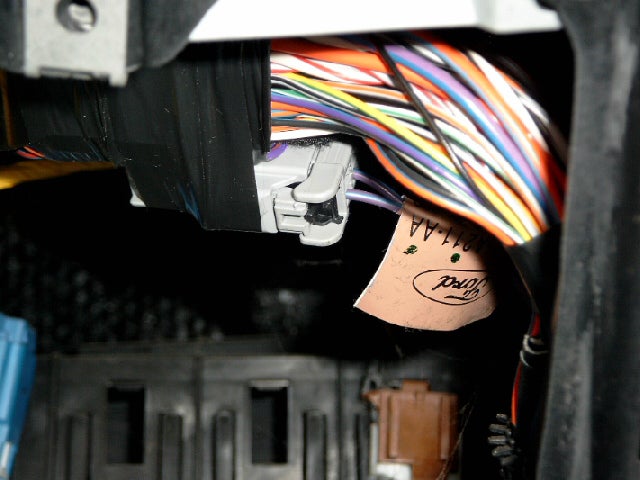
Locate the position of the original purple loop. It should be taped back just behind the original light switch and is fairly easy to access, Replace with the new one (or reconfigure the original) Once you have done this, reattach all plugs to the switches and put panel back into dash.
Put all trim back on the car. Next thing to do is to switch it all on, and it should look like this:
Once you have done this, reattach all plugs to the switches and put panel back into dash.




 Your Privacy Choices