Registrations
We now manually approve all new user accounts due to a large influx of spam bots. Accounts are normally approved within 48 hours.
If you need any help with using this Wiki, please ask here: TalkFord.com Wiki Submission Forum
Difference between revisions of "Vinyl Wrapping Steering Wheel Spokes"
(→Step 2 – Preparing the Spokes) |
|||
| (8 intermediate revisions by 2 users not shown) | |||
| Line 1: | Line 1: | ||
| + | {{note|'''The Ford Mondeo hit our roads in 1993, and has consistently been a sales success. Now on its 4th incarnation, it remains a drivers favourite.'''<br> | ||
| + | '''For more information, visit the [http://www.talkford.com/forum/596-mondeo/ Ford Mondeo] forum on [http://www.talkford.com TalkFord.com], the definitive resource site covering all Fords from the present day to the 1970's.'''}} | ||
| + | |||
| + | ---- | ||
| + | {{Infobox | ||
| + | |name = Infobox Template | ||
| + | |bodystyle = float:right; valign:top; | ||
| + | |image = [[File:Fordwiki infobox.png]] | ||
| + | |imagestyle = | ||
| + | |caption = Overview Guide | ||
| + | |captionstyle = | ||
| + | |headerstyle = background:#ccf; | ||
| + | |labelstyle = background:#ddf; | ||
| + | |datastyle = text-align:right; | ||
| + | |header1 = | ||
| + | |label1 = Ford Model: | ||
| + | |data1 = Mondeo Mk3 | ||
| + | |header2 = | ||
| + | |label2 = Petrol/Diesel: | ||
| + | |data2 = Both | ||
| + | |header3 = | ||
| + | |label3 = Estimated Cost: | ||
| + | |data3 = £0-£10 | ||
| + | |header4 = | ||
| + | |label4 = Difficulty? | ||
| + | |data4 = Easy | ||
| + | |label5 = How long does this take? | ||
| + | |data5 = 1 Hour}} | ||
| + | |||
| + | |||
| + | |||
| + | |||
MK3 Mondeos (and no doubt many other cars) suffer from particularly bad wear on the steering wheel spokes so at some point you’re going to want to refurb/mod them. Somebody had tried to polish mine and made them much worse! | MK3 Mondeos (and no doubt many other cars) suffer from particularly bad wear on the steering wheel spokes so at some point you’re going to want to refurb/mod them. Somebody had tried to polish mine and made them much worse! | ||
| Line 7: | Line 39: | ||
Basically you have 4 options; put up with them, replace them (very expensive), paint them (very time consuming) or vinyl-wrap them. | Basically you have 4 options; put up with them, replace them (very expensive), paint them (very time consuming) or vinyl-wrap them. | ||
Vinyl –wrapping sounds very daunting but it’s really quite simple and produces very attractive results for very little expense – I bought enough vinyl to wrap about 20 sets of spokes for £5. | Vinyl –wrapping sounds very daunting but it’s really quite simple and produces very attractive results for very little expense – I bought enough vinyl to wrap about 20 sets of spokes for £5. | ||
| + | |||
| + | As an alternative, you could use aluminium self-adhesive tape - the type used for binding the metallized bubble-wrap house insulation. This is cheap, very thin and available from DIY stores. The disadvantages are that it is very sticky (so no second chances), less flexible and susceptible to marking with fingernails. | ||
| Line 14: | Line 48: | ||
1. '''Vinyl''' (Obviously) - Just ordinary sign-writers vinyl. This is readily available on eBay etc. I bought a square metre but a couple of A4 sized pieces will be plenty. Personally I liked the OEM look and went for a silver that very closely matched the original Ford paint – ''Avery 546 EF Gloss Silver''. You could use any colour or finish you like, results should be the same! | 1. '''Vinyl''' (Obviously) - Just ordinary sign-writers vinyl. This is readily available on eBay etc. I bought a square metre but a couple of A4 sized pieces will be plenty. Personally I liked the OEM look and went for a silver that very closely matched the original Ford paint – ''Avery 546 EF Gloss Silver''. You could use any colour or finish you like, results should be the same! | ||
| − | 2. '''Some way of removing the spokes''' – I used a couple of plastic tyre | + | 2. '''Some way of removing the spokes''' – I used a couple of plastic tyre levers; the kind used for pedal cycles. If you don’t have these they’re worth investing in, a set should set you back less than a couple of quid. You could use a screwdriver if you think it’s worth the risk but if you slip you could do a lot of damage! I haven’t actually tried but I’d imagine the tools used to open iPods would also work quite well. |
3. '''Very sharp scissors and the sharpest knife you can lay your hands on''' | 3. '''Very sharp scissors and the sharpest knife you can lay your hands on''' | ||
| Line 22: | Line 56: | ||
5. '''Glasses''' - but only if you normally need them for detailed close-up work. | 5. '''Glasses''' - but only if you normally need them for detailed close-up work. | ||
| − | 6. '''A permanent marker''' – Not strictly necessary but I found it useful to label each the spokes as I took them off so I didn’t spend hours trying to work out which was which when reassembling the car. | + | 6. '''A permanent marker''' – Not strictly necessary but I found it useful to label each of the spokes as I took them off so I didn’t spend hours trying to work out which was which when reassembling the car. |
| Line 31: | Line 65: | ||
I was expecting this to be quite difficult and was convinced that I’d break at least one of them doing this. In actual fact they’re very robust and come off quite easily. | I was expecting this to be quite difficult and was convinced that I’d break at least one of them doing this. In actual fact they’re very robust and come off quite easily. | ||
All you actually have to do is wedge something into the joint between the front and back parts and lever them apart. If you’ve inserted into the top joint then lever up, if you’ve inserted into the bottom joint, you guessed it, lever down. | All you actually have to do is wedge something into the joint between the front and back parts and lever them apart. If you’ve inserted into the top joint then lever up, if you’ve inserted into the bottom joint, you guessed it, lever down. | ||
| + | |||
| + | If you find this hard, you can slide the back part "outwards" first - away from the steering column - to reduce the length of clip you have to release. | ||
| Line 54: | Line 90: | ||
== Step 3 – Applying the Vinyl == | == Step 3 – Applying the Vinyl == | ||
| − | Firstly you need to cut a piece of vinyl roughly to size. You have two options here, you can either work out the shape you need and cut it out or, like I did, cut a square that’s bigger than you need and trim it once it’s partially applied. Personally I didn’t bother trying to get the shape in advance as | + | Firstly you need to cut a piece of vinyl roughly to size. You have two options here, you can either work out the shape you need and cut it out or, like I did, cut a square that’s bigger than you need and trim it once it’s partially applied. Personally I didn’t bother trying to get the shape in advance as you’ll ultimately end up having to trim it any way. |
| Line 60: | Line 96: | ||
| − | Begin by peeling back one edge of the vinyl and gently sticking it to the visible face of the spoke. Of course you’ll need to remember to leave enough of a border to wrap it around the edge | + | Begin by peeling back one edge of the vinyl and gently sticking it to the visible face of the spoke. Of course you’ll need to remember to leave enough of a border to wrap it around the edge. Then gently work the vinyl along the curve of the spoke with your thumbs ensuring you don’t trap any air. ''If you do, just gently peel back past the bubble and start the process again.'' I cut some of the backing so I could apply one part without the rest sticking to itself. |
| Line 67: | Line 103: | ||
If you start by doing the backs first (if you’re going to bother) you’ll be well practiced and used to the way the vinyl handles before you start working on the readily visible parts – ''best to make your mistakes out of sight!'' | If you start by doing the backs first (if you’re going to bother) you’ll be well practiced and used to the way the vinyl handles before you start working on the readily visible parts – ''best to make your mistakes out of sight!'' | ||
| − | Once this is done you should have the | + | Once this is done you should have the vinyl applied to the visible surface. |
| Line 73: | Line 109: | ||
| − | Now you need to trim the piece to size – leave yourself plenty to wrap around the edges, you can always cut more but you’ll kick yourself if you do a great job getting this far then find you’ve cut too much off! - I’d leave at least a centimetre around each edge. You’ll also need to cut sections out of the corners so that you don’t end up overlapping more than necessary. With the fronts you’ll also need to cut into the vinyl where the inner end steps. Simply place the piece face down and cut from the corner formed but the step all the way to the edge of the | + | Now you need to trim the piece to size – leave yourself plenty to wrap around the edges, you can always cut more but you’ll kick yourself if you do a great job getting this far then find you’ve cut too much off! - I’d leave at least a centimetre around each edge. You’ll also need to cut sections out of the corners so that you don’t end up overlapping more than necessary. With the fronts you’ll also need to cut into the vinyl where the inner end steps. Simply place the piece face down and cut from the corner formed but the step all the way to the edge of the vinyl – this is easiest with a knife but is possible with scissors if you’re careful. I actually didn’t bother cutting sections out of corners for the backs, I was able to smooth out the vinyl without doing so. You might want to try both ways and see which you favour most. |
| Line 92: | Line 128: | ||
| − | If you keep heating and pulling whilst smoothing the vinyl along the edge you’ll eventually get to the point where there are no creases. If you spend enough time doing this you should in theory at least be able to get the material completely crease free along all surfaces – don’t bother though, you can’t really see the ends let alone the inside, if the ends are flat it’ll do just fine, nobody will ever see the creases inside! | + | If you keep heating and pulling whilst smoothing the vinyl along the edge you’ll eventually get to the point where there are no creases. If you spend enough time doing this you should in theory at least be able to get the material completely crease free along all surfaces – don’t bother though, you can’t really see the ends let alone the inside, if the ends are flat it’ll do just fine, nobody will ever see the creases inside! If you're really fussy and do want the vinyl flat on the inside, try heating and stretching the vinyl slightly while applying to the visible surfaces, this will allow it to shrink back into the inward curve. |
| − | Once you’ve done one end, just spin the | + | Once you’ve done one end, just spin the piece ‘round and do the other! You’ll notice that when doing the fronts there will be one edge on the centre step that doesn’t get coverd, don’t worry, this edge will be against the inside of the wheel and behind your airbag and completely out of sight. |
| Line 100: | Line 136: | ||
| − | + | That's it, you just need to do the other 7 pieces now! | |
| − | + | ||
| − | + | ||
| − | + | ||
| + | '''NB:''' Many people will tell you that the best way to apply vinyl is to wet the surface to be covered, apply the vinyl then squeeze out the liquid, thus preventing air bubbles. In this instance it’s just not necessary, the piece is so small that if you get a bubble you can just heat with a hairdryer and peel back until you work out the bubble. If you take your time though, there’s no reason why you should get any bubbles. | ||
== Step 4 – Reinstalling == | == Step 4 – Reinstalling == | ||
| Line 114: | Line 148: | ||
[[Image:VinylWrap12.jpg]] | [[Image:VinylWrap12.jpg]] | ||
| + | |||
| + | |||
[[Image:VinylWrap13.jpg]] | [[Image:VinylWrap13.jpg]] | ||
| + | |||
| + | |||
| + | [[Image:VinylWrap14.jpg]] | ||
| + | |||
| + | |||
| + | [[Image:VinylWrap15.jpg]] | ||
[[Category:Mondeo_Mk3]] | [[Category:Mondeo_Mk3]] | ||
| − | |||
| − | |||
| − | |||
--[[User:44ron|44ron]] 23:46, 5 August 2010 (UTC) | --[[User:44ron|44ron]] 23:46, 5 August 2010 (UTC) | ||
Latest revision as of 23:45, 20 February 2011
For more information, visit the Ford Mondeo forum on TalkFord.com, the definitive resource site covering all Fords from the present day to the 1970's.
|
Overview Guide | |
| Ford Model: | Mondeo Mk3 |
|---|---|
| Petrol/Diesel: | Both |
| Estimated Cost: | £0-£10 |
| Difficulty? | Easy |
| How long does this take? | 1 Hour |
MK3 Mondeos (and no doubt many other cars) suffer from particularly bad wear on the steering wheel spokes so at some point you’re going to want to refurb/mod them. Somebody had tried to polish mine and made them much worse!
Basically you have 4 options; put up with them, replace them (very expensive), paint them (very time consuming) or vinyl-wrap them.
Vinyl –wrapping sounds very daunting but it’s really quite simple and produces very attractive results for very little expense – I bought enough vinyl to wrap about 20 sets of spokes for £5.
As an alternative, you could use aluminium self-adhesive tape - the type used for binding the metallized bubble-wrap house insulation. This is cheap, very thin and available from DIY stores. The disadvantages are that it is very sticky (so no second chances), less flexible and susceptible to marking with fingernails.
Contents
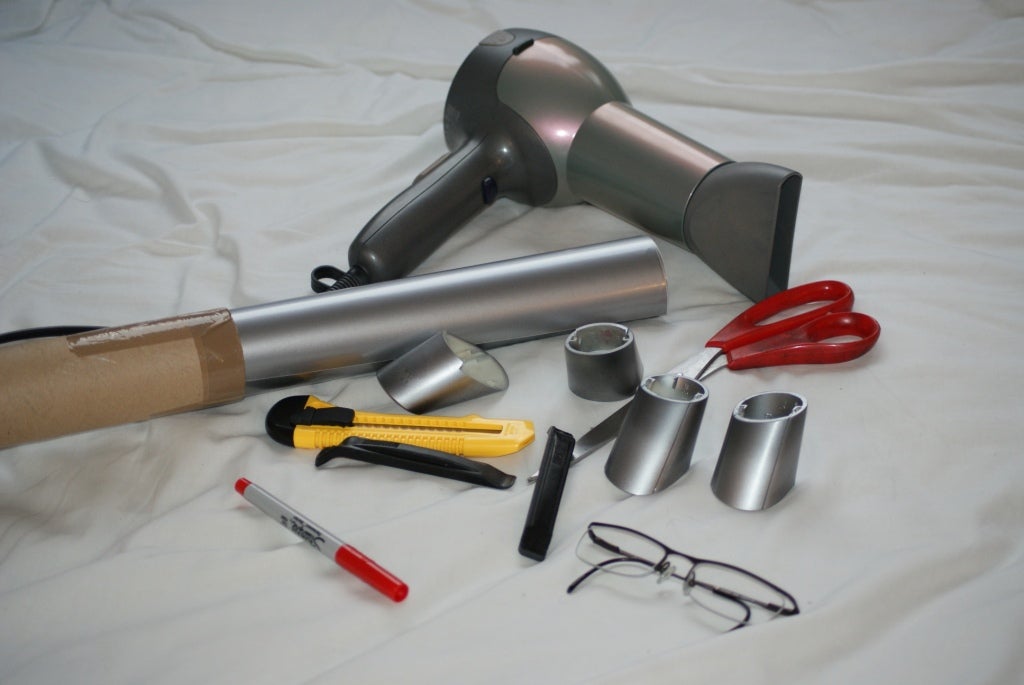
So what are you going to need?
1. Vinyl (Obviously) - Just ordinary sign-writers vinyl. This is readily available on eBay etc. I bought a square metre but a couple of A4 sized pieces will be plenty. Personally I liked the OEM look and went for a silver that very closely matched the original Ford paint – Avery 546 EF Gloss Silver. You could use any colour or finish you like, results should be the same!
2. Some way of removing the spokes – I used a couple of plastic tyre levers; the kind used for pedal cycles. If you don’t have these they’re worth investing in, a set should set you back less than a couple of quid. You could use a screwdriver if you think it’s worth the risk but if you slip you could do a lot of damage! I haven’t actually tried but I’d imagine the tools used to open iPods would also work quite well.
3. Very sharp scissors and the sharpest knife you can lay your hands on
4. A hairdryer – most women have these and will usually loan them to you as long as you promise to return them, if you don’t know any women stop modding your car and get out a bit more.
5. Glasses - but only if you normally need them for detailed close-up work.
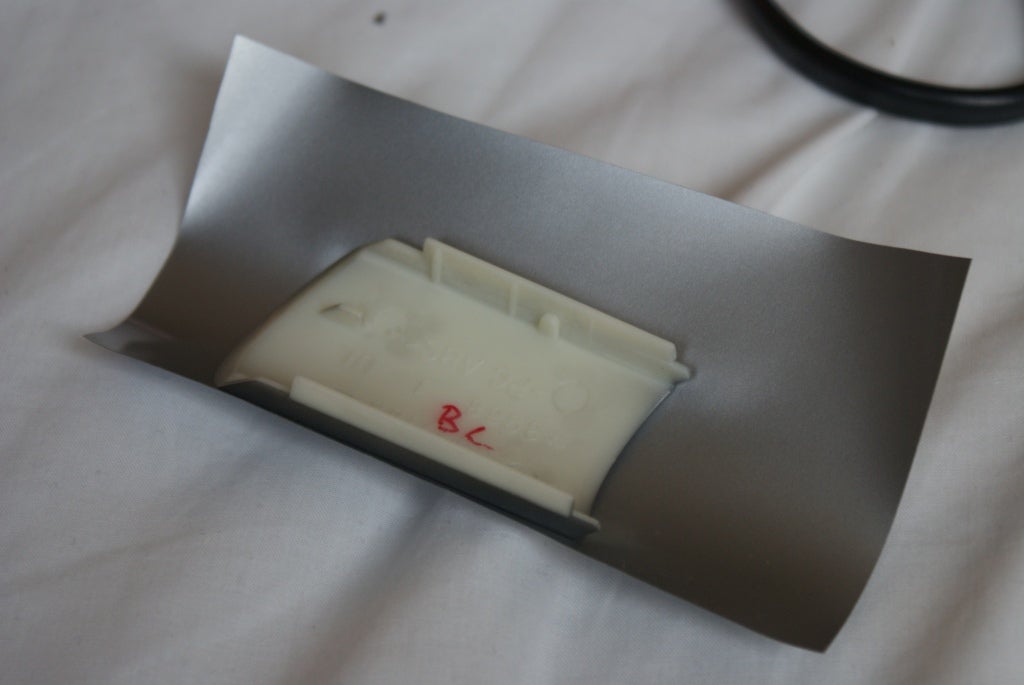
6. A permanent marker – Not strictly necessary but I found it useful to label each of the spokes as I took them off so I didn’t spend hours trying to work out which was which when reassembling the car.
Step 1 – Removing the Spokes
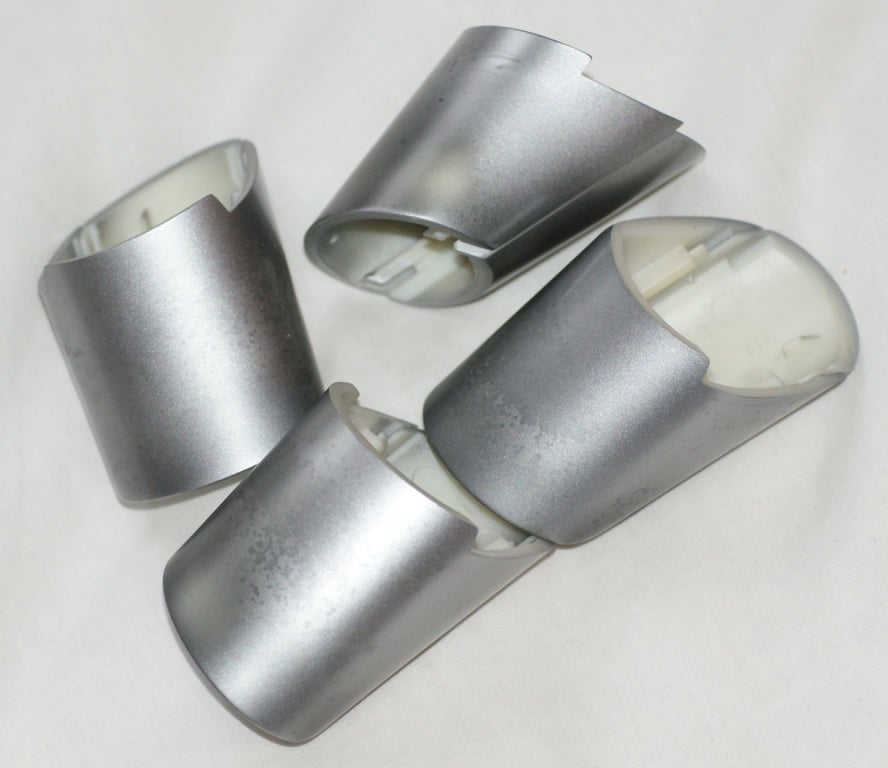
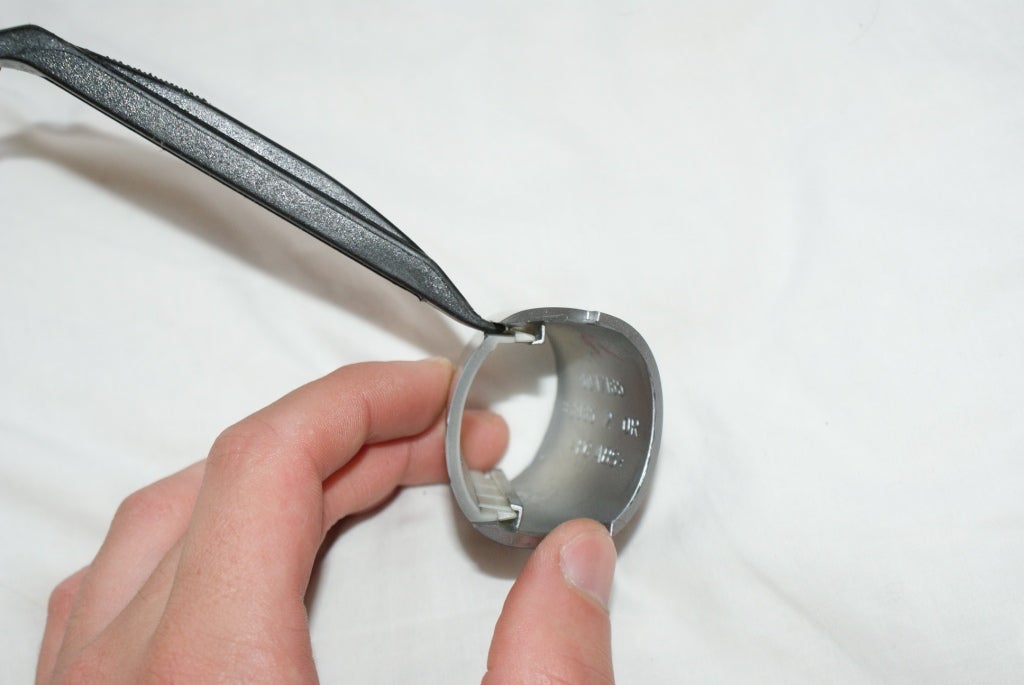
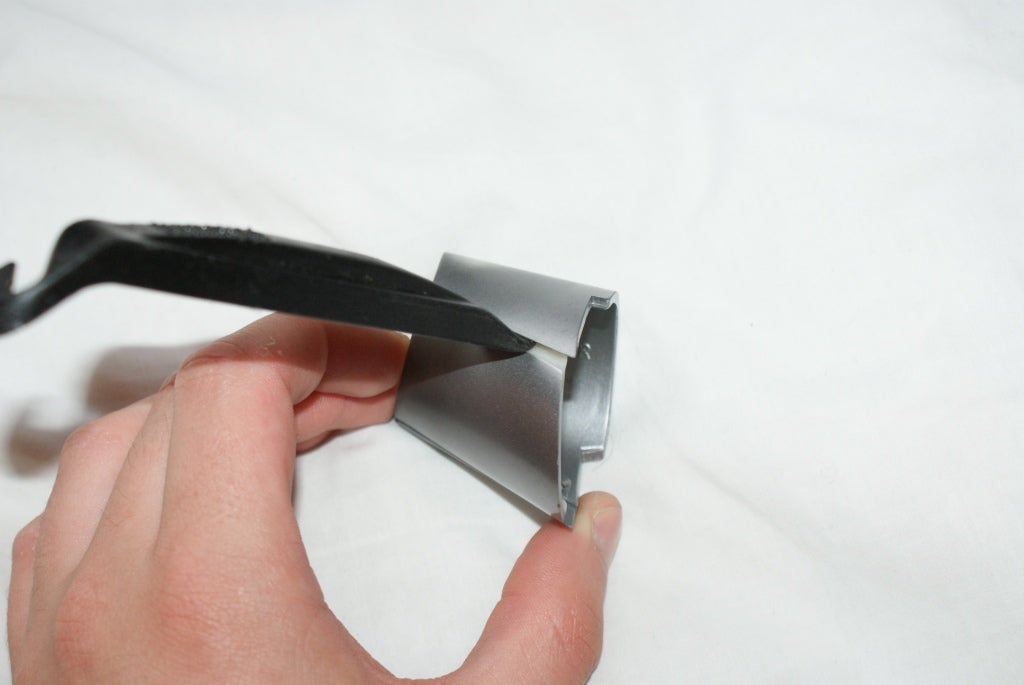
I was expecting this to be quite difficult and was convinced that I’d break at least one of them doing this. In actual fact they’re very robust and come off quite easily. All you actually have to do is wedge something into the joint between the front and back parts and lever them apart. If you’ve inserted into the top joint then lever up, if you’ve inserted into the bottom joint, you guessed it, lever down.
If you find this hard, you can slide the back part "outwards" first - away from the steering column - to reduce the length of clip you have to release.
Without a lot of effort the joint will just open up. I found that squeezing front to back opened the gap up a little and allowed the lever in more easily.
Once you’ve popped one side off, the other side is pretty easy, I used the lever for the first one but didn’t bother with the other three, I just flexed the plastic until the two parts popped apart.
Once they separate, the back part should just come free, the fronts are hooked behind the front of the wheel. Just lift the outside edge and pull away from the centre of the wheel. At this point I’d label the parts to make reassembly easier.
Step 2 – Preparing the Spokes
This stage isn’t entirely necessary but it will lead to better results. The plastic itself is of fairly good quality but the moulding isn’t so much, there are a few sharp edges etc. I took these off with some fine sandpaper. You don’t need to go mad, just take of anything that could penetrate the vinyl and round off the harshest of the corners. This will of course affect the paint so if you want to be able go back to standard in the future you’ll have to make do and just be more careful when applying the vinyl. My advice would perhaps be to have a go at applying vinyl to one spoke before doing this, then if you’re confident you can achieve a good result you can always peel it off and do it properly.
Step 3 – Applying the Vinyl
Firstly you need to cut a piece of vinyl roughly to size. You have two options here, you can either work out the shape you need and cut it out or, like I did, cut a square that’s bigger than you need and trim it once it’s partially applied. Personally I didn’t bother trying to get the shape in advance as you’ll ultimately end up having to trim it any way.
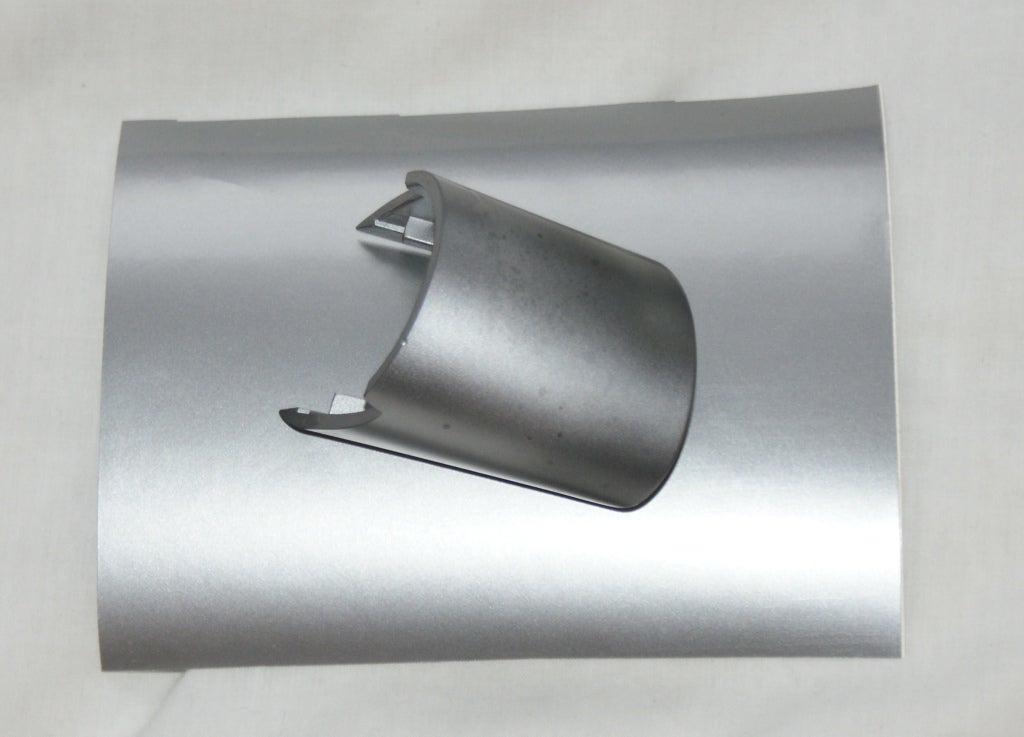
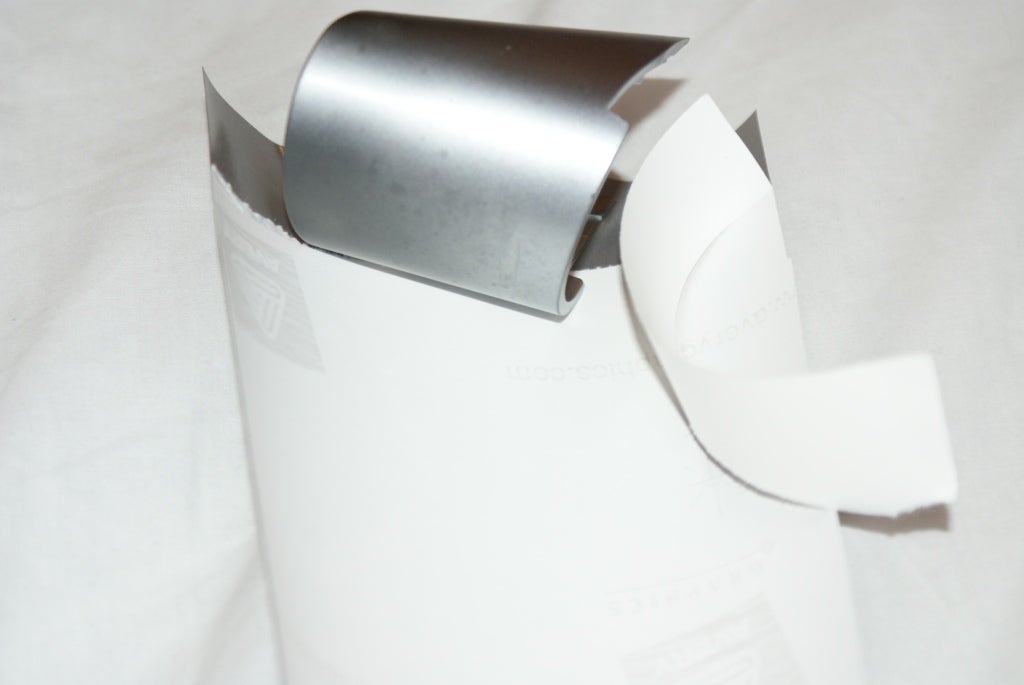
Begin by peeling back one edge of the vinyl and gently sticking it to the visible face of the spoke. Of course you’ll need to remember to leave enough of a border to wrap it around the edge. Then gently work the vinyl along the curve of the spoke with your thumbs ensuring you don’t trap any air. If you do, just gently peel back past the bubble and start the process again. I cut some of the backing so I could apply one part without the rest sticking to itself.
If you start by doing the backs first (if you’re going to bother) you’ll be well practiced and used to the way the vinyl handles before you start working on the readily visible parts – best to make your mistakes out of sight!
Once this is done you should have the vinyl applied to the visible surface.
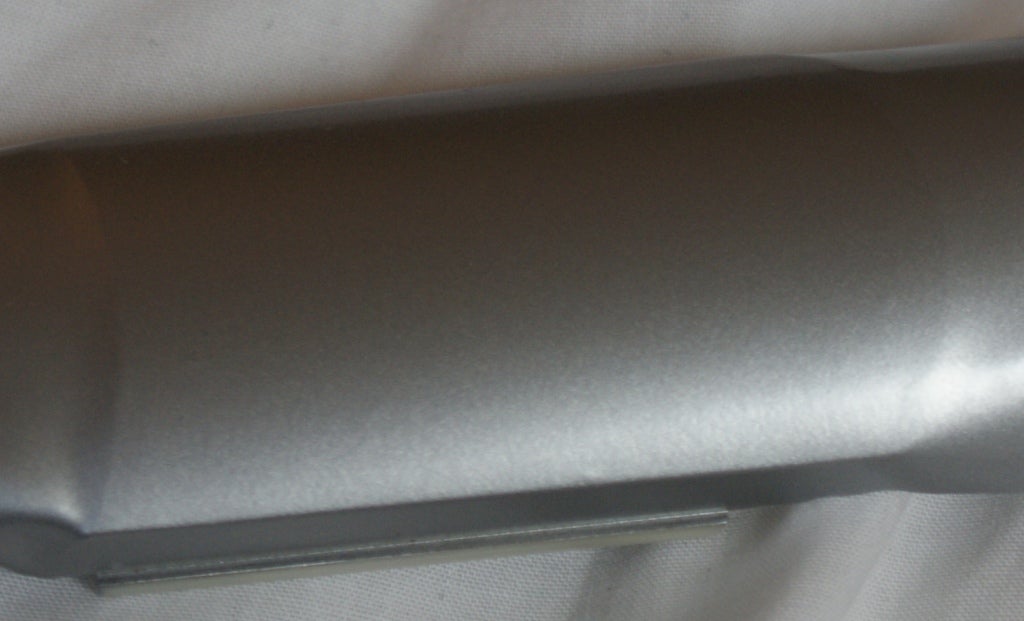
Now you need to trim the piece to size – leave yourself plenty to wrap around the edges, you can always cut more but you’ll kick yourself if you do a great job getting this far then find you’ve cut too much off! - I’d leave at least a centimetre around each edge. You’ll also need to cut sections out of the corners so that you don’t end up overlapping more than necessary. With the fronts you’ll also need to cut into the vinyl where the inner end steps. Simply place the piece face down and cut from the corner formed but the step all the way to the edge of the vinyl – this is easiest with a knife but is possible with scissors if you’re careful. I actually didn’t bother cutting sections out of corners for the backs, I was able to smooth out the vinyl without doing so. You might want to try both ways and see which you favour most.
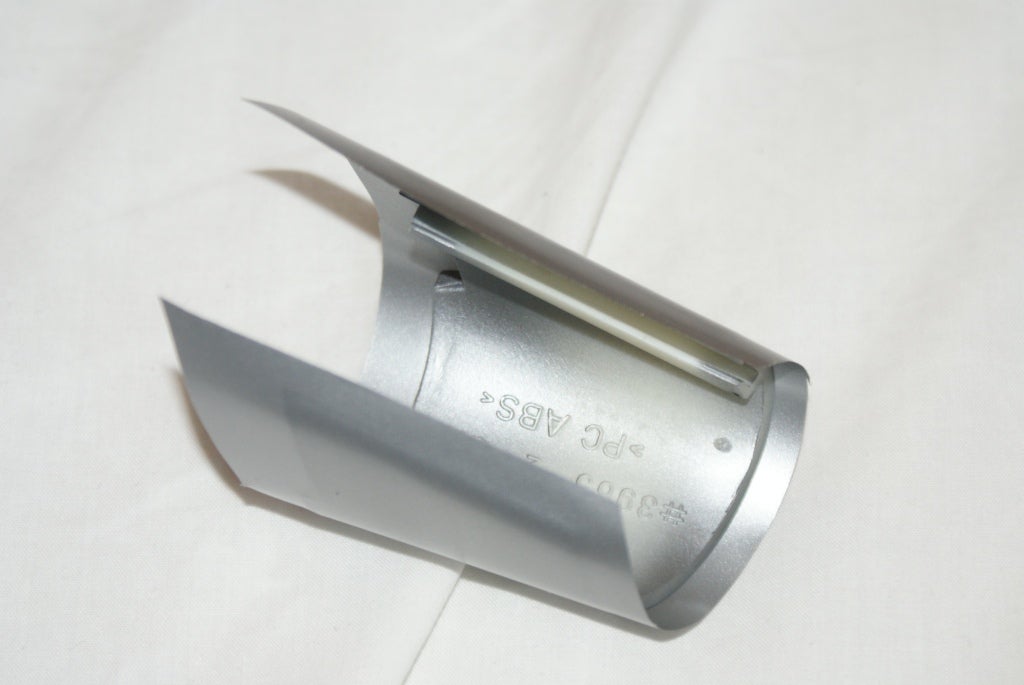
Once you’re trimmed you can start wrapping the edges. Start with the top/bottom edges as these are the ones you’ll see – they’re also the easiest! If you apply a little heat with the hair dryer at this stage you’ll note that the material becomes floppy and more workable, this will allow you to work the vinyl over the edges more easily by allowing the material to change shape if there are any imperfections in the shape of the moulding (and there will be!!). I further trimmed where necessary to prevent any vinyl getting into the clips that hold the front to the back – this is probably unnecessary but I didn’t want to find out after I’d started reinstalling them.
Once the easy edges are done we can move onto the more interesting part – the curved ends.
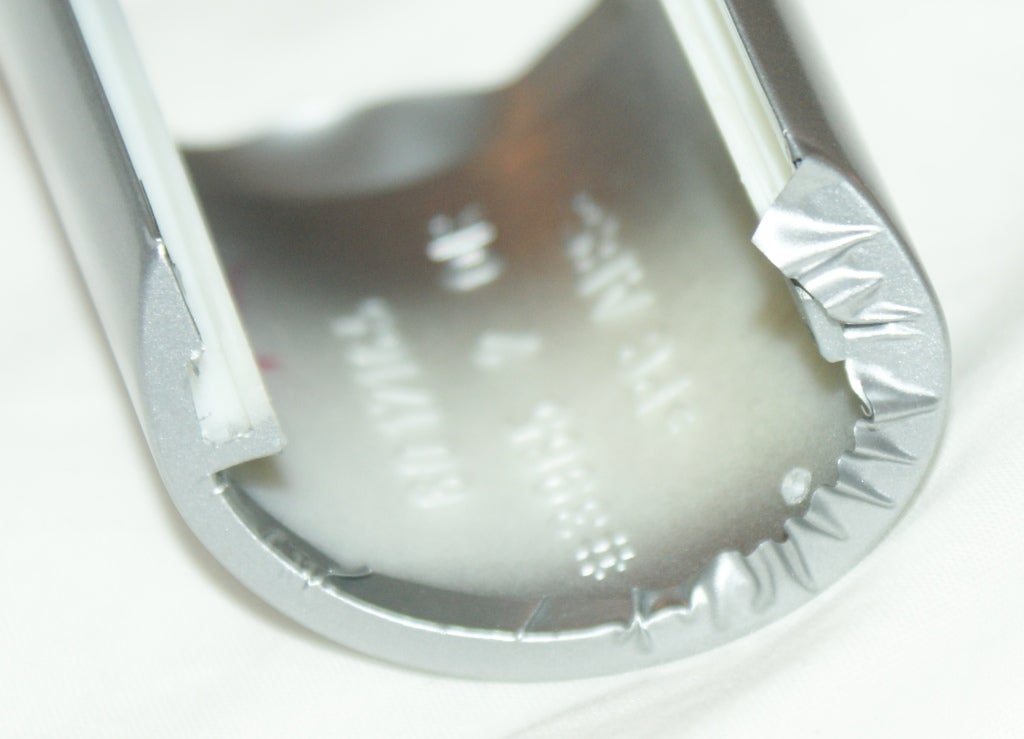
This is just a matter of patience heating and stretching. Heat the vinyl until it becomes floppy and then pull around the curve, starting in the apex and working out in either direction. Some people like to make slits into the edge of the curve to help the material follow the shape; I tried this so you don’t have to, it just makes it more difficult to get the ends flat, just persevere with the heating/massaging.
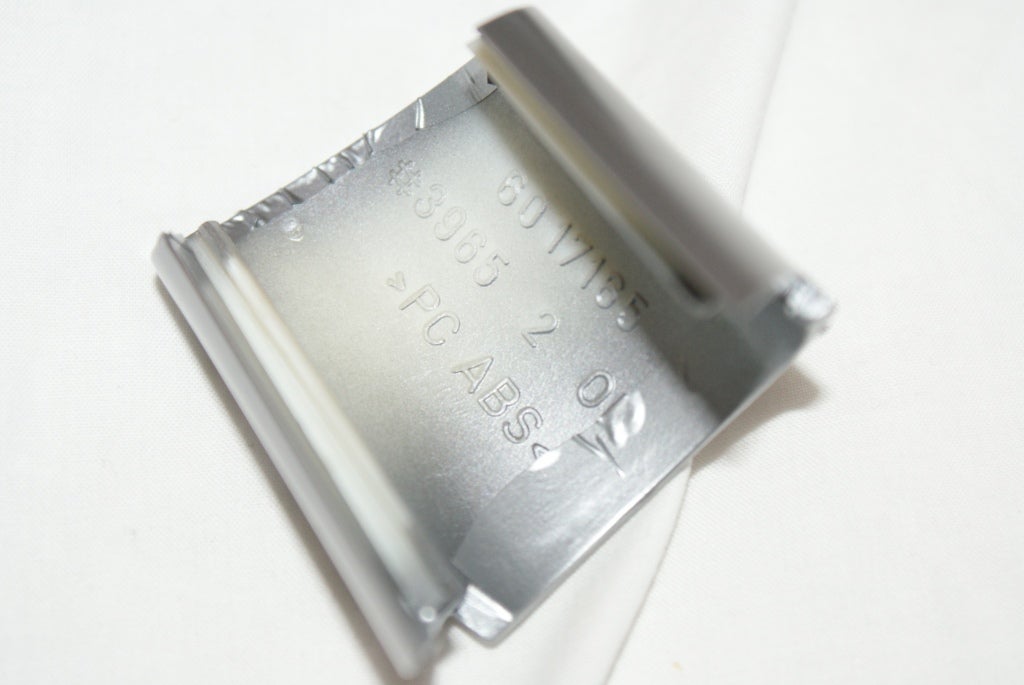
If you keep heating and pulling whilst smoothing the vinyl along the edge you’ll eventually get to the point where there are no creases. If you spend enough time doing this you should in theory at least be able to get the material completely crease free along all surfaces – don’t bother though, you can’t really see the ends let alone the inside, if the ends are flat it’ll do just fine, nobody will ever see the creases inside! If you're really fussy and do want the vinyl flat on the inside, try heating and stretching the vinyl slightly while applying to the visible surfaces, this will allow it to shrink back into the inward curve.
Once you’ve done one end, just spin the piece ‘round and do the other! You’ll notice that when doing the fronts there will be one edge on the centre step that doesn’t get coverd, don’t worry, this edge will be against the inside of the wheel and behind your airbag and completely out of sight.
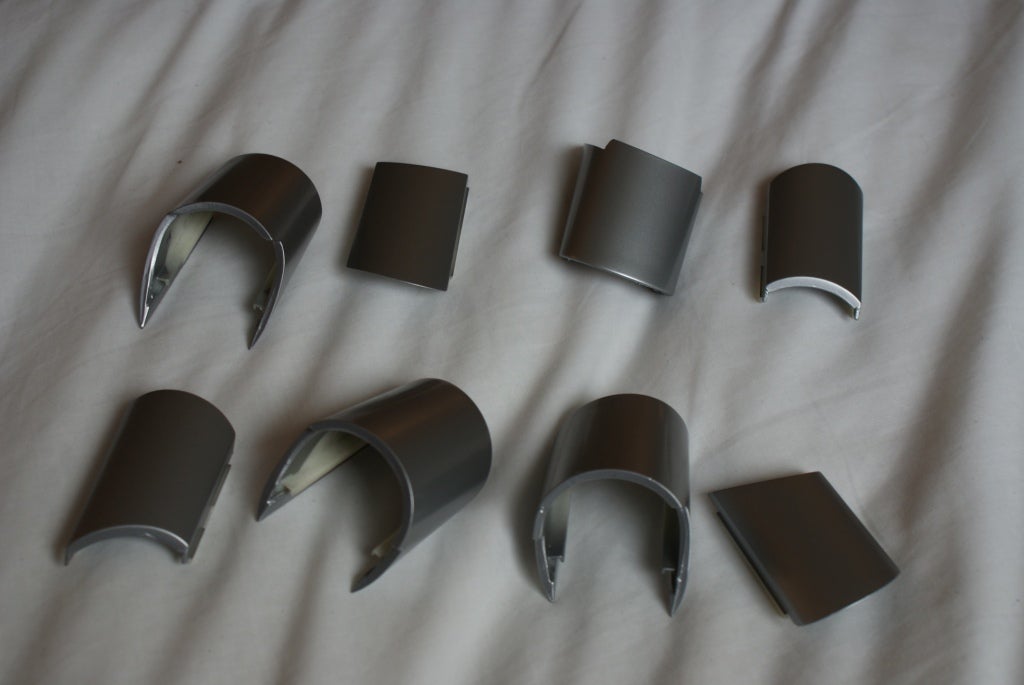
That's it, you just need to do the other 7 pieces now!
NB: Many people will tell you that the best way to apply vinyl is to wet the surface to be covered, apply the vinyl then squeeze out the liquid, thus preventing air bubbles. In this instance it’s just not necessary, the piece is so small that if you get a bubble you can just heat with a hairdryer and peel back until you work out the bubble. If you take your time though, there’s no reason why you should get any bubbles.
Step 4 – Reinstalling
Hook the stepped part of the front under the air-bag/horn switches and push the outside end back into its original position – you may need to gently open up front moulding to allow it to fit around the wheel. Once you’re happy with the position of the front just line up the back and clip it into place. You may find that you need quite a bit of force – just keep squeezing, it’ll go in eventually. If you’re certain it really wont go in, check whether you’ve been a little over-zealous with the vinyl and got it into the clip mechanism; If you have just carefully cut away the offending parts and peel them off then have another go at fitting.
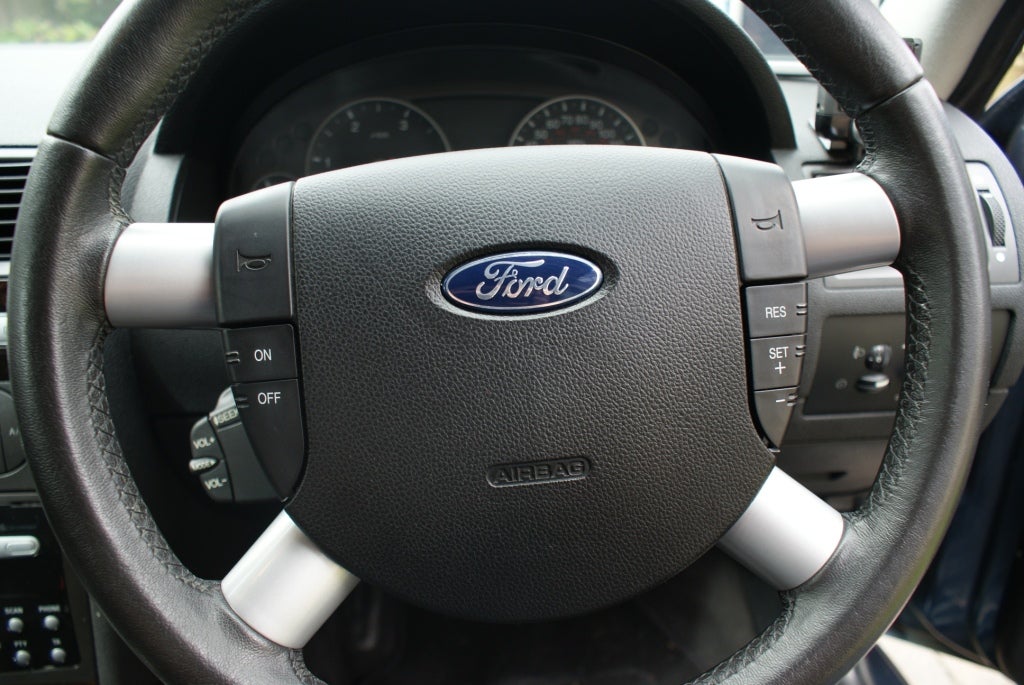
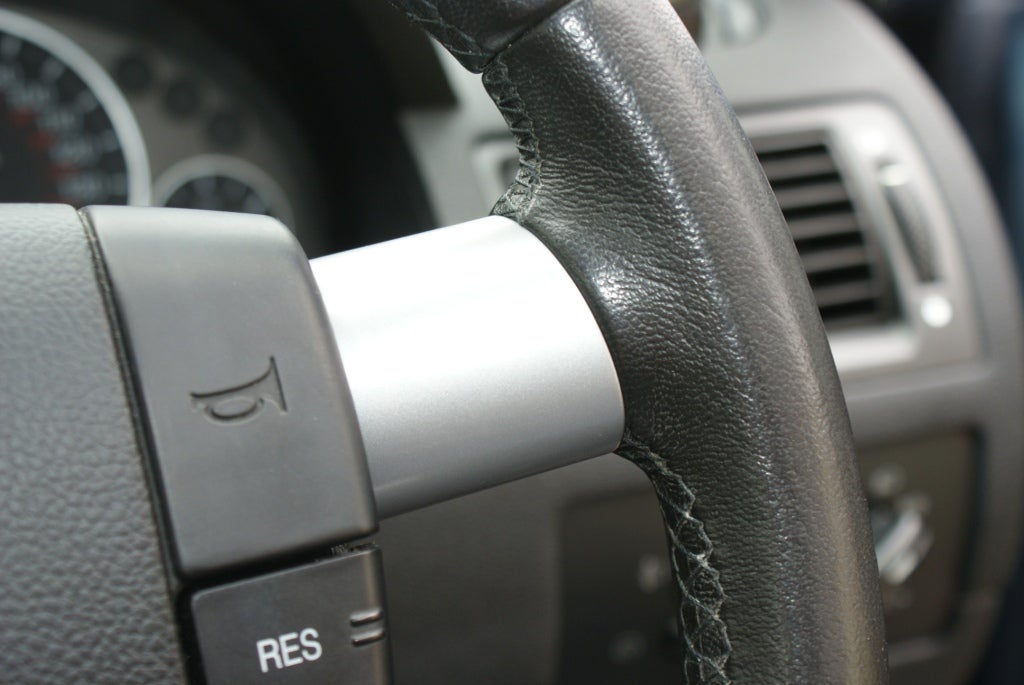
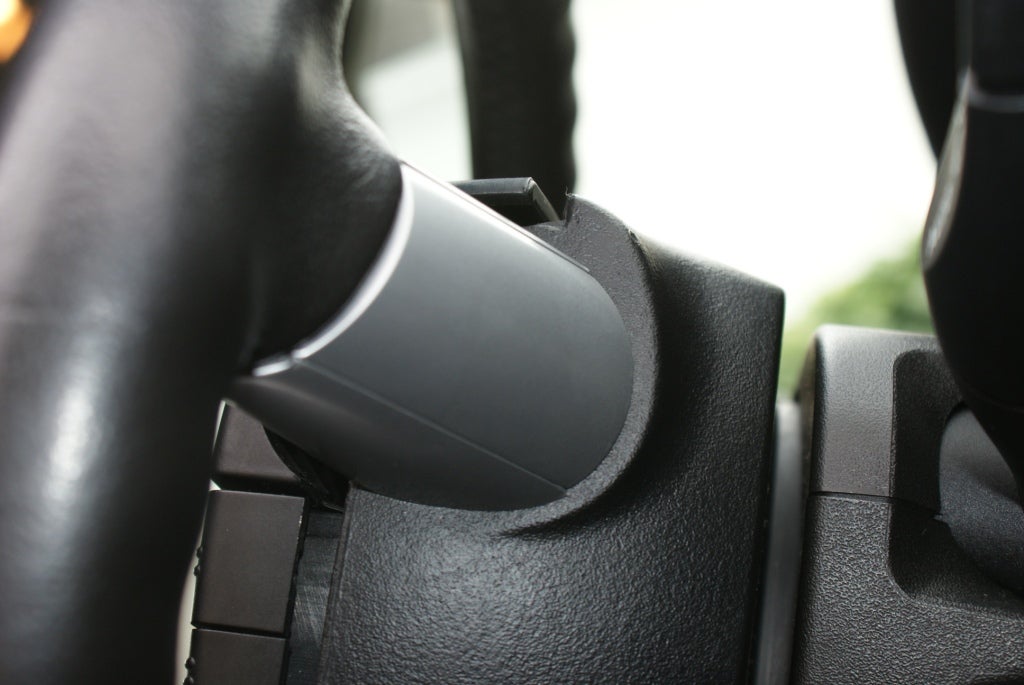
Step 5 - Admire Your Work
--44ron 23:46, 5 August 2010 (UTC)
 Your Privacy Choices