Registrations
We now manually approve all new user accounts due to a large influx of spam bots. Accounts are normally approved within 48 hours.
If you need any help with using this Wiki, please ask here: TalkFord.com Wiki Submission Forum
Difference between revisions of "Grille Mod - Mk2"
| Line 55: | Line 55: | ||
Submitted by BorgWales | Submitted by BorgWales | ||
| − | [[Category: | + | [[Category:Mondeo_Styling]] |
| − | [[Category: | + | [[Category:Mondeo_Mk2]] |
Revision as of 08:16, 8 June 2009
Mk2 Grille Mod
Note
This mod assumes that the grille has already been removed from the car!
Method
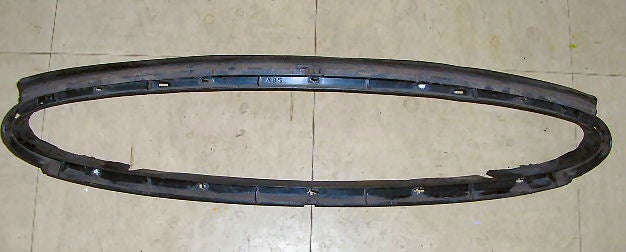
I used a Dremil to drill out the heat welded lugs that hold the chrome part to the black back part.
I then used the Dremil to remove the slats in the black part. This was a messy job. I then used a red tube grinder block to grind down the left over slats and rough saw edges. You will end up with 2 V shapes in the bottom part as this is where a slat joined on to the bottom of the surround part.
Next I made a template with cardboard using the outer chrome rim as a guide.
I then placed this on my mesh. I was using very thick Aluminum mesh. I was very hard to manipulate but was much stronger and had larger openings. I liked this mesh as it looked strong and also looked like it wouldn't block the air flow.
A little trimming, but allowing a lip. This template is slightly bigger that the opening in the black part so you should be ok. Just use your head here...
Now I started to bend the edge over. I wanted to make it fit inside the black part rather than having it fitted between the top parts. It was too thick for this method as well.
With a lot of shaping and cutting I managed to get it to the rough shape. I then started to fit it to the black part.
This was mental! I had to try and make it curved in 2 directions. There is a slight curve from top to bottom and a curve from left to right. Another pain was the flats inside the black part that the mesh was going to fix to was also on a slant.
So using cable ties and a few small holes one side was fitted roughly in place.
Using various hammers with flat edges and a few bits of wood in my workbench as shapers it was gently tapped into shape.
Here is the first In Car test
It still needed some shaping and finishing. Just take your time. I cable tied it all around the edge then when I was happy with the shape and fit I attacked the inside edge with the Hot Glue Gun. Job done. I stuck the Chrome grill back on with 'No Nails'.
Out came the Simons High Silver spray paint and plastic undercoat and squirt squirt. A few hours later here it is all ready to go on...
Submitted by BorgWales


 Your Privacy Choices