Registrations
We now manually approve all new user accounts due to a large influx of spam bots. Accounts are normally approved within 48 hours.
If you need any help with using this Wiki, please ask here: TalkFord.com Wiki Submission Forum
IMRC - How to Fix
ercdron cnamonlir
Contents
Fix the IMRC
Identification
The car has lost its power by higher rpm - from aprox. 3500 rpm. First, the car loose power in several impulses, feeling you drive through splash. Afterward the power is lost...
Problems
One of the problems with the V6 engine is the poor sitting of the IMRC (Inlet Manifold Runner Control) â under the black plastic cover(usually with Duratec V6 embossed on it) above the exhaust manifold. This means that all of the heat gets trapped under the cover and eventually cooks the PCB(Printed Circuit Board) inside the IMRC. Worst affected part seems to be the transistor on the PCB. However the PCB also suffers from âÂÂDry Jointsâ â where the heat damages the solder on the joints and the contact becomes intermittent.
Theses problems result in the Secondary Inlets not opening when they should â¦usually at Wide Open Throttle, however this does vary depending on the load etc on the engine. A fuller explanation is available elsewhere on these forums. ADDED: It depends only on rpm - you can see it also by manually opening throttle direct on the motor (rev the car) under the throttle.
The solution to these problems are:
Replace the faulty transistor with one that works better under the hot conditions Resolder any âÂÂDry Jointsâ Usually evident by discolouration around the soldered connection of the various components on the board. The are best seem using a magnifying glass Re-site the IMRC (or alternatively just the PCB) in another location where it is not as hot.
This fix outlines the steps to address problem 1.
Equipment needed
Replacement Transistor (Cougar site recommends a Motorola TIP 121)- Google is your friend here!. I would suggest you seek some more advice when selecting the correct Transistor and your local supplier could help with a suitable alternative. The main thing is to ensure that it is NPN (not PNP) and that it works in a high operating temperature range (although this is probably not as important if yoy are resiting the IMRC/PCB) SMALL Soldering iron, solder, solder sucker/braid You will also need an 8mm socket and a Philips screw driver to remove the cover and open the IMRC.
ADDED: I recommend to use "stronger" transistor. For example, I have used TIP132 (works fine). The original one there was 2N6045 (see http://www.datasheetcatalog.com/datasheets_pdf/2/N/6/0/2N6045.shtml).
Procedure
Unplug the harness from the IMRC and remove the top cover.
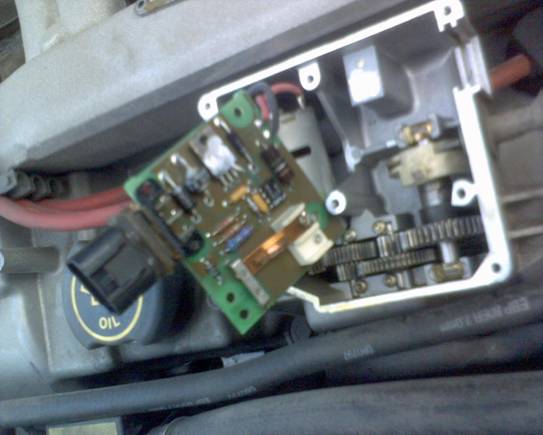
The right picture below shows the white grub screw on my PCB (also brown shellac)
Remove the 5 Philips headed screws that hold the PCB inside the IMRC housing. There may be a small white plastic grub screw in the hole indicted by the âÂÂ2â in a triangle stamped on the board. I think this is to hold the transistor tight against the IMRC housing for heat dissipation ( obviously does not work very well!!) NOTE: You can replace the plastic screw with metallic one. I have used a screw designed for my harddisk with flat head.
The PCB may now come free with a gentle pull on the plug. However more likely the PCB and plug has been sprayed with Shellac ( a sort of brown âÂÂglueâÂÂ) that holds the plug in the housing and makes it a PITA to remove. I removed mine by unbolting the IMRC housing, turning it over (it turns easily on the cable) and then placing a small wooden block against the plastic plug and tapping it GENTLY(and I do mean GENTLY as this plug will be heat damaged and brittle). It should then look like this.
The Transistor is the oblong thing with 3 legs on the upper edge of the PCB that looks like it has chewing gum stuck on it. This is Thermal Paste intended to make the transfer of heat to the alloy IMRC case. Actually works well in reverse!! You can see where it contact the square âÂÂpostâ inside the IMRC
Desolder the old transistor and install the new one making sure that is correctly orientedâ¦.line the hole up with the one in the PCB. This picture is from the Cougar website as I did not have a photo of this bit
Back of PCB showing new transistor in place â the yellow cable is not there for anything other than to help align things.
Turn PCB over and cut off any transistor pins that stick out too far. Now is the time to have a look for any other soldered joints that might be âÂÂDryâ and give them a quick zap with the soldering iron to restore the connection.
Job Done! You can now move on to either reinstalling the PCB in the IMRC box or move on to resiting it elsewhere. Somebody else can run you thru this.
If you want to see if it is working then just run the car with the cover off the IMRC. HOLD THE IMRC MOTOR DOWN WITH YOU THUMB/FINGER- KEEP IT AWAY FROM THE GEARS!!!!!!! And then rev the car. As revs get towards 3,700RPM you should see the secondary inlet lever operate (down under the Throttle Body).
You can also check to make sure the mechanical cable works by just bridging to the round IMRC motor from the battery. As the power goes on it will cause the motor to turn , rotate the gears and pull the secondary throttle cable open. Watch this to as the motor can jump out of its home even with you holding it down.
Suggestion
While you are ferreting around under the bonnet IâÂÂd suggest that you have a very close look at the Fuel Injection Wiring Harness as this may well be causing most of your driving problems. The under bonnet harnesses on the Mk2 Mondeo are a DISGRACE!!! The USA version of this car was subject to a MAJOR recall to have underbonnet wiring replaced Free of Charge and the warranty extended to 10 years. THIS DID NOT HAPPEN ON THE UK/EUROPEAN MONDEO.
It may also explain some of the poor shifting problems on the auto equipped cars as the main harness that services the Auto Transmission is also suspect â not quite as bad but still obvious signs of heat damage
Oh and donâÂÂt bother looking for new replacement harnesses â they are OBSOLETE!!!!!
Here are some pictures from under the bonnet of my car â they may also help anyone doing an Upper Inlet Manifold (UIM) Lower Inlet Manifold (LIM) clean. There is already an outline of how to do this on the site but I think it needs pictures added â feel free to use any of these whoever âÂÂownsâ the writeup.
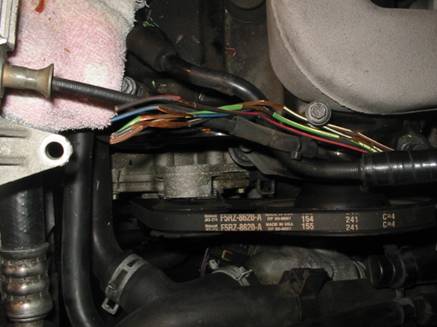
Wires to the IMRC with plug cut off
Throttle Position Sensor Plug â see damaged wires â far worse once outer wrapping removed
Wires to IMRC once they were âÂÂundressedâÂÂ
LIM (UIM removed) showing Fuel Injector Harness (which also carries TPS/IMRC connections in the same loom)
More views of faulty wiring â look at the state of the heat damaged wires under the handle of the Stanley Knife!!
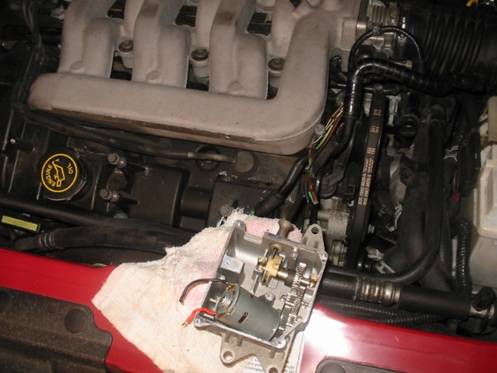
Heres one of the IMRC, cover off PCB removed and the wires with the plug removed. Its easy to turn the IMRC housing over (it rotates on the cable) and then tap out the plug if necessary
Close-ups of the IMRC wires
Another Close Up of IMRC Wires
Submitted by GerryAttrick


 Your Privacy Choices