Registrations
We now manually approve all new user accounts due to a large influx of spam bots. Accounts are normally approved within 48 hours.
If you need any help with using this Wiki, please ask here: TalkFord.com Wiki Submission Forum
Centre Dashboard Console Removal - Pre-facelift
For more information, visit the Ford Mondeo forum on TalkFord.com, the definitive resource site covering
all Fords from the present day to the 1970's.|
Overview Guide | |
| Ford Model: | Mondeo |
|---|---|
| Petrol/Diesel: | ???? |
| Estimated Cost: | ???? |
| Difficulty? | ???? |
| How long does this take? | ???? |
Approx Fitting Time
20 minutes or so to dismantle, about the same to refit ( unless you have a load of wires behind the radio like me & they come loose when refitting the radio, then refitting can
take longer :( )
Tools Required
Philips / Cross head screwdriver Small flat screwdriver Radio Removal Pins Radio Code ( should you still have a ford headunit )
Removal Instructions
Remove the gearknob
Remove the gear surround & gaitor.
Remove the Radio Headunit
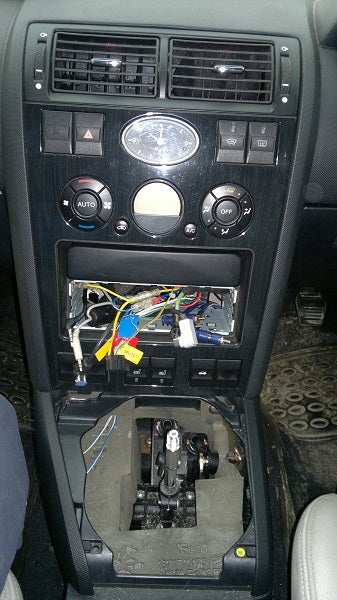
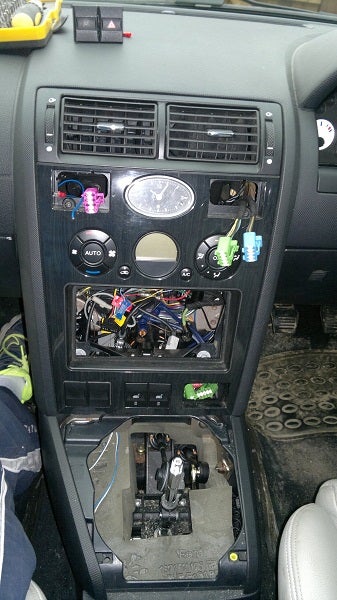
Remove the Screen Heater Buttons, Hazard warning button & boot release button ( heated seats buttons too if fitted but as per the piccies, if they are well wedged in there then
its doable with them still inplace but just remember they are still connected )
Push any loose cabling plugs into the dash & also undo the 6 screws olding the console inplace ( 2x located in the upper button openings, 2x located at the upper edge of the
radio opening & the final 2 are located under the console fascia that used to be covered with the gear gaitor & are approx inline with the boot release button & cupholer
positions )
Once those screws are removed give the console a pull using the upper button holes as grabbing points to release the pair of pushclips near the airvents that are the only things
left holding the console inplace ( it wont come out all the way as wiring & cupholder will still be hindering things )
Now pull the dash out far enough to let you reach behind & unplug the Clock & Heater Controls ( 2 heater connectors for digital & 3 for manual controls )
Now you can suitably angle & move the console enough to fully remove it as there is only the cup holder to come out now ( & the heated seat wiring if you were unable to unplug
them previously )
Refitting Instructions
Refitting is basically a reversal of the removal instructions, just make sure all the wiring is pushed through the openings they are meant for before putting the dash fully back
inplace as its easier than fishing round for the cables after or removing the dash once more to find em lol.
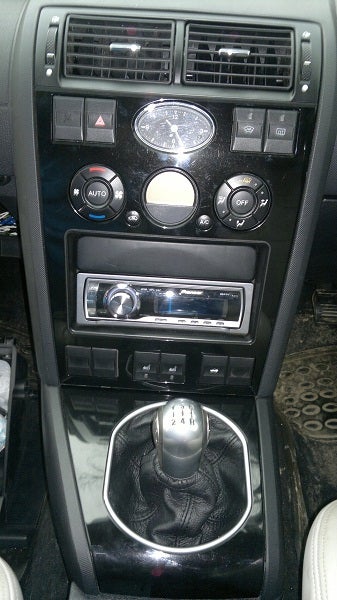
The end result should be pretty much as you started off with. ( here's mine & the only difference is that its a darker dash panel now - changed from Dark ash wood effect to
metal gloss black )


 Your Privacy Choices