Registrations
We now manually approve all new user accounts due to a large influx of spam bots. Accounts are normally approved within 48 hours.
If you need any help with using this Wiki, please ask here: TalkFord.com Wiki Submission Forum
Estate Rear Power Socket Addition
For more information, visit the Ford Mondeo forum on TalkFord.com, the definitive resource site covering all Fords from the present day to the 1970's.
|
Overview Guide | |
| Ford Model: | Mondeo |
|---|---|
| Petrol/Diesel: | ???? |
| Estimated Cost: | ???? |
| Difficulty? | ???? |
| How long does this take? | ???? |
Task In Theory
In theory it should be a plug & play fitting for most folks as ford wired most cars, BUT there may be some cars out there without the required wiring in the boot area but ford do sell the loom by all accounts but costs are high so a scrappers run may be a better bet if you dont have the wiring.
Tools Required
Phillips / Cross Head Screwdriver
Part Required
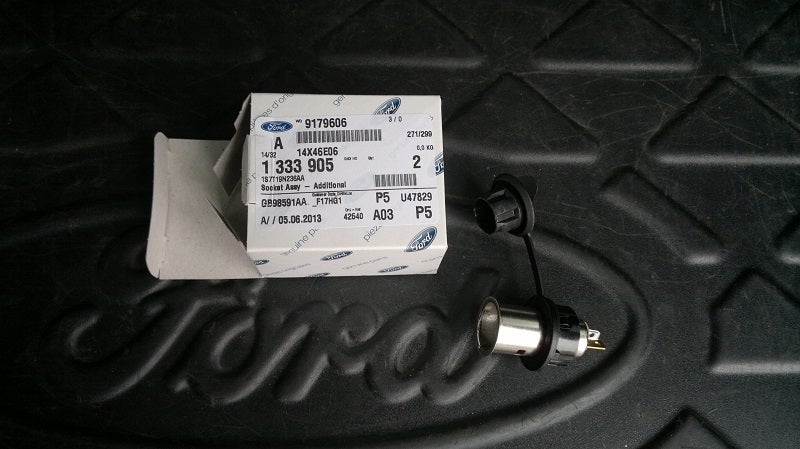
Rear Power Socket & fitting ring ( with cap ) - Ford Part Number F1333905 - Cost Around £7 ish in 2013 anyway ( 2005 it was £3.08 )
Fitting Instructions
Remove the Load Cover Fitting From The Boot
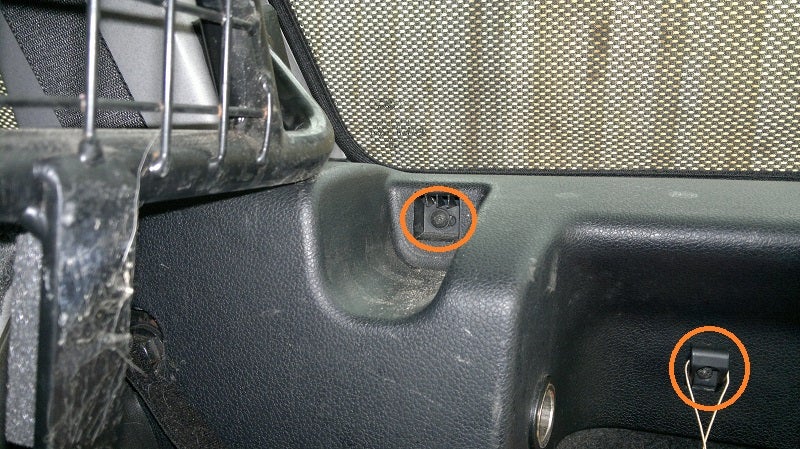
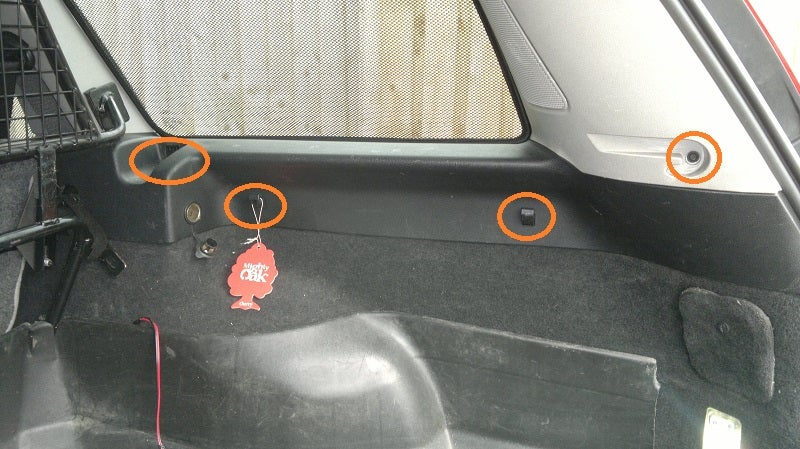
Undo the 4x cross headed screws circled below
( better view of the rearward 2 screws )
Remove the upper D-pillar trim panel
Fold the seat back forwards
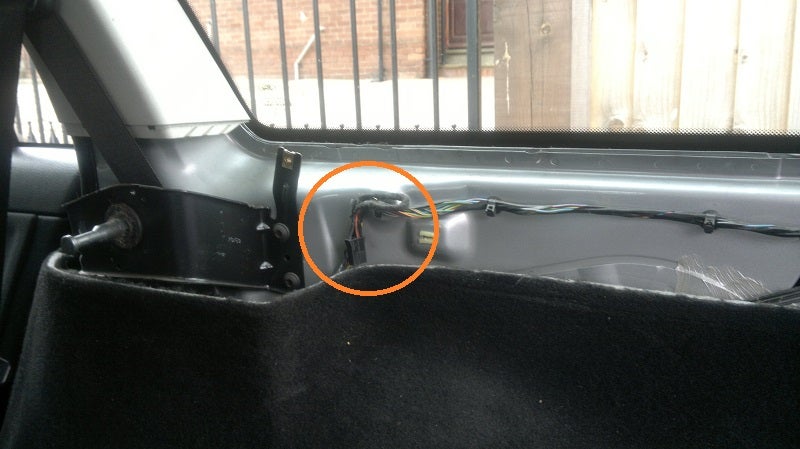
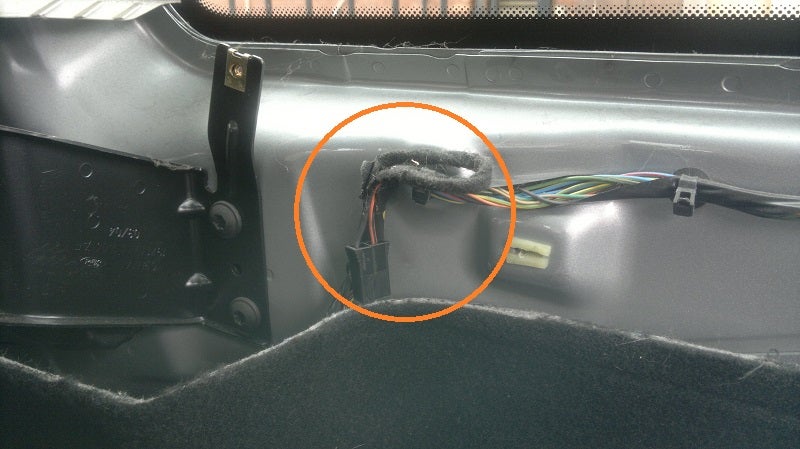
Remove the soot side trim panel to reveal the wiring loom below, tucked up to the wiring loom somewhere ( may be hidden slightly behind the carpetting etc ) should be the wiring plug as shown in the piccie below )
Remove the rubber blanking cap from the hole already in the side trim panel
Push in the fitting ring/cap section of the power socket into the hole in the trim panel ( there should be a key/notch in order to help properly locate/align the fitting so the caps writing is level when fitted etc )
Once thats done you can then push in the main socket body into the fitting ring ( once again there is a key/notch in the fitting to make sure your fitting it correctly so that it clips together as it should )
Only thing left to do is plug in the wiring to the rear of the socket during the rebuild.
Rebuilding
Refitting is pretty much a reversal of the initial removal instructions barring the steps below just to make things a little easier.
Pull off the rubber door seals from both the rear passenger door where the trim panel is now missing & also from the edge of the tailgate openeing where the panels are missing.
Now refit the panels ( remembering to plug in the electrical connector to the new socket )
Once done you can now push the rubber door seals back into place ( its easier to remove partially & then refit than it is to wrestle with the panels while trying to feed the panel edges under the seals when its still inplace etc )
Thats pretty much it - just dont forget the boot power socket is a ALWAYS live connection so remember to unplug stuff you plug in there if you dont want to drain the battery :)

 Your Privacy Choices