Registrations
We now manually approve all new user accounts due to a large influx of spam bots. Accounts are normally approved within 48 hours.
If you need any help with using this Wiki, please ask here: TalkFord.com Wiki Submission Forum
Glovebox Torch Fitting
For more information, visit the Ford Mondeo forum on TalkFord.com, the definitive resource site covering all Fords from the present day to the 1970's.
|
Overview Guide | |
| Ford Model: | Mondeo |
|---|---|
| Petrol/Diesel: | ??? |
| Estimated Cost: | ??? |
| Difficulty? | ??? |
| How long does this take? | ??? |
Glovebox Torch Fitting
Background
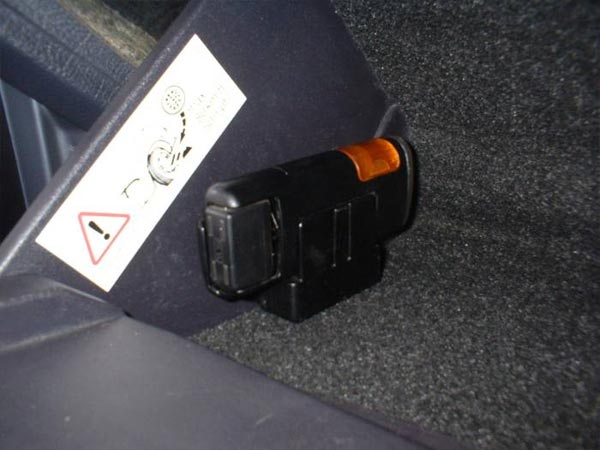
Mk1 ghia Mondeos were the only models fitted with a glovebox torch, this ‘how to’ explains the fitting of one to any MK1 or MK2 mondeo.
You will need
- One Mondeo glovebox torch and holder from a breakers or internet auction site. If as is usual the batteries are dead then you can get replacements via the internet or try your local electronics store (Maplins do not sell them). The batteries are P-15N 1.2V rechargeable 150mAh NiCd?’s, more commonly known as type N cells and the modern equivalents are usually 220mAh. It's not easy to find these RECHARGEABLE NiCd batteries - you may have better results searching for LR1, MN9100, E90, AM5, 910A which are the other names given to it.
- Two 30cm lengths of wire
- 1 earth tag crimp
- Soldering iron, solder and insulating tape unless you prefer to crimp your joints in which case you’ll need 1 yellow and 2 red butt crimps and a crimping tool.
Method
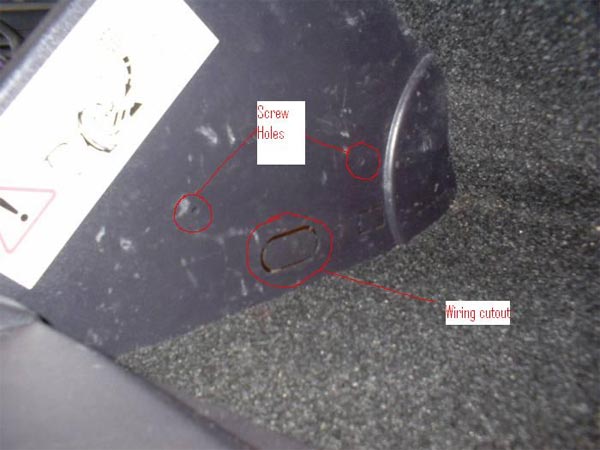
Good news is all Mk1 and Mk2 Mondeos I’ve seen have the screw holes and wiring plug cut out already in the glovebox as below
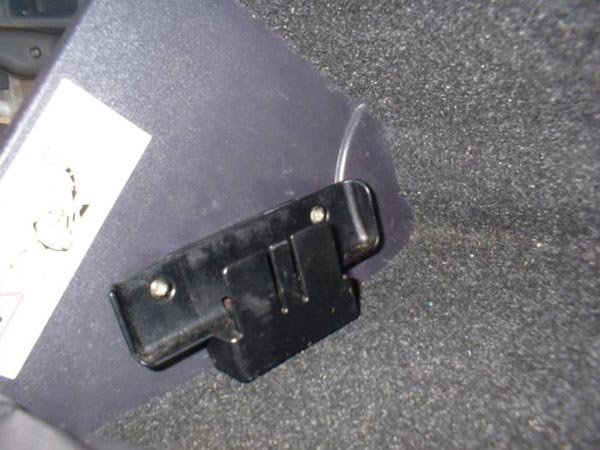
Push the piece of plastic for the wiring plug out and use 2 short self tapping screws to fix the torch mounting cradle.
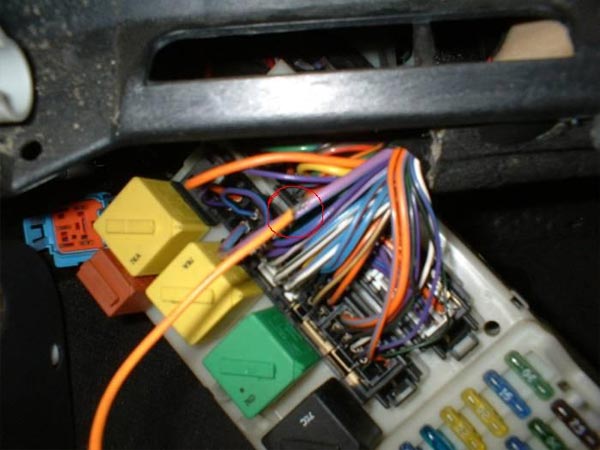
For the wiring you need a 12v supply that’s live when the ignition is switched on and also an earth. For the live drop the fuse box down which is right where you are working and take the ignition live from here. I took the supply from the thick violet electric window power supply wire as below.
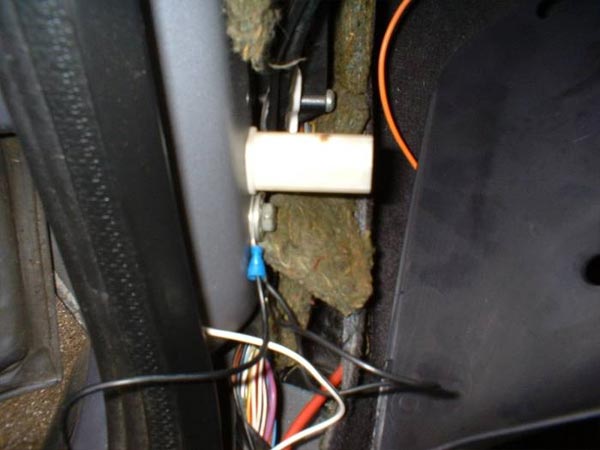
For the earth remove the plastic footwell kick trim by unscrewing the plastic screw and you will see an earth point, remove the bolt with a 10mm spanner, crimp your earth tag to one piece of your wire and refit the bolt with your earth tag on it.
Now connect your wiring up, the 12v ignition live goes to the violet wire on the torch holder and the 2 black wires go to your earth wire.
Refit the glovebox, if your torch holder came with a long enough bit of wiring to include the wiring mounting clip this is where it plugs into.
Tidy the wiring, refit the fusebox and kicktrim, put the torch in the holder and that’s it job done!


 Your Privacy Choices