Registrations
We now manually approve all new user accounts due to a large influx of spam bots. Accounts are normally approved within 48 hours.
If you need any help with using this Wiki, please ask here: TalkFord.com Wiki Submission Forum
Galaxy head unit removal (centre trim and sony stereo removal)
Instructions for removal of Sony DAB CD Head Unit (Stereo) from 2010 + Galaxy Mk3 (Titanium+)
|
' | |
| Author: | Tony Woodhouse |
|---|---|
| Ford Model: | Galaxy Mk3 |
| Estimated Cost: | Free |
| Difficulty? | Easy |
| How long does this take? | 30 minutes |
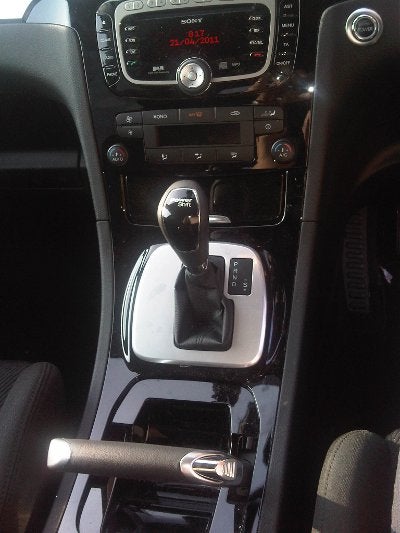
The entire centre trim above and below the headunit needs to be removed. It is an easy process, the majority of it just clips off, and can easily be clipped back on again afterwards.
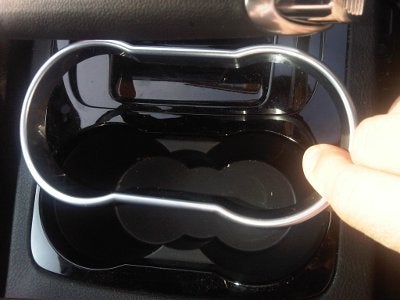
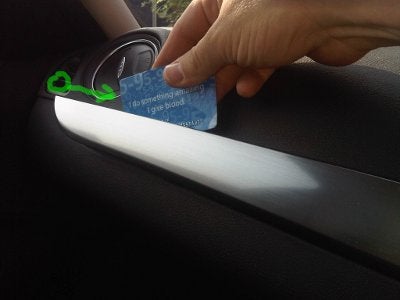
First remve the silver cup holder trim, this makes it easier to start prising the centre trim up
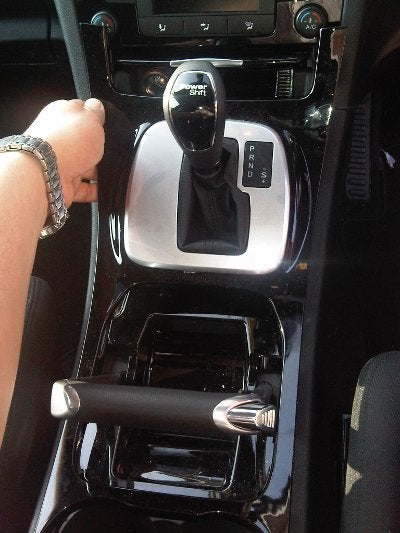
Next start prising the centre trim, starting from the cup holders and gradually working forwards along both sides until you reach the ash tray. You will need to move the auto lever to Neutral position to help get the trim clear of the ash tray once it is fully unclipped.
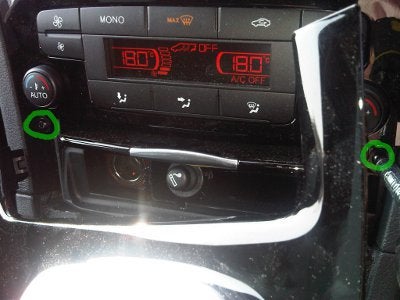
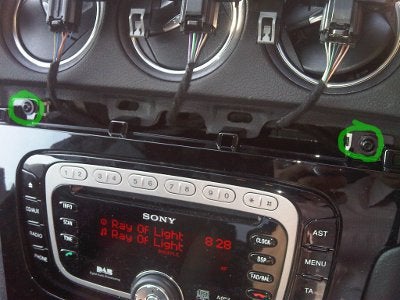
This now reveals two torx screws, either side of the ash tray which need to be removed.
Next prise up the left hand end of the spear of brushed aluminium that go across the top of the glove box with a trim removal tool (or an old NHS donor card in my case!) Start at the very end and then gradually work to the right until the entire thing has been removed, including the three buttons that are in it.
This now reveals two more torx screws which need to be removed. The trim which surronds the head unit can now be lifted away completely.
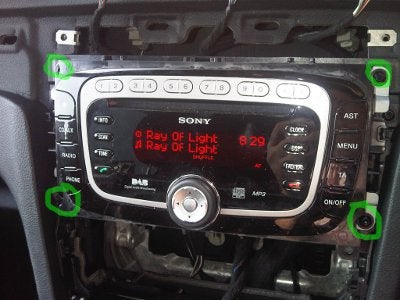
This has now revealed four more torx screws which actually hold the head unit in place. Remove these.
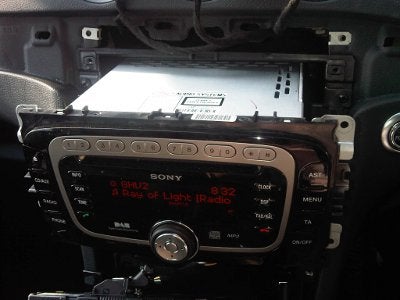
The head unit will now slide out.
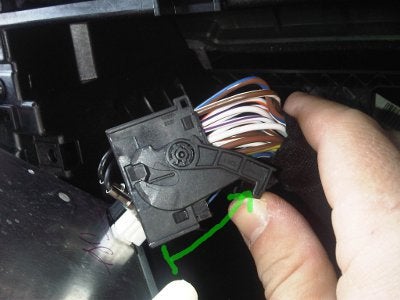
There are three cables to remove, two antenna connections to the bottom left of the unit and a quadlock connector to the bottom right.
To remove the antenna connections squeeze the top and bottom of the white and black plastic connectors and the plastic and metal part of the connector both pull easily away.
Finally remove the Quadlock connector by hinging the "lock" bar at the bottom of the connector backwards and upwards. The connector will then pull away from the unit.
The quadlock connector has power, all the cables which go to the speakers, and all the input and control wires from the aux inputs, mic, steering wheel controls etc.
Refitting is simply the reverse of these instructions.
 Your Privacy Choices