Registrations
We now manually approve all new user accounts due to a large influx of spam bots. Accounts are normally approved within 48 hours.
If you need any help with using this Wiki, please ask here: TalkFord.com Wiki Submission Forum
Hatch Rear Seating Into Estate
For more information, visit the Ford Mondeo forum on TalkFord.com, the definitive resource site covering all Fords from the present day to the 1970's.
|
Overview Guide | |
| Ford Model: | Mondeo |
|---|---|
| Petrol/Diesel: | ???? |
| Estimated Cost: | ???? |
| Difficulty? | ???? |
| How long does this take? | ???? |
Contents
Approx Fitting Time
Fabrication time - Unknown ( i did not make up the brackets so cannot be more helpful than that )
Fitting time - 5 - 10 mins per side
Parts Required
1x Pair of hatchback seat securing brackets.
Metal to make bracket out of
Optional - 1x pair of estate seat securing pins ( makes reverting to estate seating a doddle if you work on all new bits )
The Fitting To Make
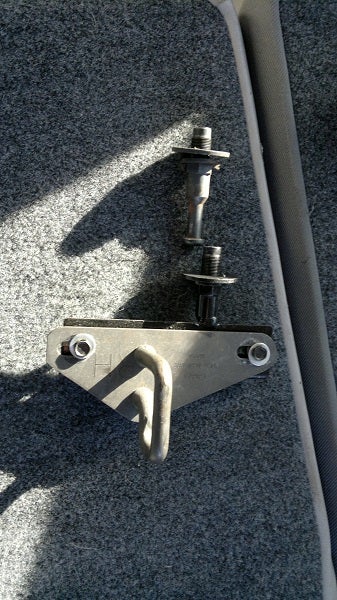
Here's a piccy showing the Estate Fitting Pin & the fabricated bracket
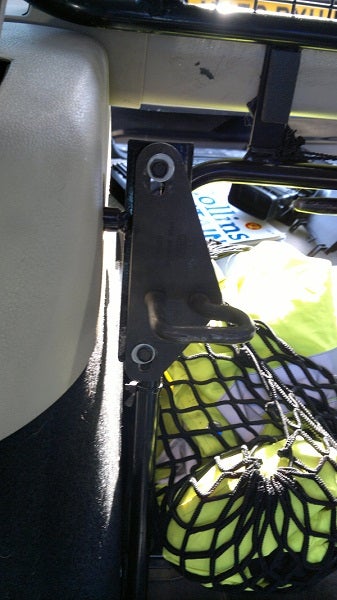
Its basically a bracket made up by welding on some metal bar to the standard estate fitting pin & then the passenger side hatch bracket fitted to the drivers side new bracket ( Doing this makes the bracket smaller as it does not need to be set so far down as the mounting point for the seat is offset slightly on the hatch brackets )
Removal Of Estate Pins
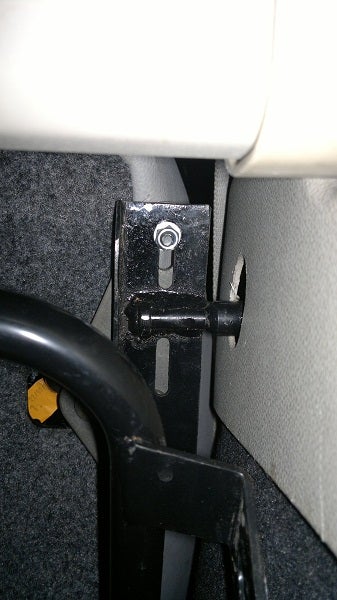
To remove the old estate pins is simply a task of unscrewing them & then when undone angling them slightly so the washer can make it through the hole in the plastic trim panel ( the offical route no doubt involes fully removing said plastic panel but its not required ) & give the pin a good pull if its not easily making its way through the hole.
Its much easier than it sounds
Fitting The New Bracket
Fitting the new bracket is basically a reversal of the above removal instructions.
Angle the fitting pin slightly & push it through the opening in the plastic trim panel.
Screw in the new bracket & line it up at a suitable angle for fitting into the rear seatback.
If you find the bracket is not fully lining up with the hole in the seat then there is a small amount of up & down movement in the estate fixing point so undo the bracket a few turns & push it down & tighten it up once more ( also if made right there should be some adjustment in the bracket itself too )
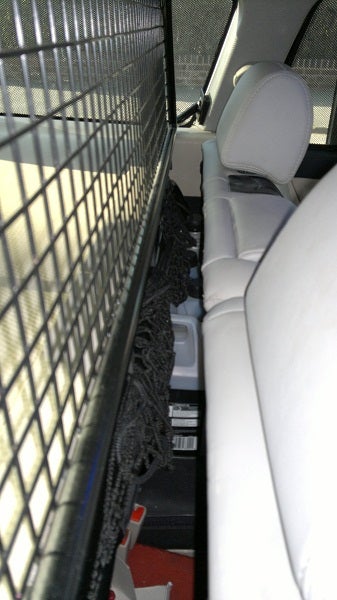
If you have a metal dog guard fitted then you will have to let that lean back till it rests on the plastic trim panels in order to fit the new brackets as it gets in the way otherwise
Problems Remaining After Fitting
As these seats are not meant for the estate then there is some problems that need working on or something making up to hide these effects ( a slight modification to the bracket design shown in this guide may go a long way to reducing these effects but they are not that bad a problem )
Gap between seat back & load cover ( could easily be hidden with a suitable amount of material such as foam etc stuck the the rear of the load cover or dog guard )
Small gap at each side of the rear bench seating ( normally covered up by side bolsters on the hatch models )


 Your Privacy Choices