Registrations
We now manually approve all new user accounts due to a large influx of spam bots. Accounts are normally approved within 48 hours.
If you need any help with using this Wiki, please ask here: TalkFord.com Wiki Submission Forum
Rear Interior Light
Mk3 Rear Interior Light
Parts Required
Light unit (Finis Code 4363929 - with map lights),
Surround (Finis Code 1256557)
Tools
Scissors, Penknife, Stanley knife, Elctrical tape, Roll up measuring tape, Different coloured electrical wire
Method
Check that the light will fit into the surround - there were 2 bits of plastic that were stopping mine from fitting to the light completely snugly. I cut the offending bits of plastic off and it fitted. Take the light out of the surround.
Mark out where you want to place your rear light. When positioning the light I figured that I would need it close to the front to be able to reach to see who was hitting who back there. You may have less dilettante passengers. There seems to be one ceiling beam around the middle of the car. Don't put your light here as there won't be enough room for it.
Cut out the shape of the surround with the scissors, penknife, stanley knife etc. The hole I cut was too small and seemed a little ragged: I gradually made it bigger until it was a perfect fit. The surround was not clipping to the headlining as it was too thick so I halved the thickness of the headlining around the clips and the housing went on very nicely covering any raggedness in my cutting.
The front sunglasses holder is held in by velcro and a few clips. Take out the front light and have a good look inside to see what's what. Pop the velcro off (much stronger than the normal velcro) it takes a bit of pulling and dragging to get it out. Again, have a good look around inside when you are doing this to see where the clips are. I seemed to even bend the grey plastic and was worried this would affect the pop down glasses holder.
Tape the 3 wires to a rollup measuring tape to feed them from the front to the back. Again I made the wires way too long and cut them towards the end of the job. You may have to use the freshly cut hole to bend the headlining down to get the tape measure past the supporting beam.
I didn't know the correct way to split the wires. My splicing of wires consisted of stripping away the rubber on one side of the 3 pre-existing wires. (Before doing this I disconnected the battery - take heed if your radio needs a code if the battery is disconnected.) I wound the ends of them through and around the now exposed pre-existing ones. Then I taped up the connections.
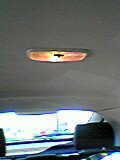
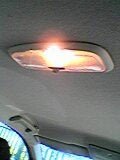
I cut the wires I had fed through the lining and through the fittd surround to a suitable length and then I wrapped the 3 wires around the contacts of the new light and fixed them also with the insulating tape. Snap the light into place. Mine looks perfect from the front seats but the view from the back shows a slight gap between the light and the housing:
The front goes back together very easily. The black part with the velcro on it seperates from the grey via 4 clips. I popped the black part back onto the velcro and the grey was went on very smoothly.
The front light snapped in easily.
Now the back lights operates independently the same as the front: either off, on or open with the doors.
I didn't know whether my method of splicing was going to cause my car to go on fire? (I was trying to remember secondary school physics and hoping that a big glob of twisted copper does not act as a heater!!) But I fitted the light 7 months ago and there is no sign of singe-ing as yet. (Perhaps someone can suggest proper scotch locks or something...)
Submitted by Kieran_Mc_Carthy


 Your Privacy Choices