Registrations
We now manually approve all new user accounts due to a large influx of spam bots. Accounts are normally approved within 48 hours.
If you need any help with using this Wiki, please ask here: TalkFord.com Wiki Submission Forum
Alternator Rebuild - Visteon IS7T
I recently had to rebuild my alternator. I got another one from a scrap yard but it sounded terrible when span so I’ve rebuilt it and documented the steps below. My alternator is a Ford / Visteon IS7T-BC, the date stamp is '06 which means it's been replaced before (The car's an 02).
A few things: I'm not a professional, just cock about in my garage. I've found no information anywhere about rebuilding these alternators so I thought I’d record it here. It works fine in the car but obviously use your head, if you don't think you can do it use your local auto electricians to rebuild it.
With regards to removing it from the car, this is what I did. There's probably a better way.
- Take -ve battery cable off
- Jack car up
- Remove o/s wheel, remove cover in wheel arch (4x 10mm bolts)
- Take off engine cover
- Remove overflow tank
- Loosen fuel hose retaining clamp (don’t remove)
- Take off engine mount weight
- Jack up engine (use a bit of wood under the sump). Just enough to take the pressure off the mount. Don't get mental.
- Remove engine mount (3x15mm & 2x 19mm).
- Press on belt under idler pulley and push it out the way - you should be able to overcome the pressure of the tensioner quite easily - be careful not to "crimp"/bend the belt.
- Undo the 3 bolts which hold the alternator to the engine/tensioner mount.
- Pull the alternator away from the body a bit, undo the main power feed to the (10mm bolt).
- Pull off the other wiring plug, you need to squeeze quite hard as far down the plug as you can on the side with the air feed bit thingy.
- Take the air feed cover off the back of the alternator (4x 8mm nuts).
- Down the bottom of the car, take the stud out the bottom of the engine which was just holding the alternator on, it's a female torx. Sorry I can't remember the size. Comes out nice and easy anyway. You might get away with a spanner on the end. You only need to take out the outside one.
- Buzzy gun the steering knuckle off the hub and beat the hub with a hammer, the knuckle should release itself quite easily. Push that towards the back of the car.
- Pull the alternator out the hole you've just made.
When you've done all that you'll have it in your hands and spin it. If your alternator sounds like a bag of spanners falling down the stairs you'll need some new bearings. The bearings which are in it don't have standard bearing ID's on them but they're pretty standard sizes. You'll need:
(I've put what's written on the bearings here in case anyone searches for it and wants to know the specs:)
NSK B18-102DG48 A02 ao2
FRONT BEARING:
ID: 17mm
OD: 47mm
WD: 14mm
NSK 6202DG7 689
REAR BEARING:
ID: 15mm
OD: 35mm
WD: 11mm
They should be double sealed and require no additional lubrication. They don't need to be taper bearings. High speed is required. They cost me about 20 quid with a hefty discount 'cos I know a bloke who knows a bloke sort of thing.
With that said, let's get to the task in hand.
Stripping it apart.
I should mention that I took the pulley off the front before I thought of taking pictures, it's a 24mm nut I think. You'll need an impact most likely. Buzz off the nut and the pulley will come off no problems.
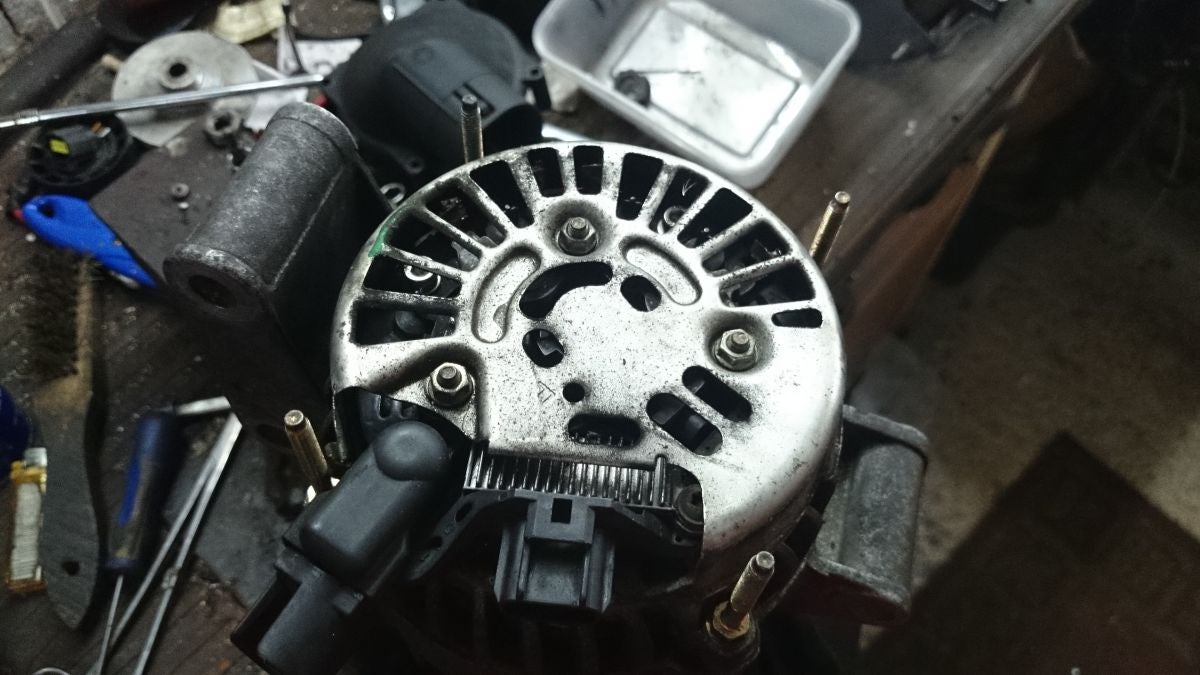
Under the black cover you'll have a metal cage which you need to remove with 3x 8mm nuts. Remove them.
Take the cover off the main terminal.
Remove the two exposed torx bits holding the regulator pack on and the one under the cover you just took off. (T20 iirc).
Take off the "big" nut under the cover you just took off (13mm I think, maybe 14, can't remember).
You can just lift off the main terminal now, put it in your box of bits :).
Next, take off the two 5.5mm nuts which hold the brush's output onto the diode pack/regulator. They're tiny and you won't have spares so put it somewhere safe (I use an old Chinese container).
The regulator will now just lift out.
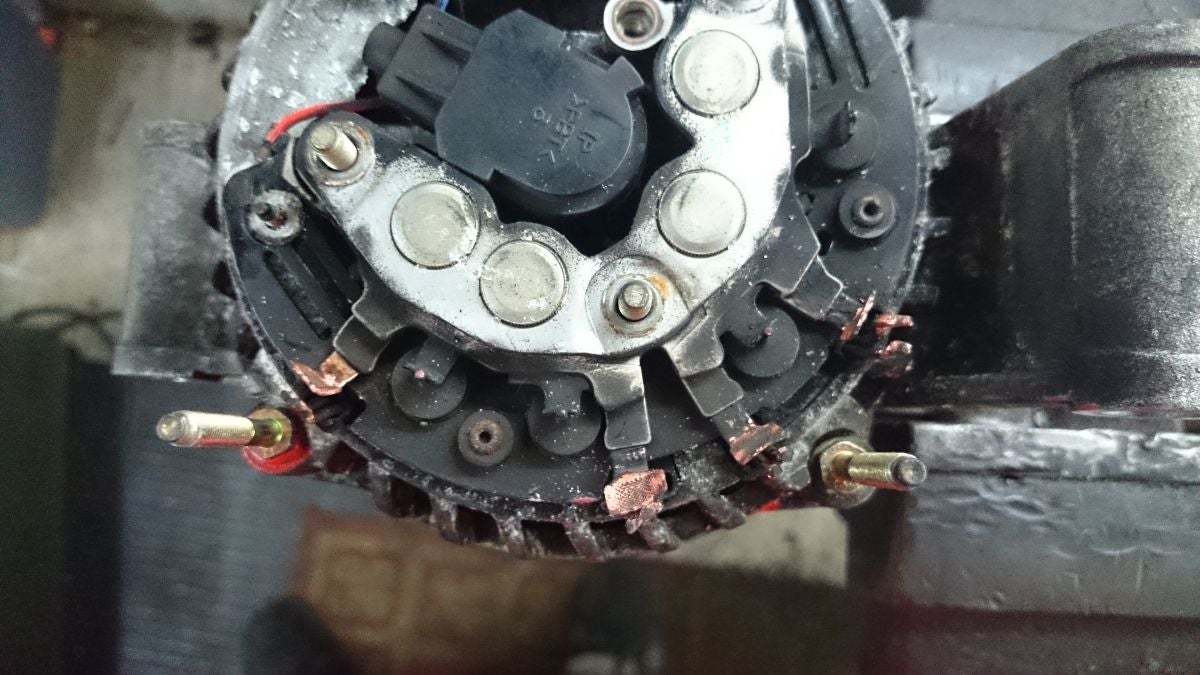
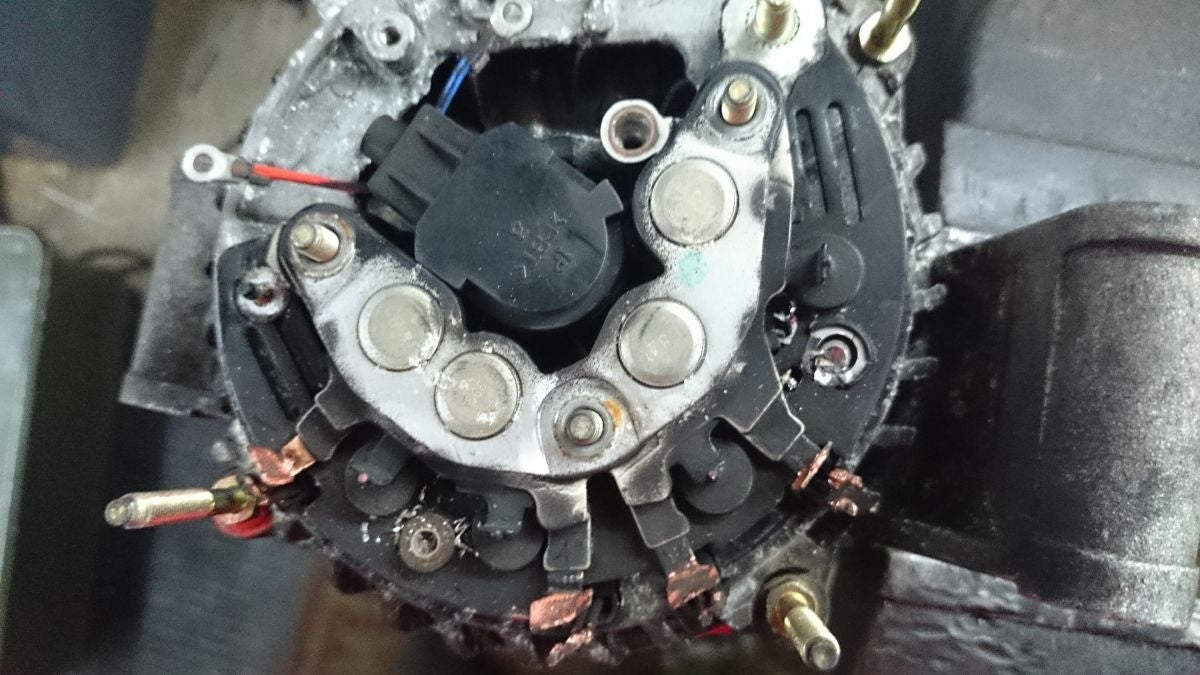
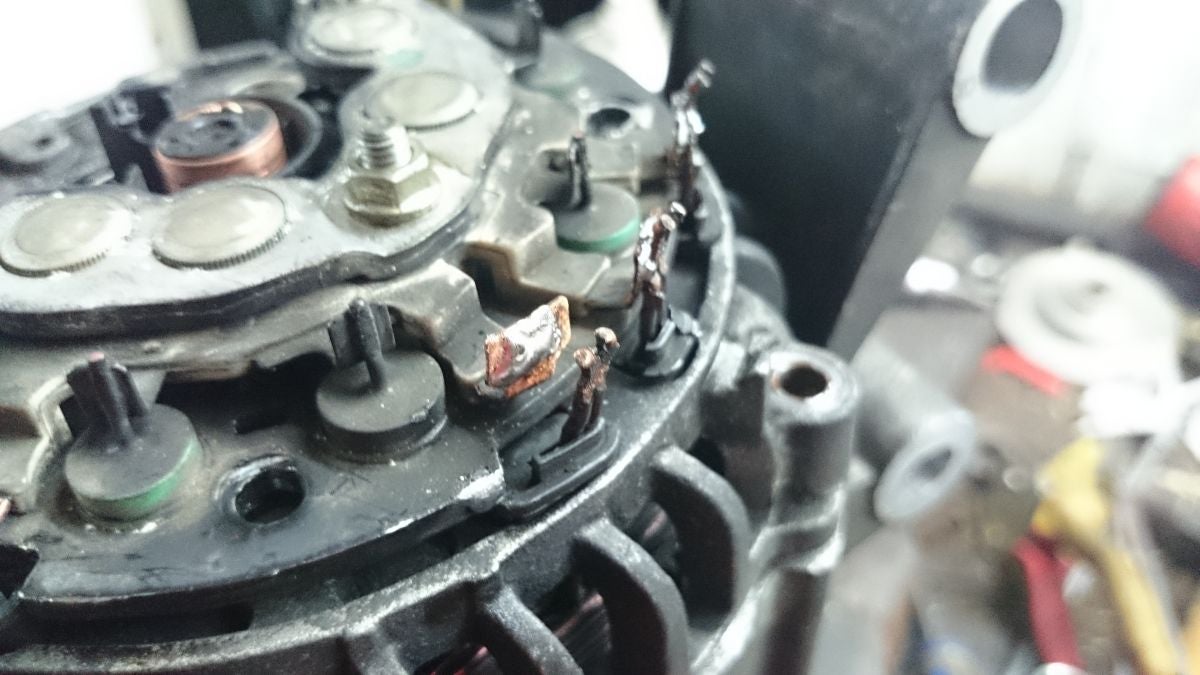
Next is the fun bit. In order to get the diode pack off, and open up the casing to get to the bearing you need to remove the wires from the stator. On this particular alternator these are just crimped together, which is fine for manufacturing but it does make it a tad tricky to get to it. There's a couple of different ways to do this, one it to get a pair of snips and try and snip between the diode pack's tab and the stator wires, it's a bit tricky. The best way I found was to grab the tab with something like a set of needle nose pliers (to hold it steady) and put a small flat headed screwdriver between the wire and the tab and use a twisting motion to prise them apart. It's very hard to take pictures of this so here's a lovely hollywood shot. Don't worry too much about bending them, just be careful not to snap anything (I did, oops).
You should have them all looking like Rhianna.
Next there's two rivets you need to drill out. I can't remember which sized bit I used, about 4mm at a guess. There's little plastic spacers under the diode pack. DONT LOSE THEM. You'll need them later.
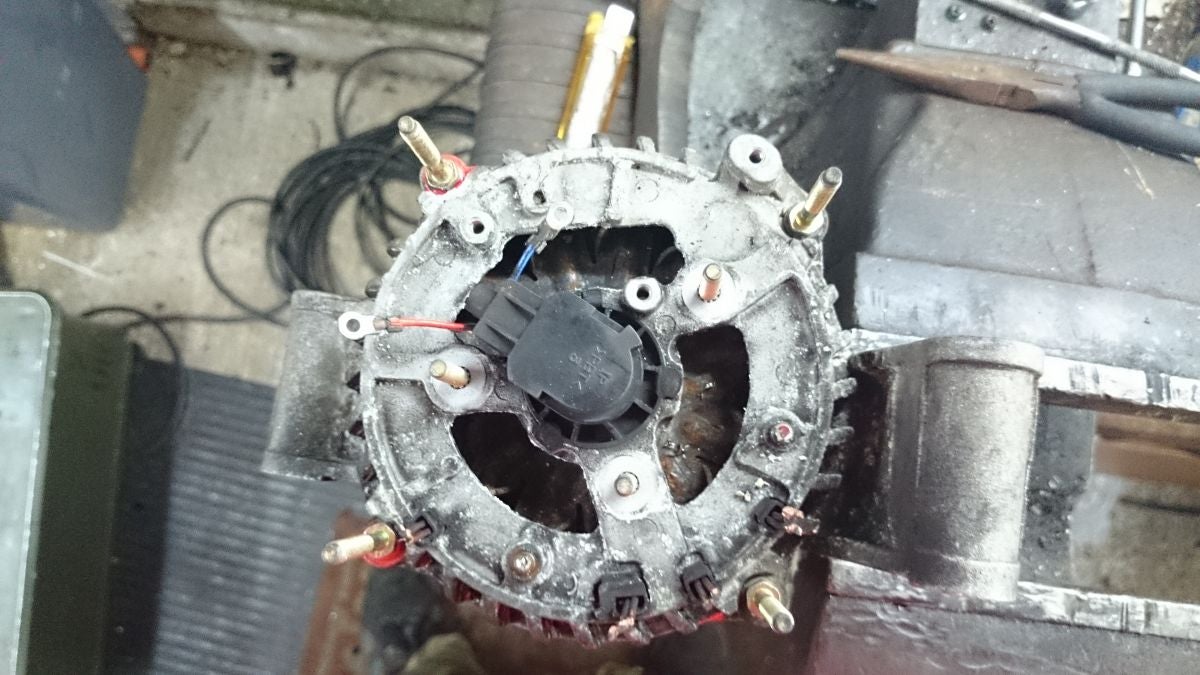
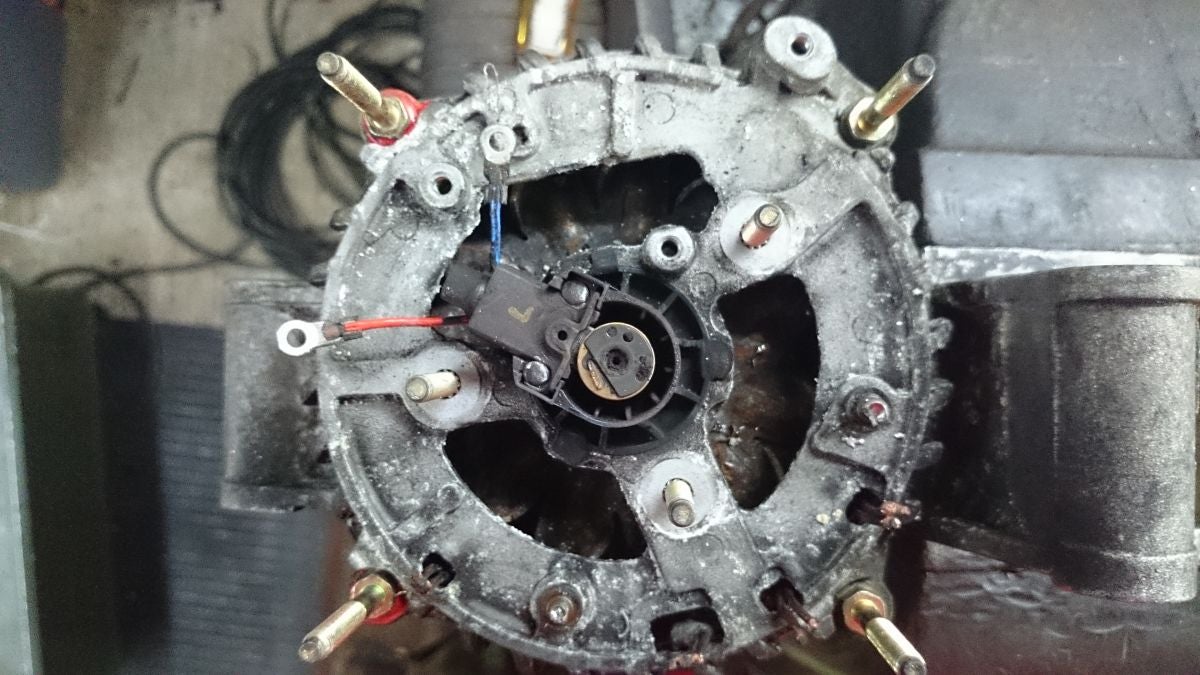
Your diode pack should now lift out. You should be left with a rather nakie looking alternator. Let's get her apart!
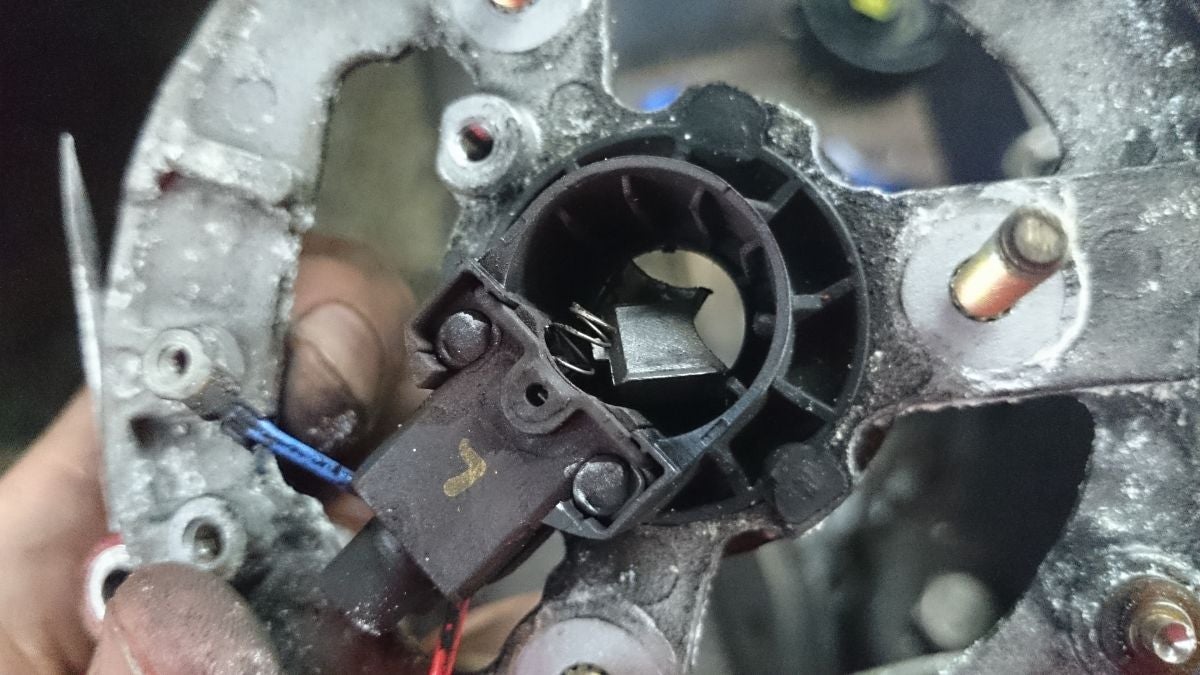
The best bet here is to take the cover off the brush pack and push the brushes into their housing with a dentist pick or something similar, then use the hole in the top to stop them coming back out. If you need to replace the brush pack then take the cover of and the top has a resin or something holding it in, just drill it out and it comes out easy enough. More on that later. I'm actually making two alternators into one good one, I didn't care about this brush pack or rotor so i just pulled it apart, disregarding being nice to it.
Take the four long bolts out. These MIGHT be tight depending on what your alternator's been through in the past. Best bet is to use a deep 8mm socket to get them off. Clean them up with a wire brush when you get them out.
Pry on the screw lugs as it's nice and thick there, do it evenly, so apply pressure in opposite corners and it should slip apart quite easily. Don't be tempted to pry anywhere else, the aluminium casing is quite thin in places and you wouldn't want to break it, would you?
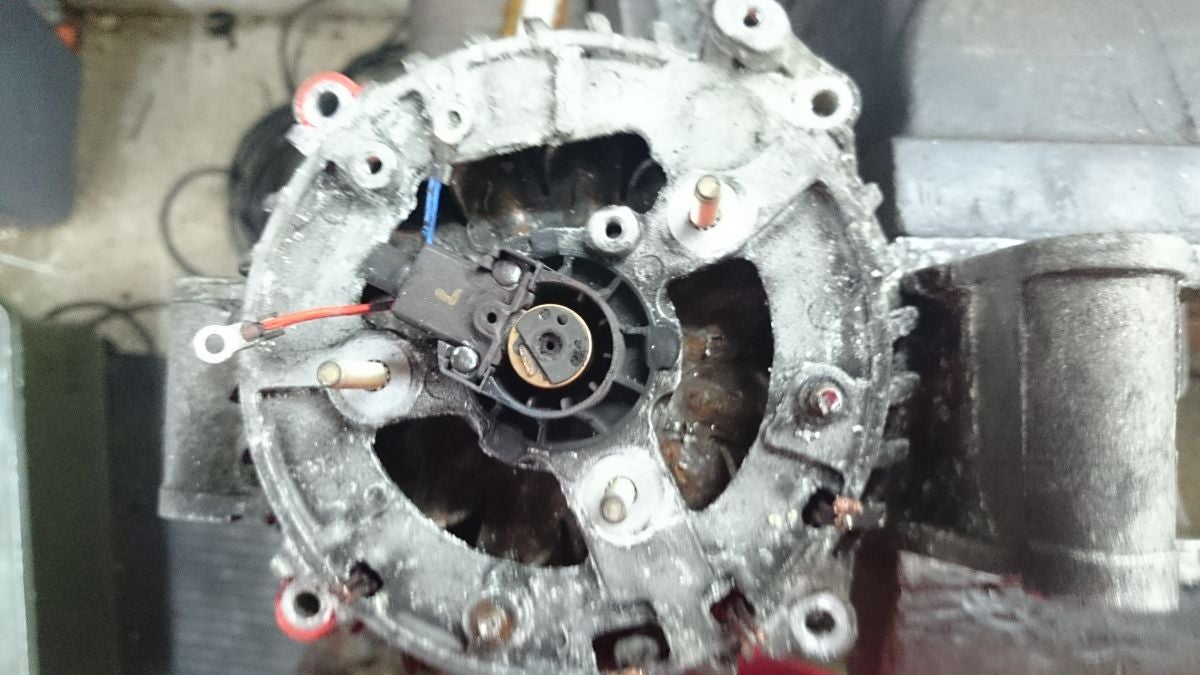
My brushes jumped out of their holder, but as I said I’m not using this set but it's a nice close-up shot. You can just press them back in and use something like a small allen key to hold them in. You can see the goopy stuff holding it in here quite well.
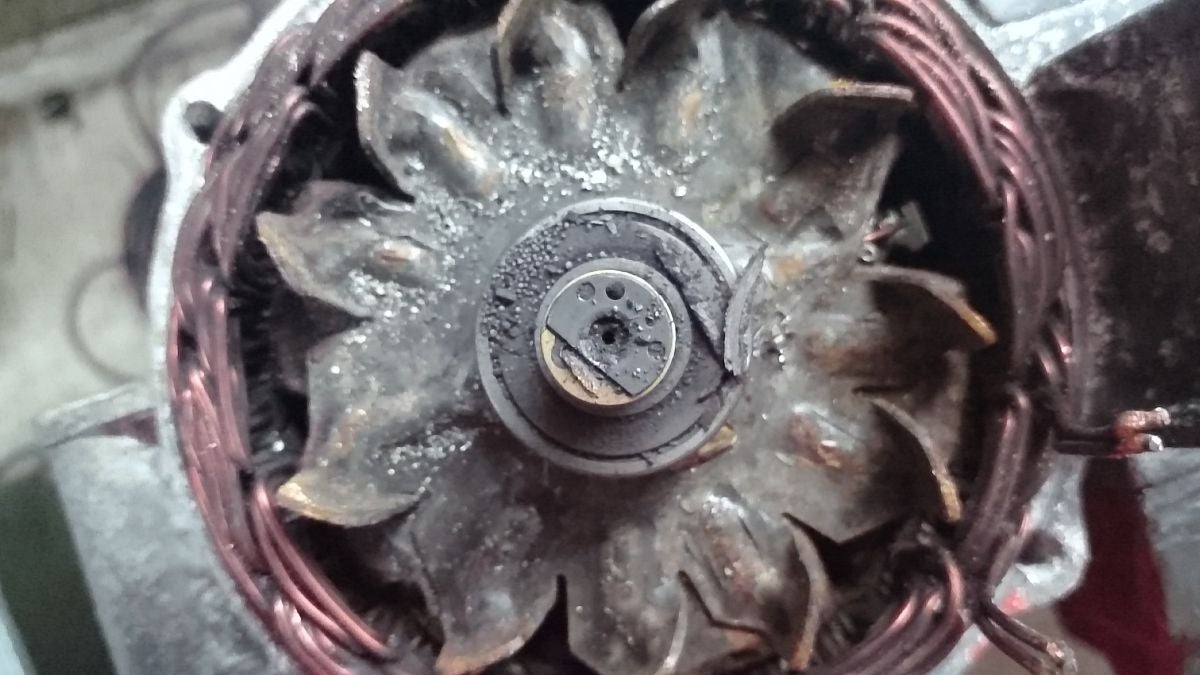
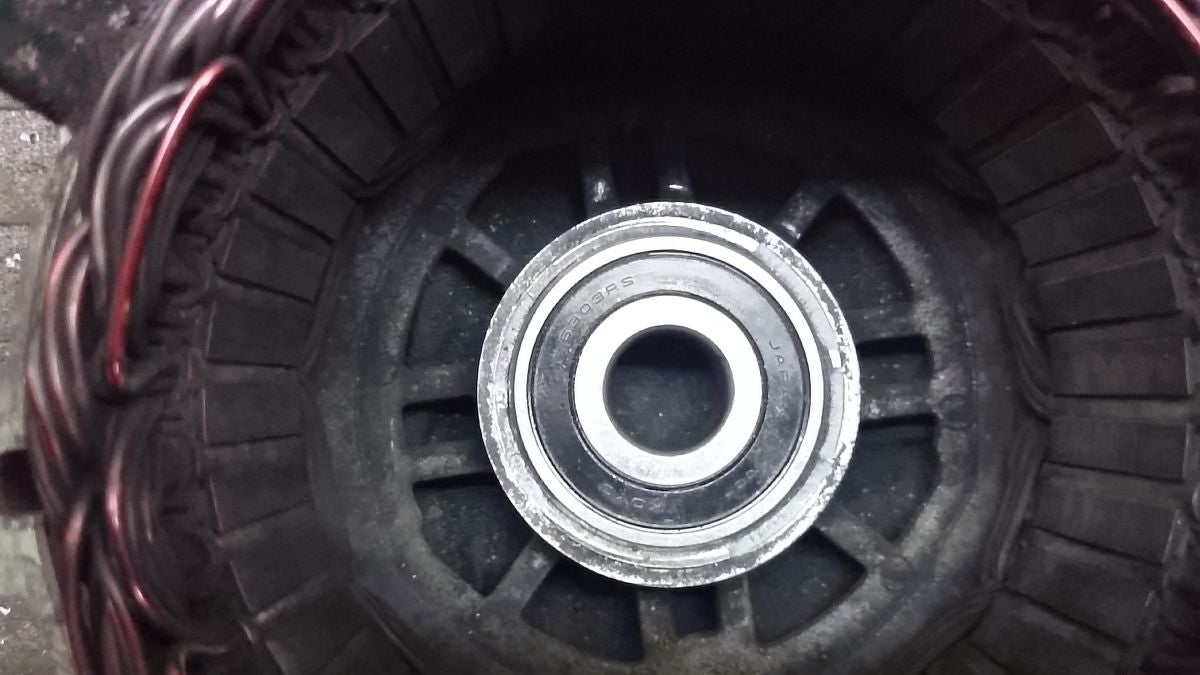
This is to top of my rear bearing. What HAS been going on in here? A note about this end of the alternator. The brushes run on the commutator (I think this is what it's called, It's called that in electric motors anyway) so you want it to be nice and level. You don't want to use the end of the shaft as a point to use a puller on as you could bugger up the plastic end piece.
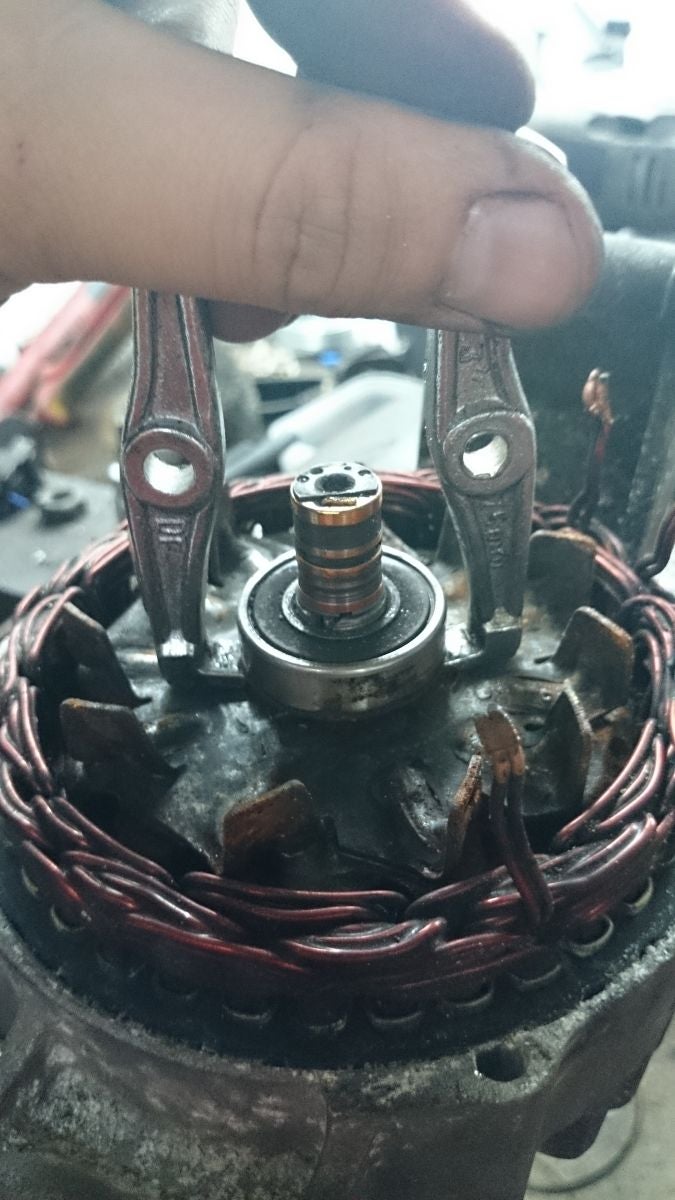
I got the bearing off by taking some arms off a little puller and grinding the ends so they fit underneath, then just pulling them apart, the bearing came off with little effort. Other things you can do including getting a small grinder in there to cut the races off the bearings apart - just be careful of the contact patches. Or putting the bearing in the corner of your vice and doing it up until it cracks. If you cut into the shafts metal when you're grinding it doesn't matter, just be careful of the contact patches!!!
Look at 'me shaft!
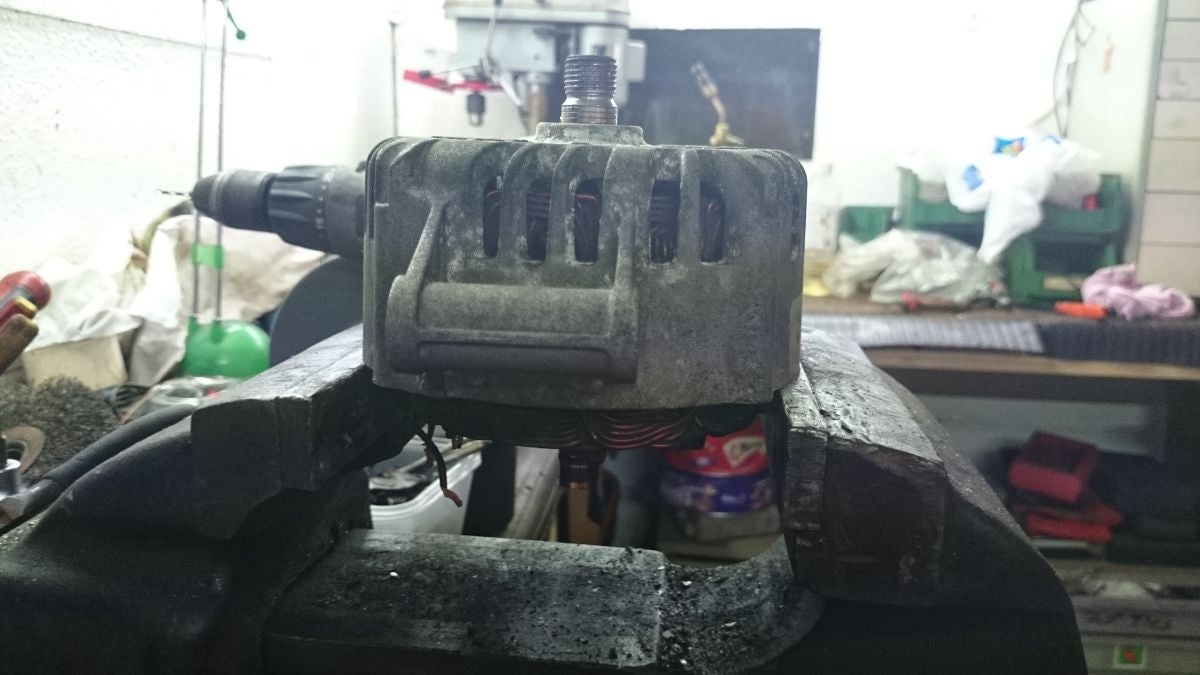
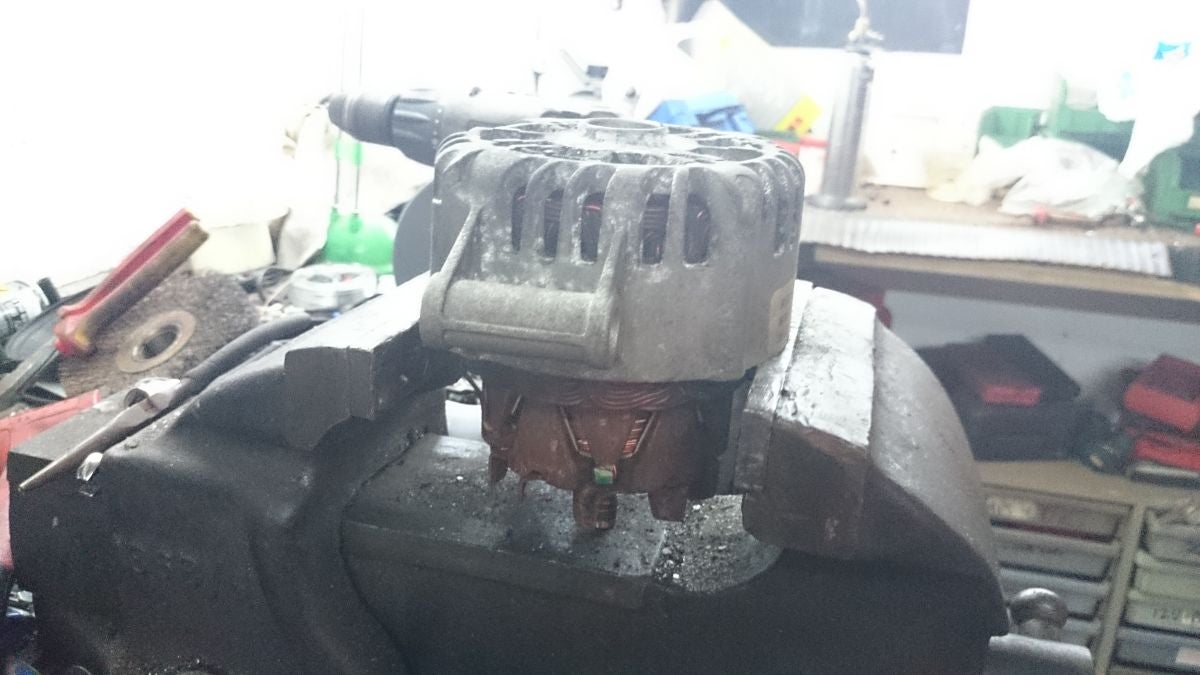
Next you want to support your alternator's front casing in the vice like so. Make sure it's not resting on the stator and just the casing. "Gently" apply some "aimed blows" to the front shaft with a soft faced hammer (copper, leather, rubber, plastic or preferably a dead blow hammer).
Clonk! - Might be a good idea to put a rag down in your vice to make sure it doesn't bugger the end up.
Now then, getting the front/big bearing out was a bit of a bugger. I had to take it down to my local engineering firm and ask very nicely to use their press (I bought along some chocolate hobnobs to sweeten the deal). I used a large socket (~55mm) to go inside, then a socket to press on the internal face of the bearing from the other side. This did crack the lip on the spacer bush inside but I didn't see that being an issue. I pressed the new bearing in as I was there. Look ma, new bearing!
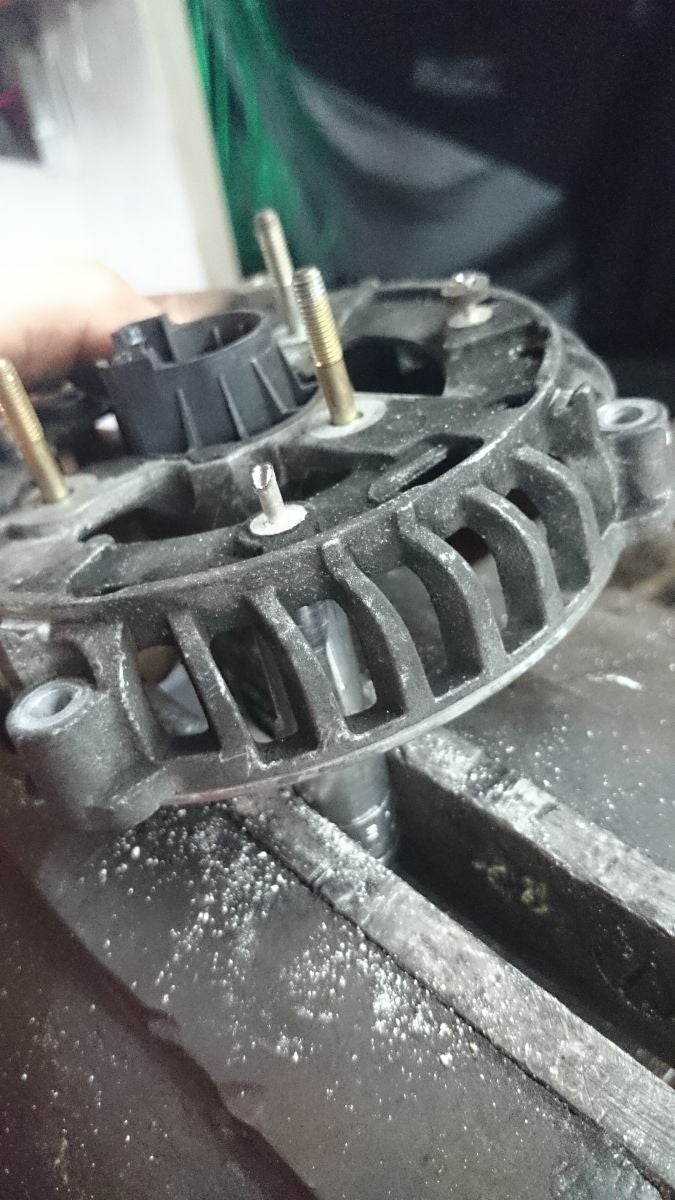
Next you'll want to prepare the rear casing. Remember those rivets we drilled out? Yeah they'll need replacing. I didn't have any rivets long enough so I decided to tap a thread into the casing and use some little bolts to secure them. The smallest I had was M5 so I tapped to ~5mm. First, tap out the remaining rivet heads. I put a 10mm deep socket in the vice then gave the rivets a belt with a hammer.
.. and tapped the hole. Note this part doesn't really have anywhere nice to clamp it and keep it still so I popped the bolts in to clamp to them.
Remember those spacers I told you not to lose? Well you'll need to drill them out to whatever size bolts you're using. I used M5 so i drilled these out to 5mm.
NB: I didn't use those bolts for realsies, I just used them for mocking up. The ones I went with in the end are these. ~12mm long threaded section. Much longer and they'll rub on the cooling fins on the back of the rotor.
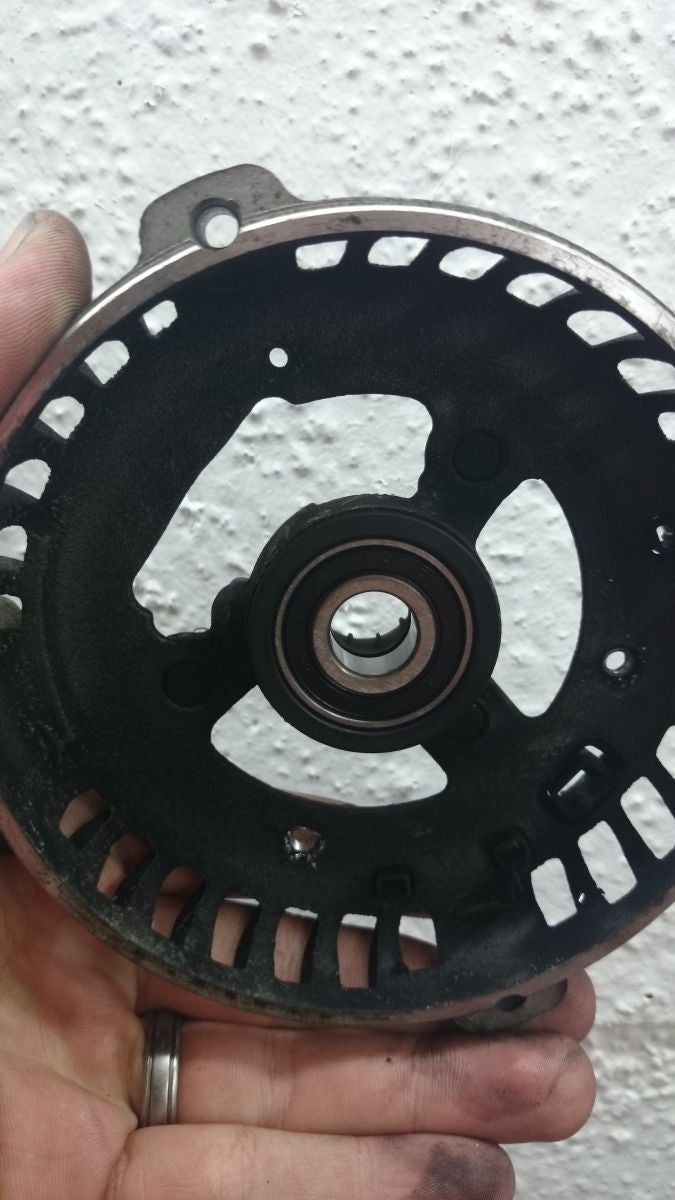
Pop the new bearing in the back of the panel. This should just press in by hand, it's not that tight but it will hold itself there.
-- NB: I forgot to take pictures of this bit but you want to LIGHTLY clean the commutator contacts (if that's what they're called) with some very fine wet & dry paper (1200+) and squirt a bit of contact cleaner on there too. You want it to be nice and shiny, not black. If yours are really buggered / heavily pitted or worn you can buy replacement rings, I didn't really see the need on mine. --
Put the rear panel back onto the front and evenly do up the long bolts round the outside. Put some copper slip on the bolts as you put them on so your future self will love you. Same idea as when you do up wheel studs. You want to do it in a criss-cross pattern and do each up bit by bit. You'll need to align the wires from the stator to go through it's holes.
File:Alternator-rebuild-visteon-28.jpg
IMPORTANT: When it's done up tight, try and spin the rotor, it won't move very far. At the moment the bearings are being pushed into their respective faces making everything bind up. You need to release this tension. The best way is to clamp it in the vice and give it one bloody good belt on the end of the shaft with your soft faced hammer:
Give the rotor a spin now. It should be lovely and free and spin for a while and not make any noise. Wish my wife was this easy to shut up! Please make sure you do this otherwise the bearings will eat themselves quite quickly.
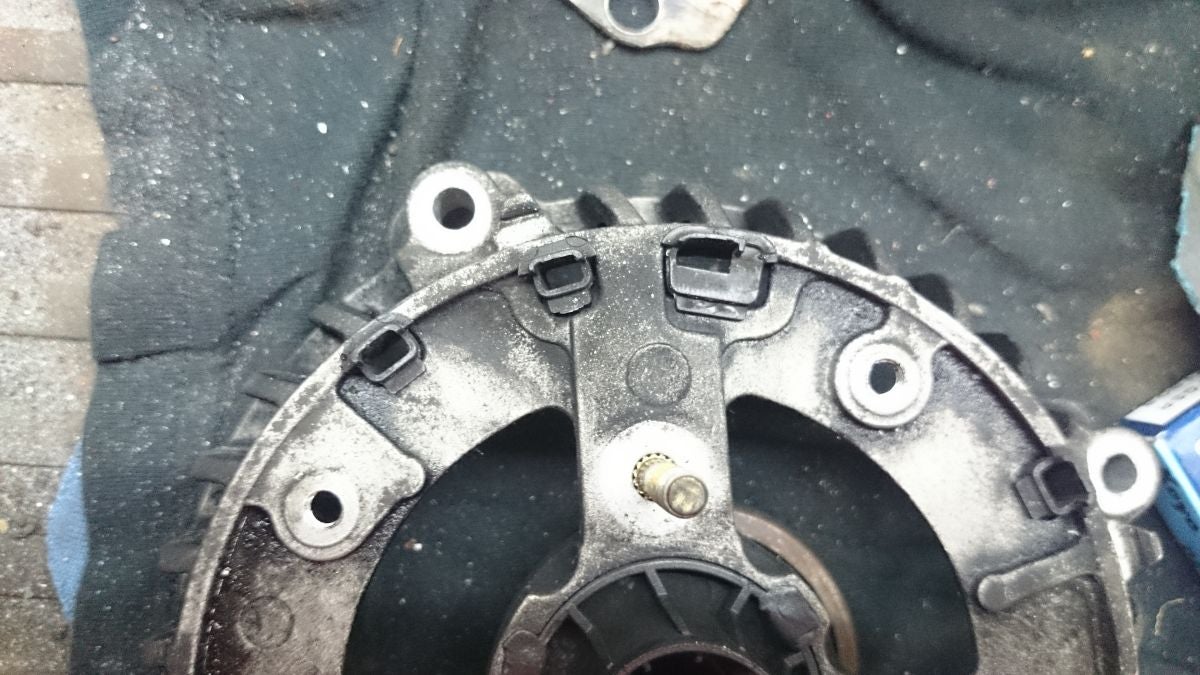
Put the little rubber/plastic collars over the stator leads. I didn't get a picture of this but here's a picture of the bits and which holes they go in:
Next you'll want to straighten out the tabs on the diode pack. Use a light grade of sand paper and a squirt of contact cleaner. GET IT CLEAN. The solder won't stick to manky old copper. Do the same to the back of the stator wires.
PUT THE SPACERS UNDER THE DIODE PACK. I forgot and had to poke them under afterwards! Put in a couple of nuts/the little bolts we just tapped to hold it in place and get your soldering iron on. Stop for a tea/beer whilst it warms up. Get them roughly lined up..
SOME NOTES ON SOLDERING
I'm not a soldering expert by any means but remember these few things:
Remember what you're soldering: You're soldering the tab to the wire, not the soldering iron to the wire, so don't add any solder there....
..unless something's not heating up very quickly. You can use a dab of solder between what you're heating and the soldering iron to speed up the heating process as it transfers more heat.
Cleanliness is next to godliness: Use contact cleaner or the solder won't stick. If it's not taking buy some flux from a plumbers store and use that to clean things. I don't really like flux cored solder.
Tin things for the win: Bits are a lot easier to solder together if they both already have solder on them.
You can't solder things that move about: Make sure something's clamped hard together otherwise the movement will make a weak joint.
Don't flood it: You don't need a lot of solder to make a strong joint. Only add what you need. It's harder to clean up dripped solder then it is to not add it in the first place.
With that in mind, heat the back of the tab (not the bit you want to solder on) and put solder on the front. It'll melt when it's up to temperature. Tin the wires too in a similar fashion. Heat the back, apply to the front. Don't drip solder inside for god sake. When they're both tinned, clamp them together with something (I use surgeons forceps) so they don't walk about and just touch the soldering iron to the top where the two meet. The solder will flow from where you've tinned it and make the joint. You can add a bit more if you like.
Here's a tinned one:
Lovely job. You might want to trim the leads a bit so they don't touch on the metal cover in a minute as they're bound to have moved from their original position.
Put your brush pack back on if you took it off before.
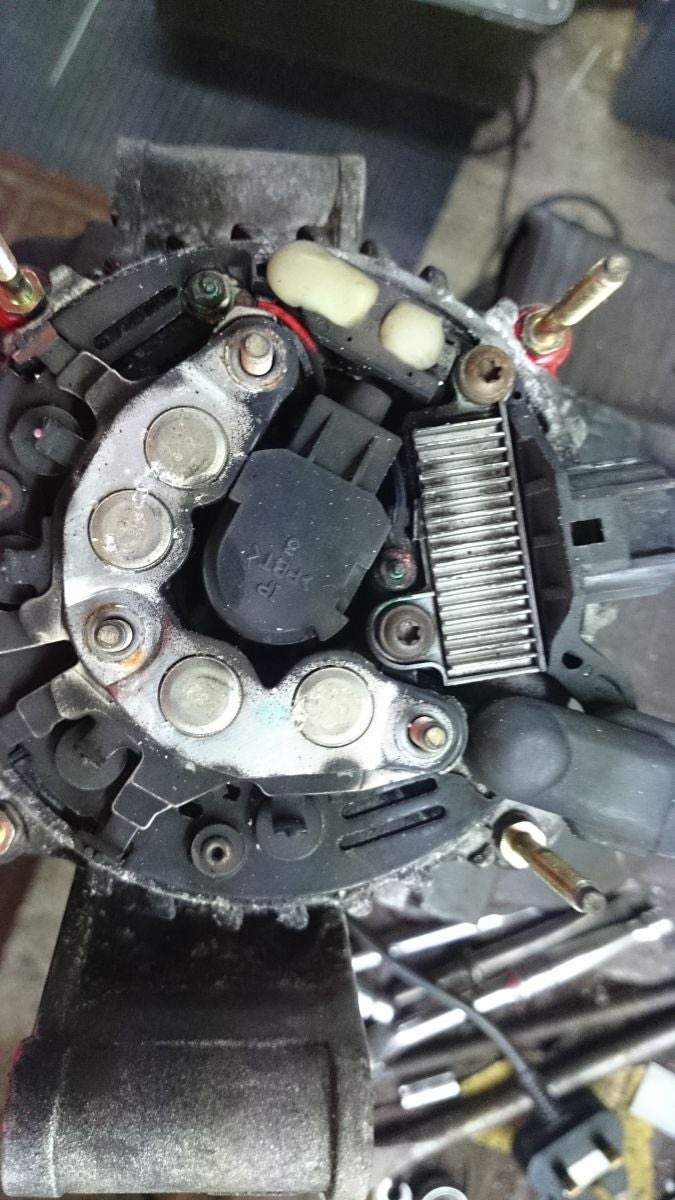
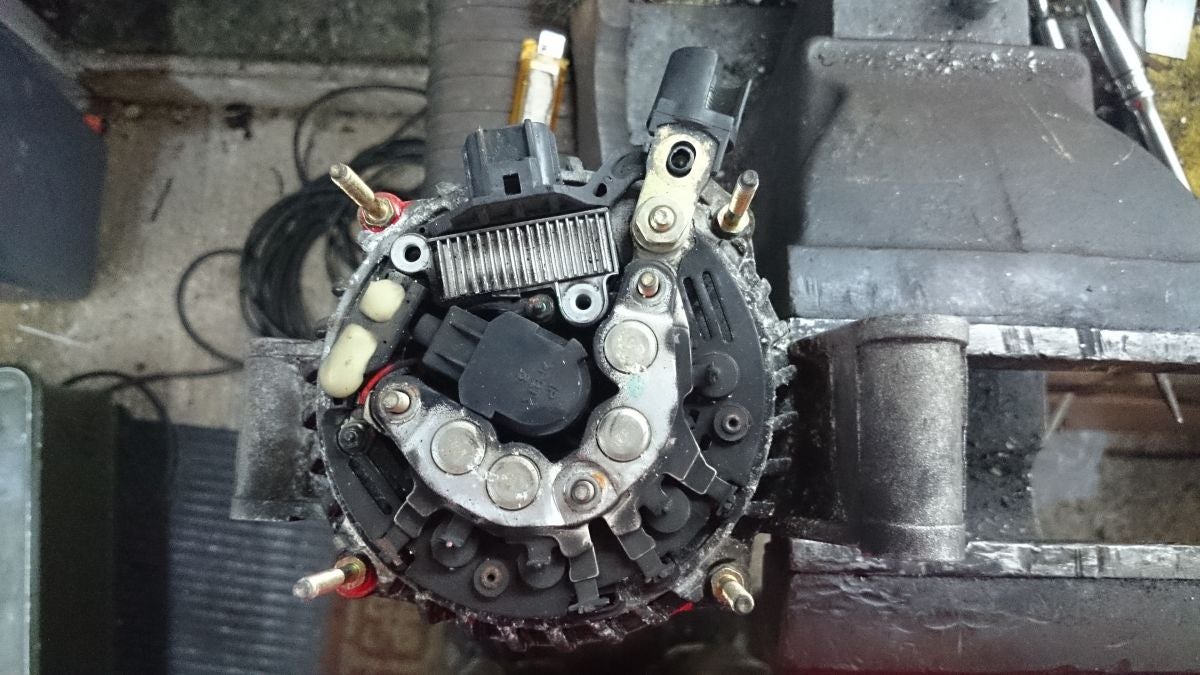
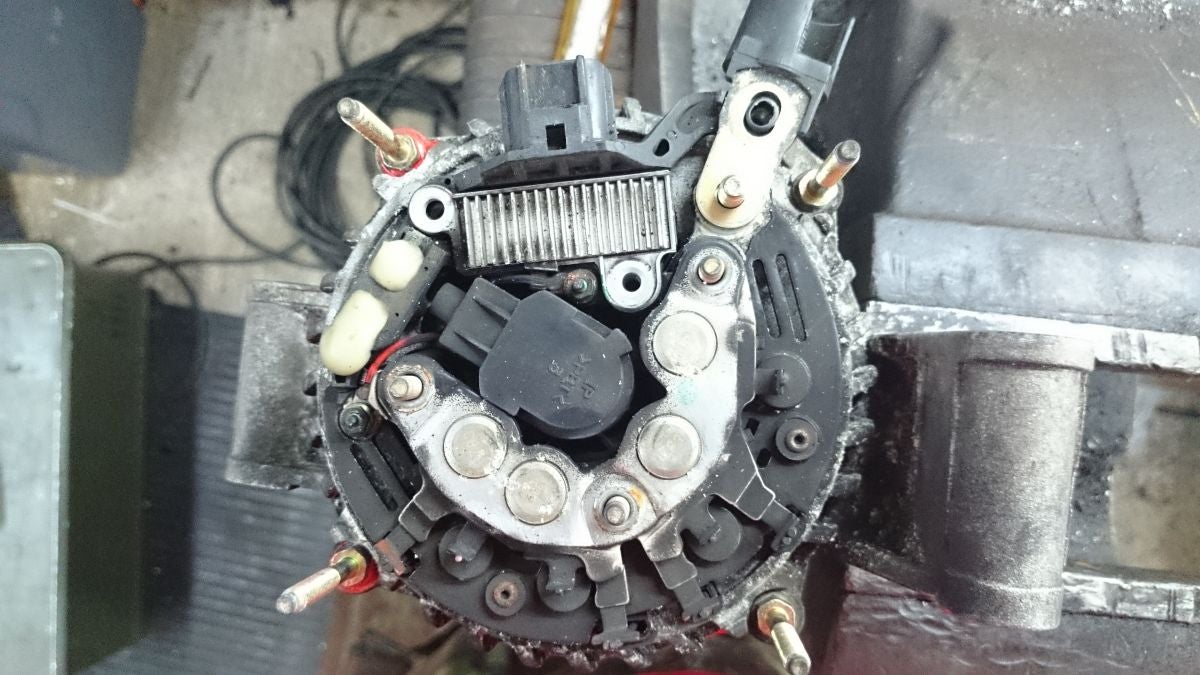
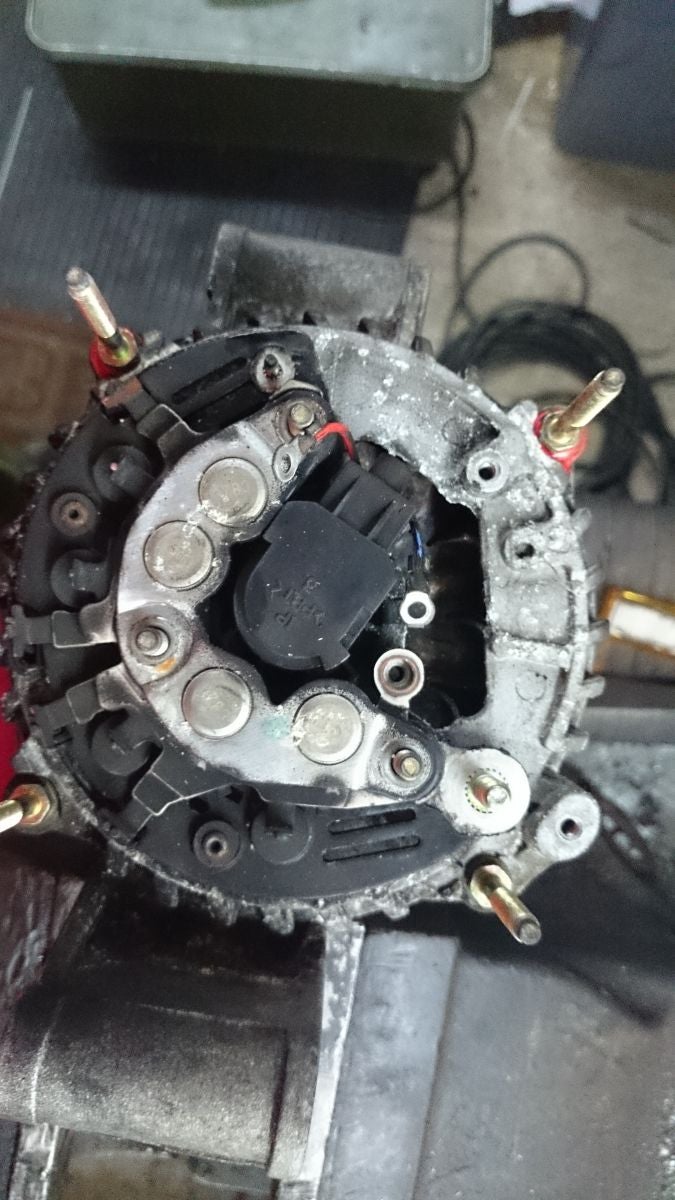
Bolt in the diode pack (if you didn't do it before to solder it) - again make sure those spacers are underneath! The three studs in the middle are for the metal casing on top so don't put them back on yet.
Put the resistor pack back in and put the little 5.5mm nuts back on. You can see where they go here. Put the three torx bits back in and the "big" nut (13mm I think). You can pop the cover back on the main terminal now too if you fancy it.
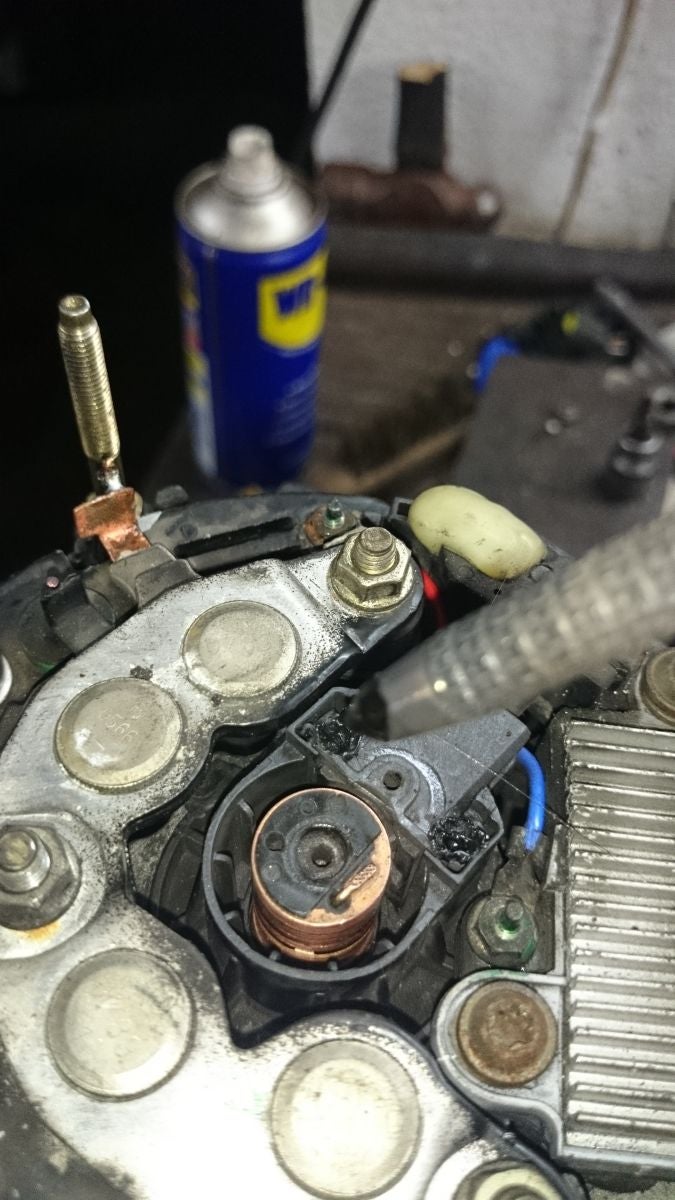
Now then, if you took your brush pack out and want to secure it again (you probably should) you can use a bit of goopy stuff (silicon or something) or (as I didn't have any) just heat up something and melt it back in. Future you will hate you but you'll be rich enough to just buy a new alternator then, right? You'll excuse the crap pictures, it was a bit burny.
Stick the cover back on, make sure you've not got any bits left over and put it back in the car. I put the final black cover on when it was in the car as I had more room to manoeuvre it without it in the way. DONE!
Now you can swear about not having the right tensioner tool. I'll leave that one to you.














 Your Privacy Choices