Registrations
We now manually approve all new user accounts due to a large influx of spam bots. Accounts are normally approved within 48 hours.
If you need any help with using this Wiki, please ask here: TalkFord.com Wiki Submission Forum
Angel Eyes - Mk2
For more information, visit the Ford Mondeo forum on TalkFord.com, the definitive resource site covering all Fords from the present day to the 1970's.
|
Overview Guide | |
| Ford Model: | Mondeo |
|---|---|
| Petrol/Diesel: | ??? |
| Estimated Cost: | ??? |
| Difficulty? | ??? |
| How long does this take? | ??? |
Angel Eyes - Mk2
Background
With any luck you will find this document useful to aid and assist you in the installation of a set of 'Angel Eyes' into a Ford Mondeo. Please note that I am not an authority on the installation of these types of lights and I have only written this as a result of my experience after I did exactly this type of modification to my own car.
Full and absolute thanks as well as total kudos has got to be given to KerryW of MEG who was kind enough to provide me with pretty much all of the information contained in this document. It was enough to convince that I wouldn’t do irreparable harm to my much loved Mondy...
Method
Firstly remove your existing headlights from your car. There is no way this modification can be undertaken with the lights in situ
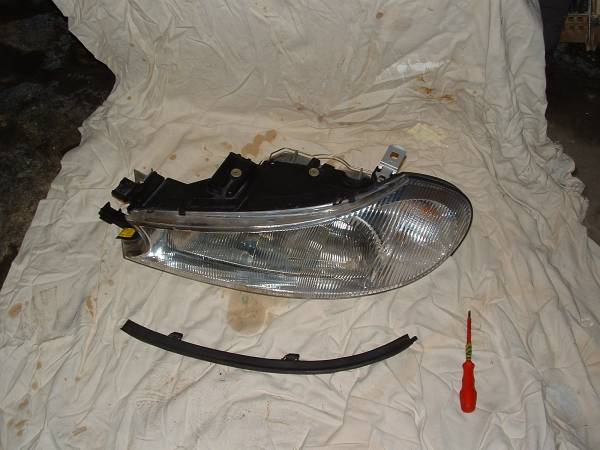
Along the top of the headlight assembly is a simple black rubberised weather strip attached to the headlight by three simple push clips. Undo these and remove the strip
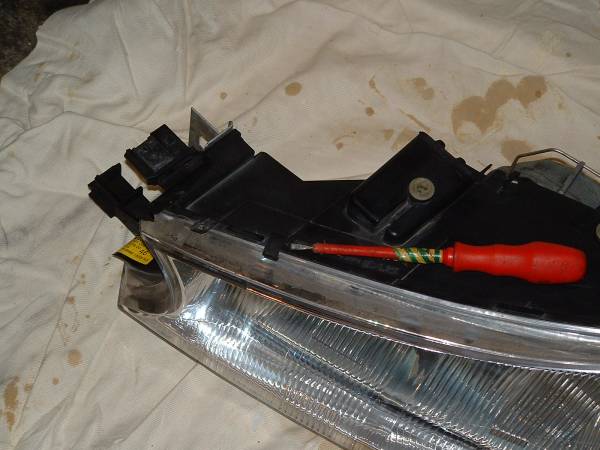
Next around the rim of the glass you find 5 metal clips that physically secure the glass to the back body of the headlight assembly. Remove these clips CAREFULLY as they are likely to ping off and either be lost for ever (no chance of a replacement from Fords) or worse still, hit you in the eye etc
In order to separate the glass from the body of the headlight it is necessary to soften up the glue that is applied to seal the 2 halves of the head light. The easiest way to do this is with a heat source. For Gods sake do not use your Wives/Girlfriends/Mothers best (and probably very expensive) hairdryer. It is no fun being a single guy and having to cook and clean for yourself, so bite the bullet and use a heat gun or a fan heater as I did
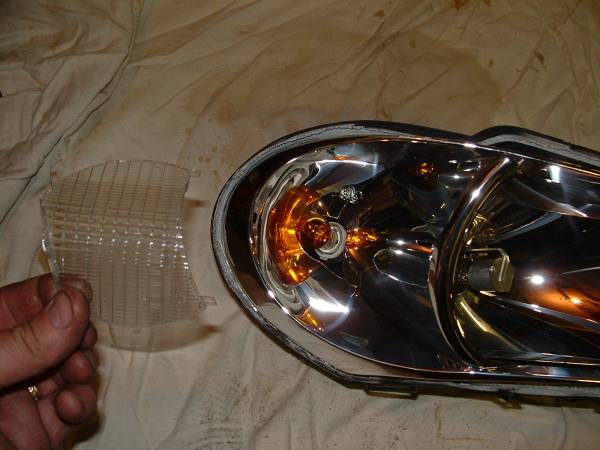
It can take about 30 minutes to an hour to soften up the glue, but once it is soft enough to allow you to remove the lens with minimal effort you should be able to gently prise the 2 halves of the head light assembly apart. Store the glass part carefully where it will not get damaged or allow any of the glue to become contaminated. Next look inside the main body of the light and remove the indicator diffuser as well as the indicator bulb and holder
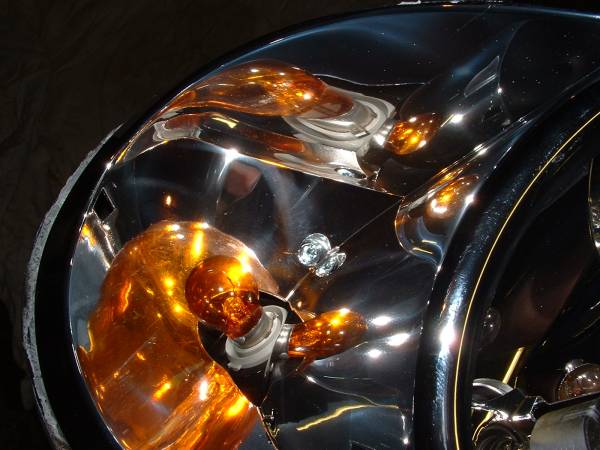
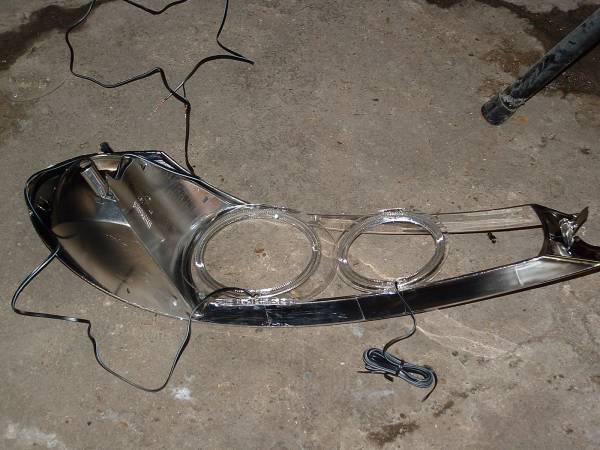
Now remove both of the T20 Torx screws that secure the inner shiny sub frame to the main body assembly
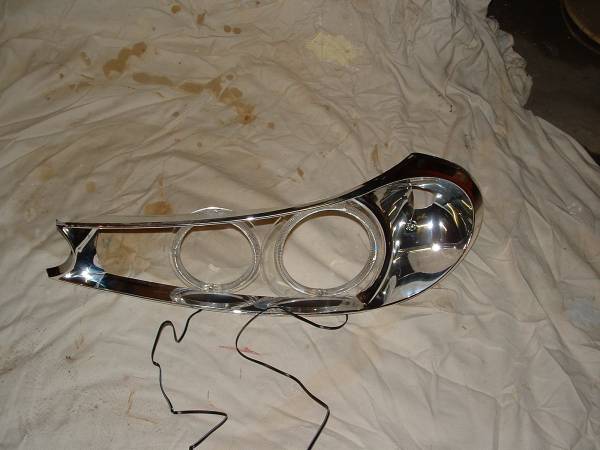
This inner sub frame is where all of the work is done. It is also the part you would need to spray with a few layers of black paint if you were to give your head lights the 'Black Eye' effect. If you are going to do this as well, you would be best off spraying this part first. I chose to attach my angel eyes to this inner sub frame and all you need to do is simply stick them in place. However please be aware of the following. My set of angel eyes were considerably brighter in one direction than the other due to the diffuser ring on one side. So please make sure that you fit yours the correct way round, try them before committing to attaching them. Also make sure you can route the cables out at the bottom of the lights so that they can pass underneath the main reflector when put back into the main body of the light
Once your glue of choice has chosen to finally set you can now re-install the inner frame back into the main head light body. This basically involves re-fitting the two T20 Torx screws that you removed to take out this frame. Remember to route the cable for the Angel Eyes underneath the main reflector and out through the rear aperture
With the wires now running out through the rear access panel (where you would change blown light bulbs) trim of any surplus wire so that you have enough wire to be able bare off some insulation to pick up the power source
Now you are ready to connect them up electrically, simple isn’t it, after all its just a couple of wires init? Well ordinarily I might agree with you, but these angel eyes have L.E.D.’s fitted. L.E.D. stands for Light Emitting Diode, and it’s the word Diode here that you need to be aware of. A Diode is a one way electrical switch (to put it at its simplest) and if the current doesn’t flow the correct way through it then no pretty lights will work! The supply cable should have the trigger side of the circuit marked with a white stripe. This is the side to which you must connect the positive side of the circuit. The other cable is the negative side of the circuit. I chose to fit my angel eyes into the side light circuit. The connections were made straight into the side light supply cable which just happens to be conveniently available inside the rear aperture. Simply cut the cable and install the new angel eyes circuit into the side light circuit by using a 'Choccy Block' type connector. The side light circuit has 2 cables. Positive is orange with a grey stripe, and the negative is the ubiquitous black
I know that this type of connector is not the best in the world and I suppose that I could have done it a thousands time better had I not just completed a 12 hour night shift last night, but what the heck, this connection works and they look great.
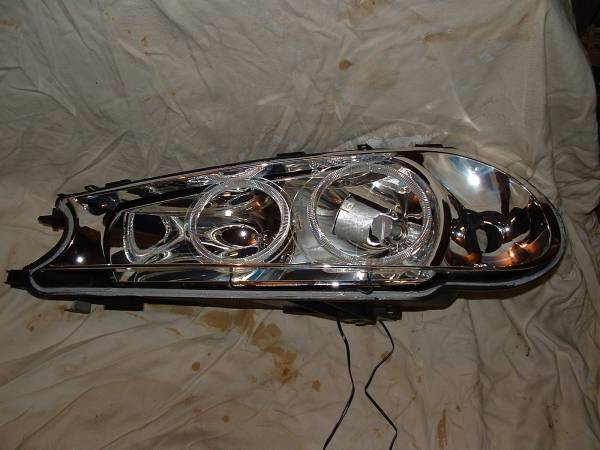
Now before you start to reassemble your headlights to their pre-installation condition, test the angel eyes to ensure that you have the cables the right way round. If all is well then carefully re-apply the glass to the front and apply firm pressure to ensure that the glass re-seals itself into the glue that you softened up with the heat source. Now re-fit those 5 clips that you took off earlier. They go back into a specific place and should require a firm press to get them to re-apply. You should hear a very satisfying and re-assuring click as it clips together. Now re-attach the weather strip along the top of the head light assembly
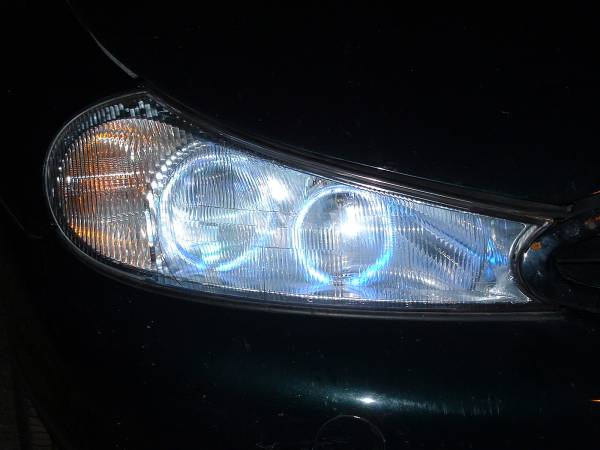
With any luck you should have now completed the installation and your new lights should look something like this
Now re-install your lights back into your car - Job Complete!!!







 Your Privacy Choices